Improve Delivery to your Gmail Email List
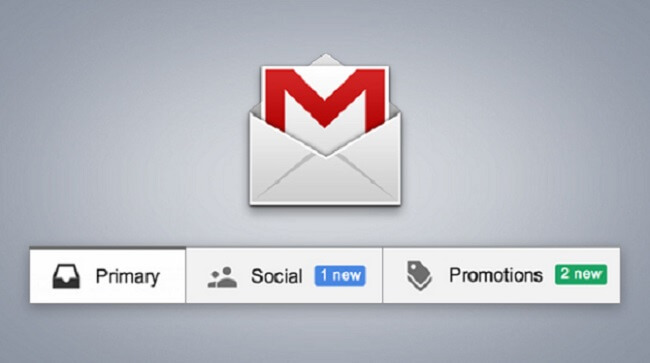
Did you know that there are over 1.5 billion Gmail users all over the world? Chances are that a large portion of your email list consists of Gmail contacts. But are your emails reaching the Gmail primary inbox?
Find out if your email was delivered to the Gmail
Primary Inbox, Promotions Tab, or Spam Folder
In the past, Gmail was error-prone and would accidentally filter legitimate emails as spam. Therefore Google developed Gmail labels to categorize incoming emails as Primary, Promotions, or Social messages.
If your email marketing campaigns land in the Gmail Promotions tab, it’s not as bad as landing in spam. However, people don’t usually check their Promotions folder so not all subscribers may see your sent messages.
Follow this Gmail deliverability article to improve your email delivery to Google contacts, train Gmail to send your messages to the Primary tab, and significantly boost your response rates.
1. 4 Things You Should Know about Gmail
2. 9 Tips to Get your Emails Successfully Delivered to Gmail
3. Getting your Emails from Gmail Promotions to Inbox
4. How to Check if an Email is Delivered to Gmail
4 Things You Should Know about Gmail
When it comes to email deliverability, Google takes the following factors into account:
1) Gmail protects Google contacts by actively filtering inbound email messages
Google makes no excuses for being aggressive with its filtering algorithm in order to protect anyone with a Gmail account.
2) Your email content plays an important role
Gmail reviews your message’s content when deciding where to place your message.
If your emails are image heavy and contain fewer words, Google assumes that your message is an advertisement and will place it in the Promotions tab. Likewise, a text-based email with no images has a higher chance of being delivered to the Primary inbox.
Some niches such as weight loss, health, beauty, real estate, grants, payday loans, dating, and business opportunities are prone to spammy email practices and have a higher percentage of scammers.
If you are working for a legitimate company in any of those groups, you may have to work more carefully on your email content to prove that your messages are not spam and are worthy of being delivered to the inbox.
3) Your reputation with your subscriber has a high impact on your deliverability
Gmail calculates your reputation based on the recipient’s actions on the email. Every time an email gets a certain amount of spam complaints, the sender’s reputation decreases.
On the same note, if the email is continuously marked “Report not spam,” then the email will start being delivered to the inbox rather than the spam folder and the sender’s reputation will increase.

4) Engagement is critical for Gmail delivery
Engagement is calculated based on the sum of the total actions made on an email. Gmail tracks its user’s engagement (recipient opens, marking email as spam, replying to the email, moving it to the Junk folder, etc.) to properly categorize the email for all users receiving mail from that sender.
When subscribers frequently open your emails, it signifies that they are engaged with your content, which then improves the chances of your future email campaigns landing in their inboxes.
But if your subscriber leaves your emails unread, deletes them without opening them, or moves them to spam, then Gmail will penalize your reputation because your subscribers don’t appear to be engaged with your emails.
Read Also: Staying Out of Gmail Spam After the Latest Security Update
9 Tips to Get your Emails Successfully Delivered to Gmail
Now that you know what factors Gmail considers when handling inbound emails, it’s time to put things into practice to maximize your Inbox placement.
Follow these 9 tips to increase your Gmail email deliverability:
1) Make sure that your list is opt-in.
Avoid sending emails to Gmail users who did not give you explicit permission to email them. For example, if people gave you their business cards at trade shows, exhibitions, etc. they never subscribed to your list. Preferably, you should have a list of (confirmed) double opt-ins.
2) Have a clear and simple unsubscribe process.
Be sure to add recipients who have unsubscribed to the “do not email” or suppression list so that you don’t accidentally email them in the future. Emailing an unsubscribed person can lead to serious legal fines.
3) Re-engage inactive subscribers.
Measure inactivity based on the volume of emails sent, not on the time frame. Instead of asking “Did they open an email within the last 6 months?” ask “Did they open any of the last 10 emails I sent them?”
You should first increase your email frequency to consistently send emails every week. Begin sending at least one email a week and increase to the recommended 2-3 emails a week. Once you have found a workflow that suits your business, you can even send 1-2 emails a day. However, you should avoid sending more than 1 email a day as this can be overstimulating for your list and may lead to an increase in spam complaints.
If your subscribers have not engaged after sending more frequently, use a re-engagement automation to incentivize engagement. Depending on how valuable your subscribers are to you, you can offer a discount, additional resources, or another benefit for engaging. If your inactive subscribers continue to ignore your emails, send them a final farewell email allowing them to unsubscribe before you add their email to the “do not email” list. You want to maintain good list hygiene and only have engaged subscribers for maximum deliverability.
NEVER DELETE SUBSCRIBERS from your email list! You can always leverage those emails to retarget people on Facebook or Google Adwords.
4) Do not use shortened links.
Unfortunately, link-shortening services like bit.ly have been abused by scammers to hide malicious links. Gmail flags email messages with shortened URLs as suspicious because they have the highest spam rates.
5) Know the real reputation of your email service provider (ESP).
Ensure that your ESP has a strict policy regarding their user’s contact list quality. If your business is sharing your IP with a number of other users, it can impact your deliverability.
If other users on your shared IP are broadcasting emails without any contact list quality control or email verification, you could be penalized by Gmail and other ISPs simply for sending from a “bad neighborhood.”
6) Monitor your sender’s reputation.
If you are using a self-hosted email system with a dedicated SMTP server. Check your sender score by using Inbox Insight. It helps to ensure that your sending IP address is considered trustworthy by ISPs. If your sender score is low, email providers are more likely to flag all emails sent from your entire IP address.
7) Check if your sending IP is blacklisted.
Use GlockApps’ Inbox Insight to track your sending IP address health. You can even create automatic tests to constantly monitor your program’s email deliverability.
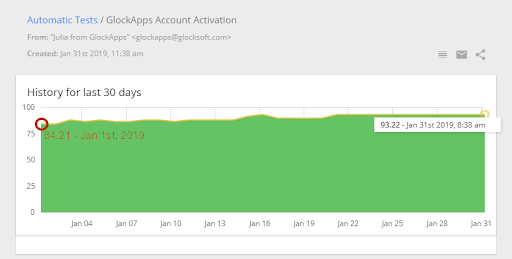
It also may be useful when you are with a 3rd party email service provider. If your ESP is blacklisted, your emails sent to Gmail contacts will bounce.
Learn how to find out if your sending IP is blacklisted by Gmail and how to request removal: How to Remove Your IP Address from Gmail’s Blacklist
8) Follow Gmail’s Bulk Sender Guidelines.
Follow these guidelines to have your email considered as high quality and land in the Gmail Inbox.
9) Sign up for Google Postmaster.
Create a Gmail postmaster account to see how they rate you. You just need to add your authenticated domain. You will then need to prove that you own the domain by entering the DNS TXT or the DNS CNAME. Once it’s verified and you are sending emails, you will get access to several dashboards:
- Spam Rate Dashboard (only for emails authenticated by DKIM): shows the volume of emails that were marked as spam vs. emails sent to the Inbox.
- Domain and IP Reputation Dashboard: this lets you see if Gmail is likely to mark emails from a particular domain or IP as spam.
- Feedback Loop Dashboard (only for senders who’ve implemented the Gmail Spam Feedback Loop): shows the identifiers flagged by FBL and their corresponding spam rates.
- Authentication Dashboard: shows traffic that passed SPF, DKIM, & DMARC, and overall received email traffic that attempted authentication.
- Encryption Dashboard: shows TLS encrypted traffic vs. all mail received from that domain, and consists of two distinct graphs within the same dashboard.
- Delivery Errors Dashboard: shows rejected/temp-failed traffic vs all authenticated traffic coming from that domain within a single graph. You are also able to see the reason why the traffic was rejected or temp-failed.
After implementing these tips, you may increase your deliverability among your Google contacts list.
Other email providers are following Gmail’s approach to handling spammers. The time you spend optimizing for Gmail delivery should pay off later on.
Getting your Emails from Gmail Promotions to Inbox
After Google introduced tabs and separated incoming emails into specific categories: Primary, Social, and Promotions, it became difficult to distinguish where your emails were delivered. A lot of marketers noticed a significant decrease in their open rates because of this change.
As a result, your aim should be not only to deliver email to the Gmail user but also get it into their Primary tab, where it has a greater possibility of being seen and read.
If you see a drop in your Gmail open rates, follow this step-by-step guide to teach Google to move emails from Promotions to Primary tab.
Get regular exclusive email marketing content and deliverability tips! Subscribe to our newsletter and boost your campaigns.
1. Ask your subscribers to drag your emails to the Primary tab.
This practice is not guaranteed because:
- You can’t guarantee your contacts will perform the action
- Your emails will only be sent to the Primary Inbox for the user who took action. You need a significant amount of people to perform that action in order for Google to consider that your email should be delivered to Primary.
Either way, it’s worth trying!
2. Re-write your email template.
Google categorizes your emails based on their content. It factors:
- links
- phrases
- picture count
- even RSS feed shot out by your email service
To increase your chances of landing in Primary, try to keep your design elements to a minimum. After you change your email’s format, your emails may be sent in the Primary tab.
Gmail-Friendly Content Best Practices:
- Be short and straight to the point
- Don’t promote or sell aggressively
- Do not add more than one link in your email
- Don’t include pictures
- Add the recipient’s name using dynamic fields or Merge Tags
- Turn off the RSS Campaign. If you want a higher open rate, you should type your emails out by hand.
- Write as if you’re speaking to one of your friends.
- Don’t write in ALL CAPS
- Write in Traditional Letter Form
As long as you write an attractive subject line with compelling preheader text, your contacts will open your emails and show Gmail that your emails are engaging, important, and deserve to land under their Primary tab. Plus, you will see higher open rates.
Learn More: How to Write Emails that Convert
How to Check if Mail is Delivered in Gmail
There are 3 ways to check if an email has been delivered to Gmail:
- Gmail Read Receipts (Only G Suite & Outlook)
- Analyzing the Original Message (Directly in Gmail)
- GlockApps Inbox Insights (For all Major ESPs)
Gmail Read Receipts
You have to set up G Suite in the Google Admin Panel settings in order for your team to be able to request read receipts. Regular Gmail accounts are not able to request read receipts.
The read receipt feature is available within 24 hours of altering your Admin settings.
Then, you can request a read receipt anytime you send a message by:
- Open Gmail & click Compose
- Write your message as you normally would
- Before you send, click the three dots (More Options) located in the bottom right corner of the compose window.
- Then select the Request Read Receipt option
- Send your message
You will get a ‘read receipt’ email with the time and date that your recipients opened your message. However, your recipient may have to approve the feature by clicking “Send Receipts.”
Analyzing the Original Message
Step 1:
Open Gmail, and click the Compose button
Step 2:
Write your message as you normally would and send it.
Step 3:
Click on your Sent Mail Folder and open the message you just sent.
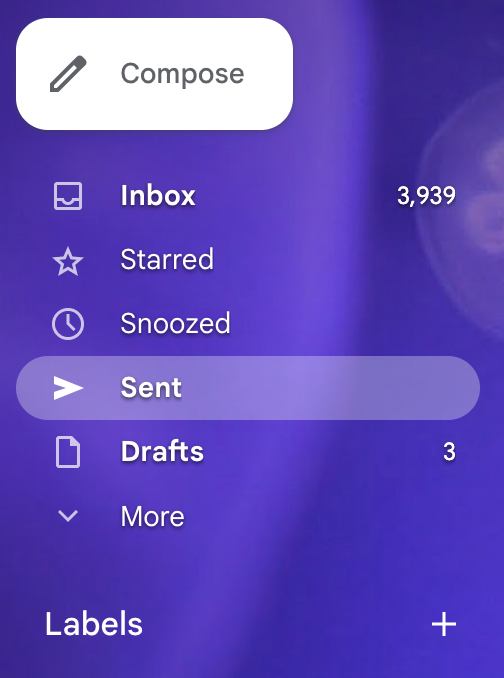
If you can’t see your sent folder:
- Click on the Gear Icon at the top right corner of the page
- Click See all Settings
- Click on the Labels tab
- Select Show next to Sent
Step 4:
Click on the three ‘More‘ dots located next to the arrow

Step 5:
Select Show Original
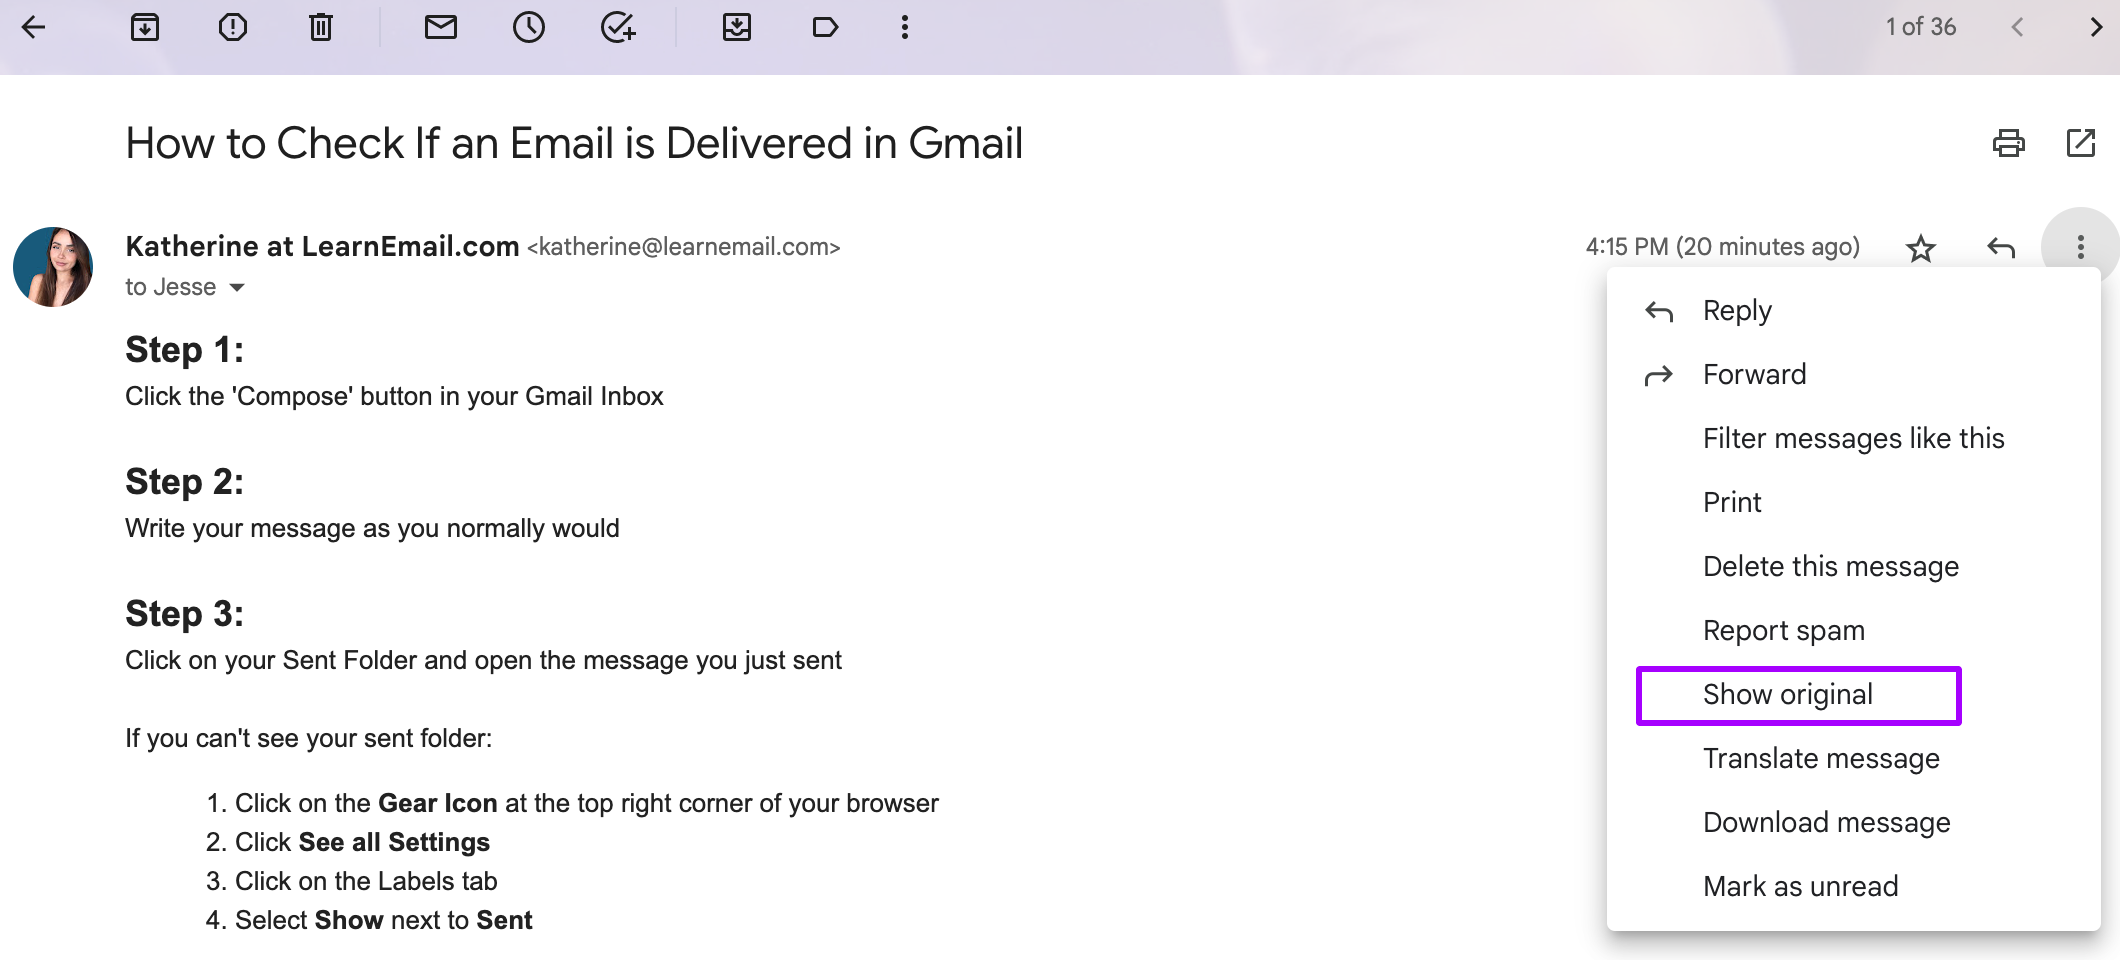
Step 6:
You can see when your message was delivered in the Created at: row
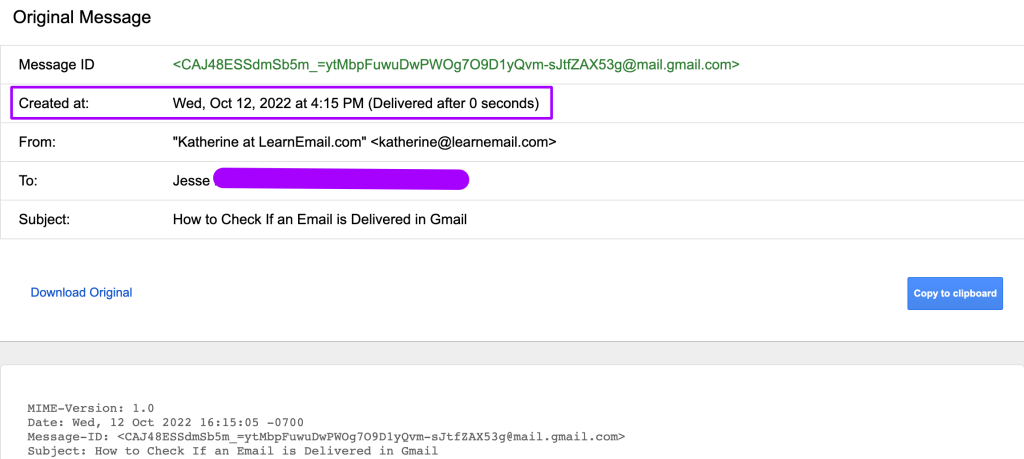
Most of your emails should be delivered instantly unless you have:
- Exceeded the Gmail Sending volume
- Been marked as spam recurringly
- A brand new account and attempted to send bulk emails
Email tracking is difficult to manage when you’re sending a large volume of emails. It would be extremely difficult to repeat the steps listed above for 14,000 emails. These first two methods merely show you when your email was delivered, not where, which also holds a large impact on your email’s performance.
Additionally, this method does not display what your deliverability is for other ESPs.
GlockApps Inbox Insight
The easiest way to check if an email has been delivered is by using an email tracking tool such as Inbox Insight.
Not only will you see which mail folder (Inbox, Promotions, or Spam) your Gmail message was delivered to, but you’ll also see your email’s deliverability for other ESPs such as Outlook and Yahoo! Mail.
Testing email deliverability with an email tracking tool like GlockApps helps you identify potential filtering issues before you send.
Note: Deliverability may differ when you send emails through your SMTP server, third-party application, or email service provider.


