Test Inbox Deliverability and Spam Score of an AWeber Email Campaign
You can use the GlockApps email spam checker with any email service provider or email software to test the Inbox deliverability and spam score of your email campaign before sending it to the list of real subscribers.
In this tutorial, we’re going to guide you through the steps how to test your email campaigns created and sent by AWeber using the GlockApps Inbox Insight tester.
Starting Inbox Insight Test
Login to your GlockApps account.
Go to Inbox Insight at the left side.
Click Start Spam Test -> Start Manual Test.
Select the spam filters and mailbox providers and click Next.
Optionally select a folder to save the report, add a note for the test, and disable the link checker, and click Create.
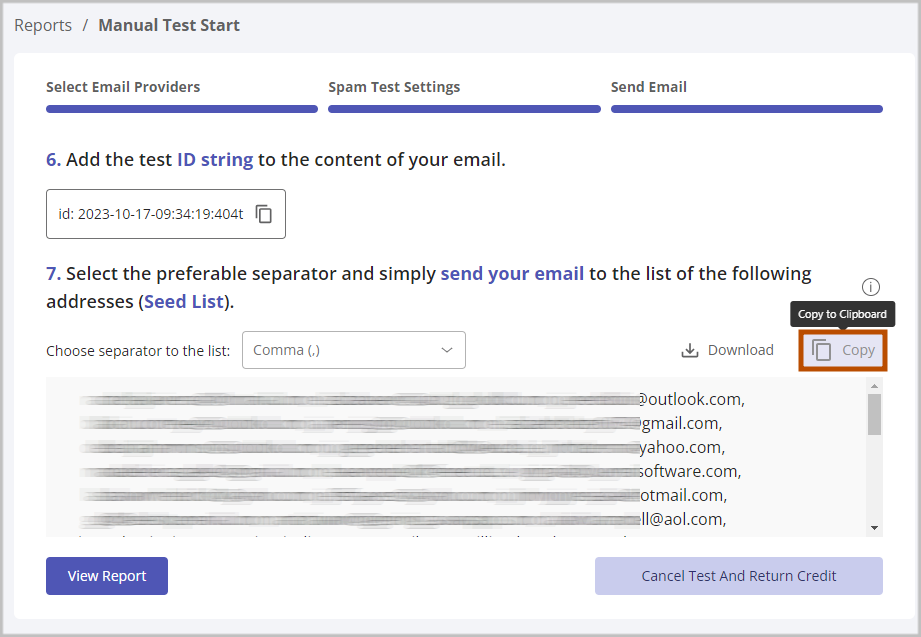
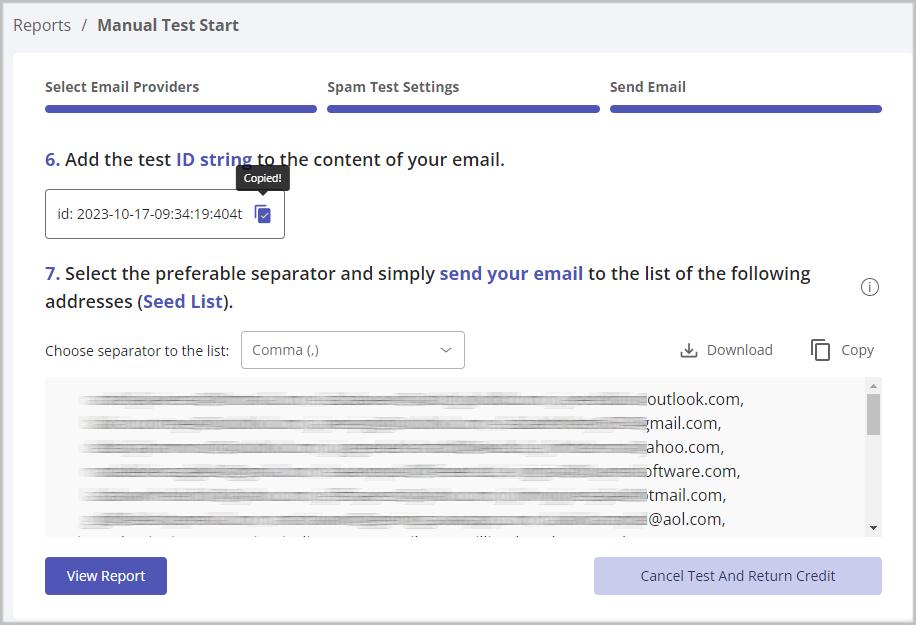
Select the separator for the email addresses on the seed list. A line break or a comma should work well.
Сopy the seed list.
Importing Seed List in AWeber
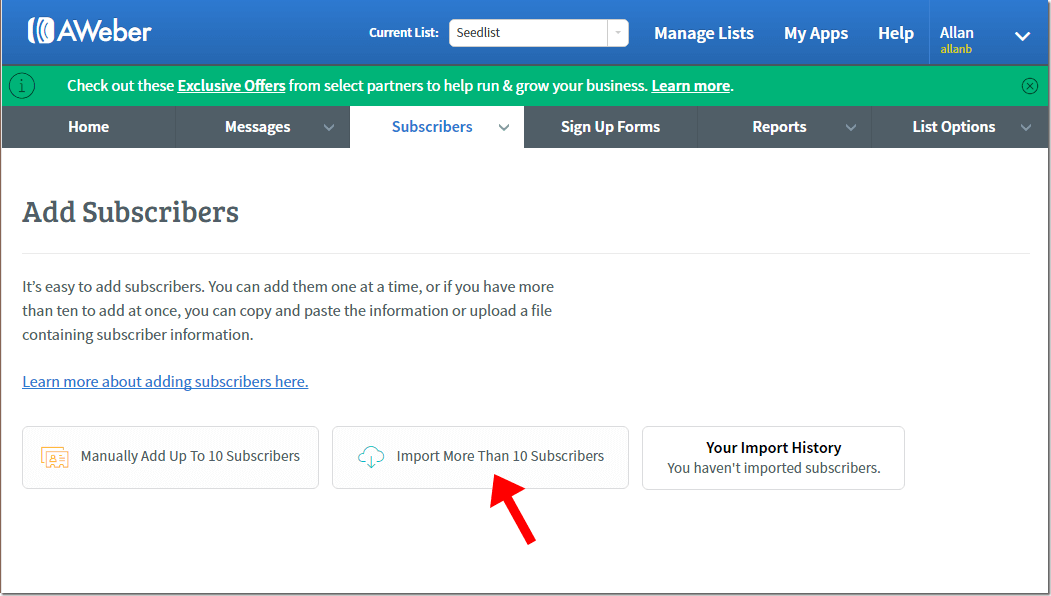
Go to your AWeber account and under the “Subscribers” tab choose “Add Subscribers.”
Click “Import More Than 10 Subscribers”.
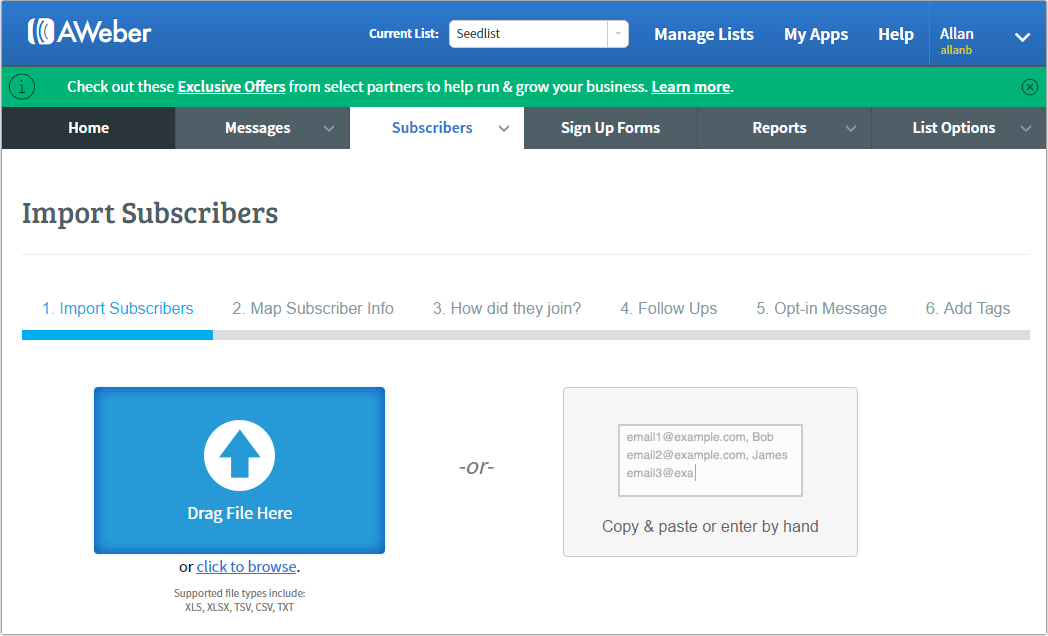
Click “Copy & Paste or enter by hand”.
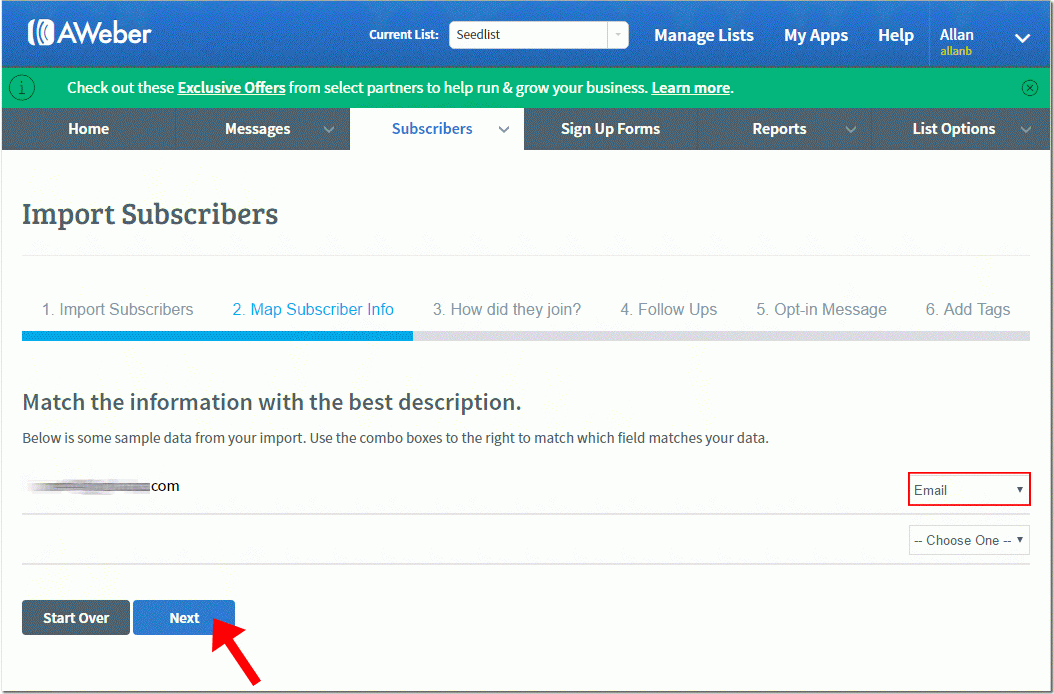
Choose “Email” in the combo box on the right and click “Next.”
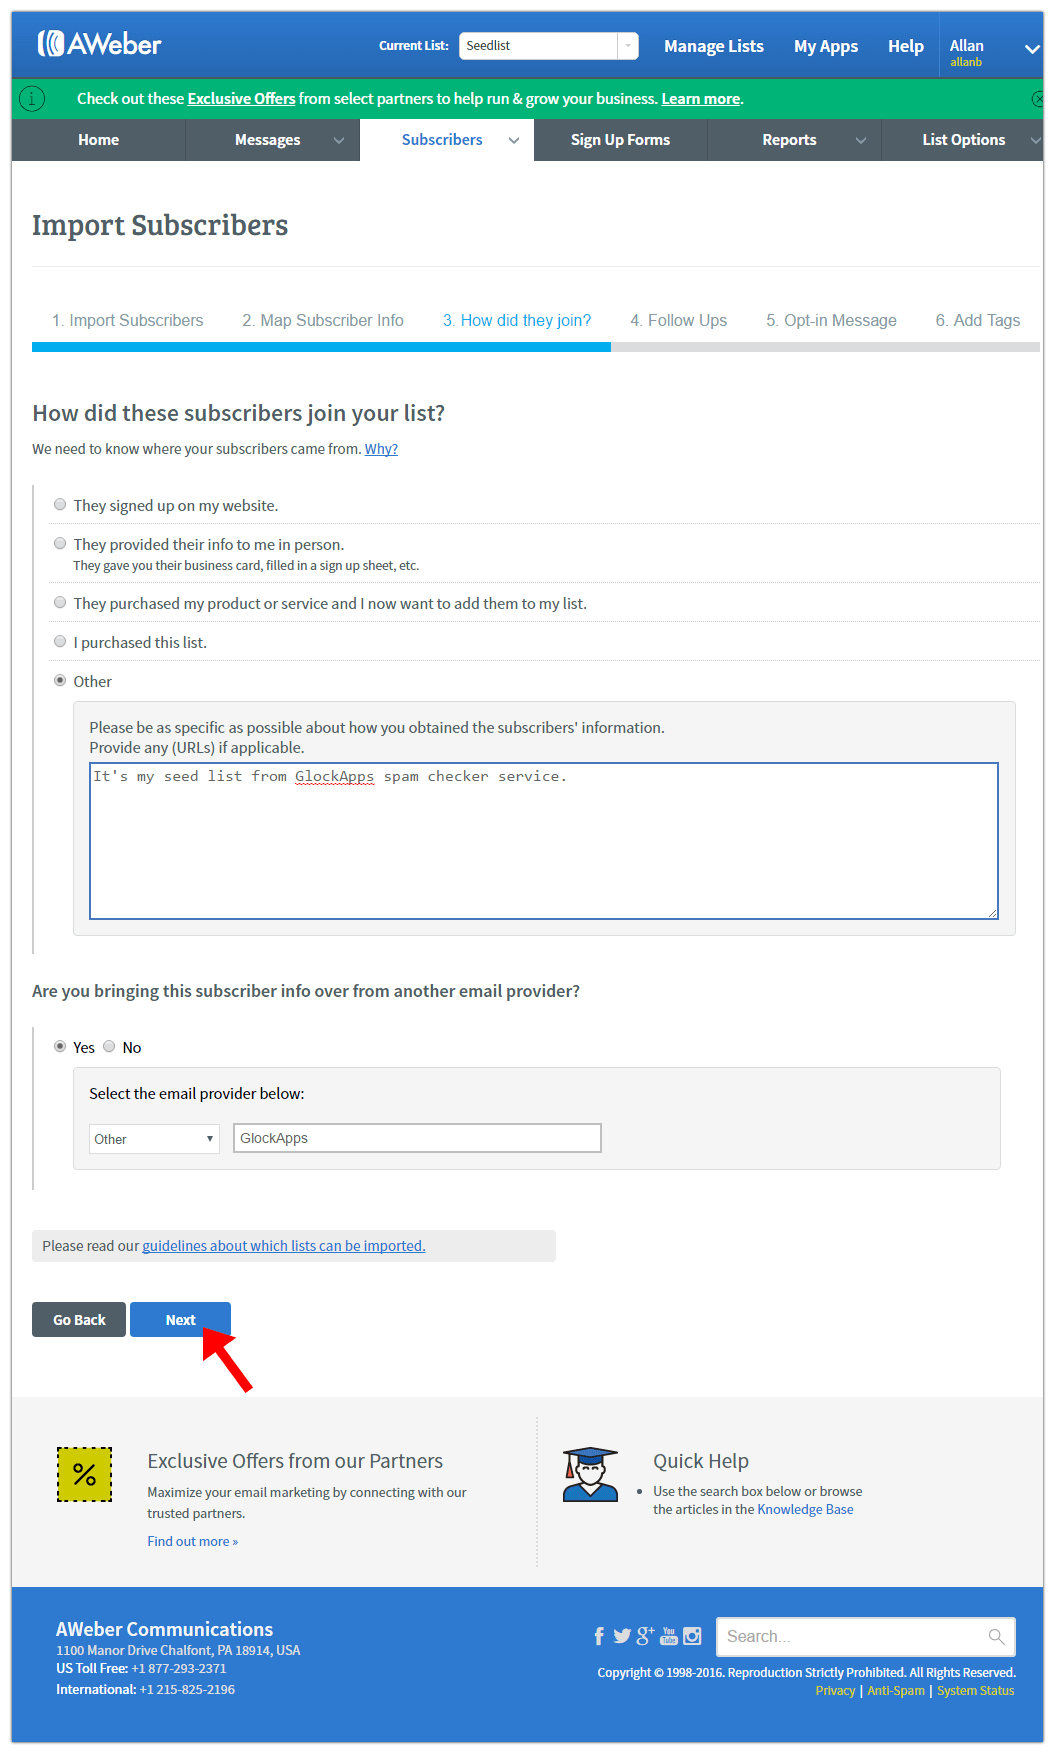
Tell Aweber how the subscribers joined your list. You can write that the email addresses are your seed list from the GlockApps email testing service. Click “Next.”
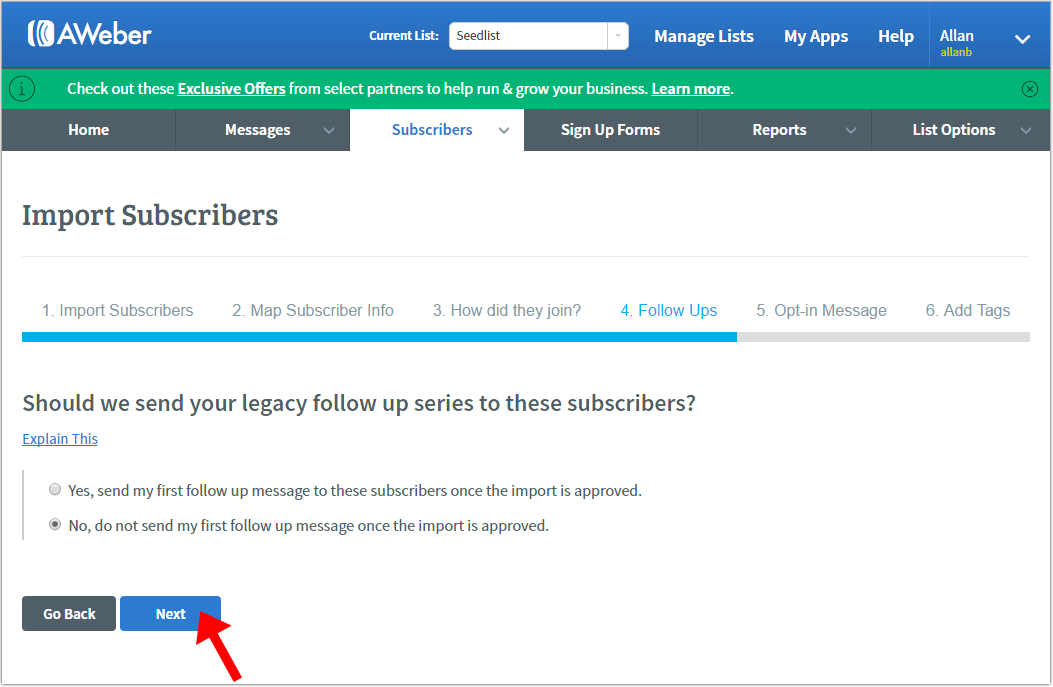
Choose to not send a followup message to your seed list when it’s imported and click “Next.”
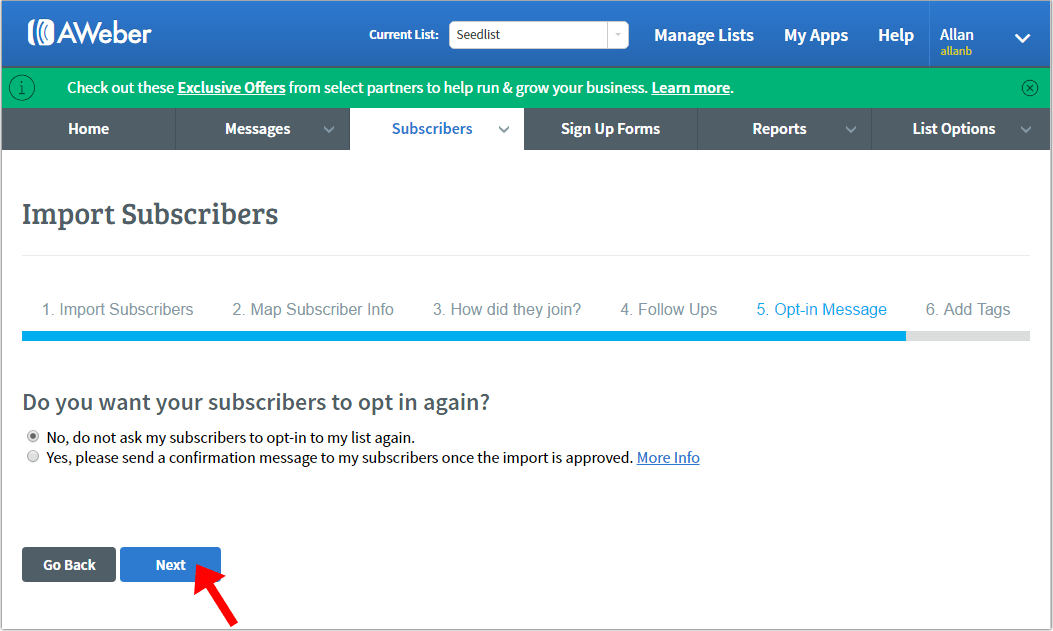
Choose to not ask your subscribers to opt-in again and click “Next.”
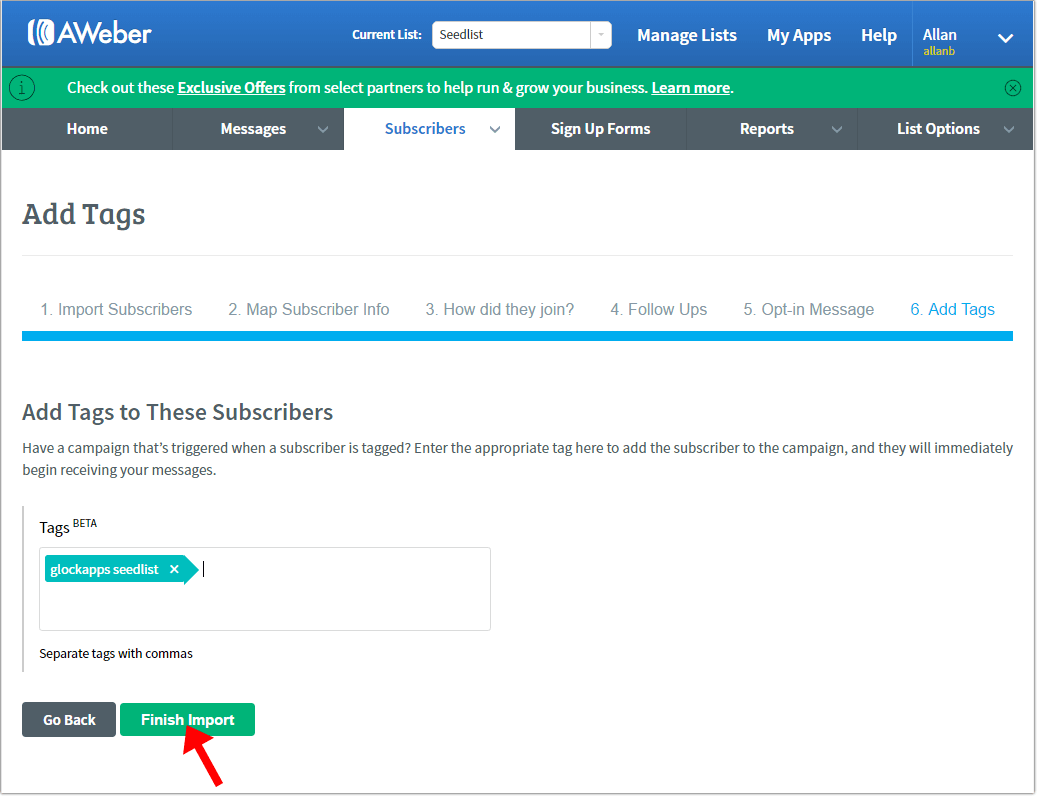
Add tags to the subscribers and click “Finish Import.”
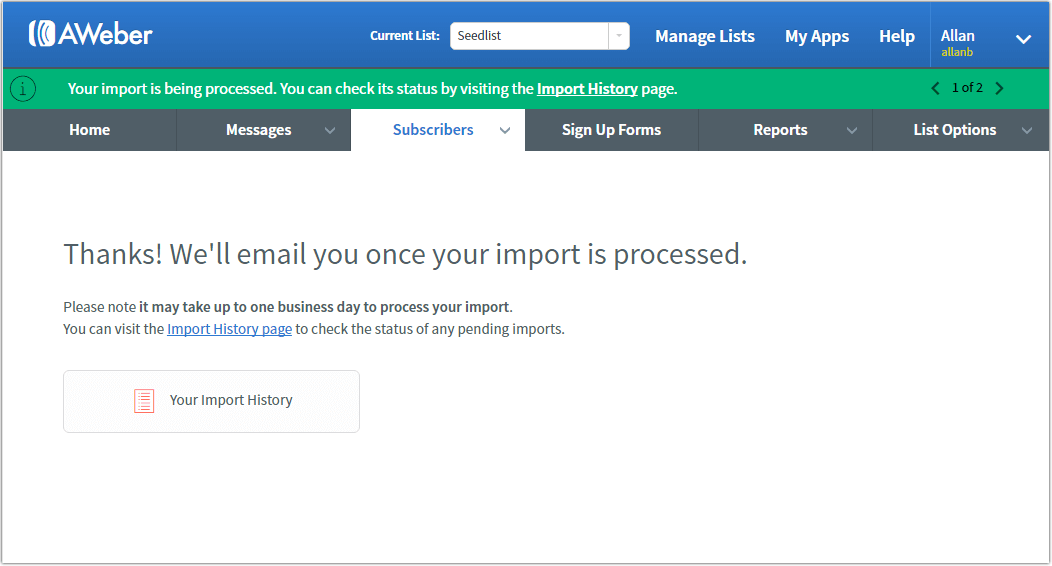
Wait for the email from AWeber confirming that your import was processed.
Sending Message to Seed List from Aweber
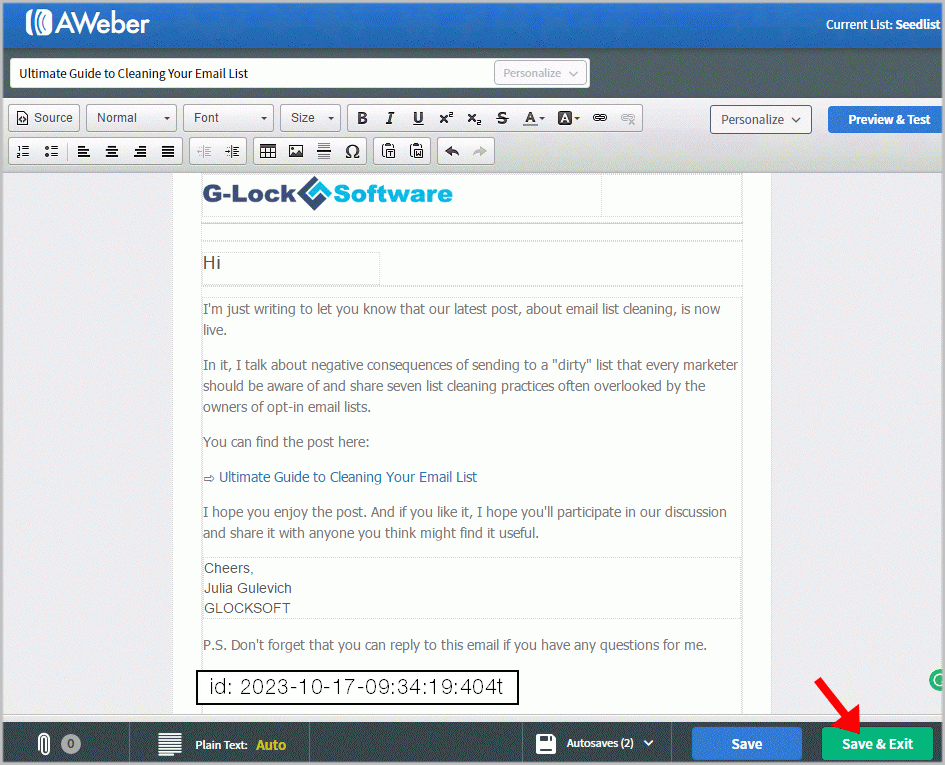
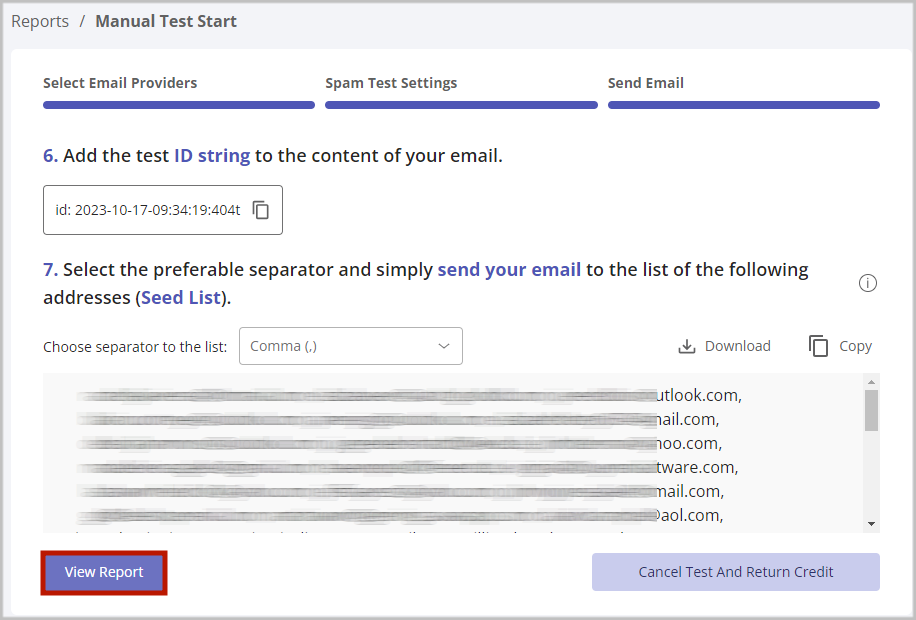
Go to GlockApps and copy the test ID string.
Return to Aweber and open a message.
Paste the test ID into the message body at any place or in the Subject line.
Click “Save & Exit.”
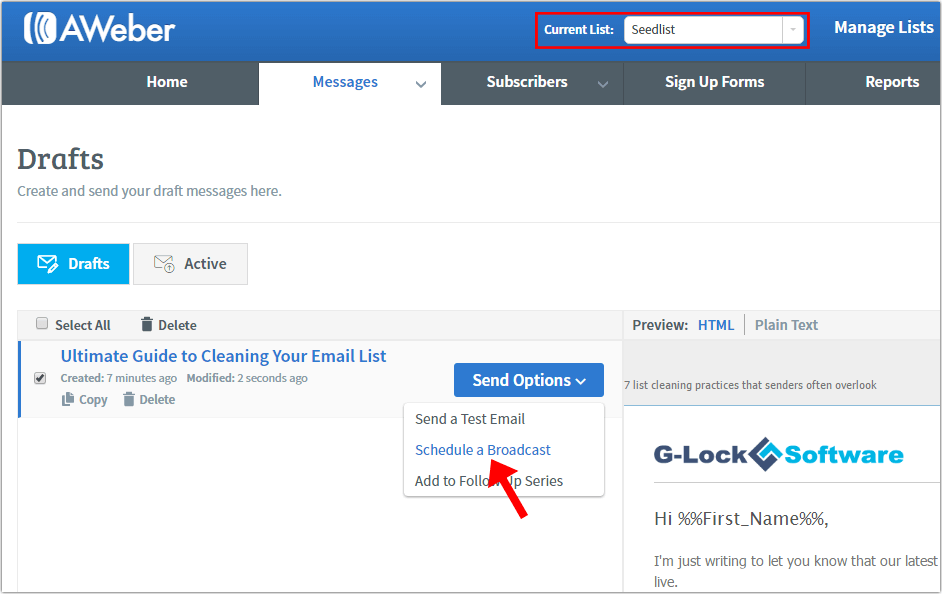
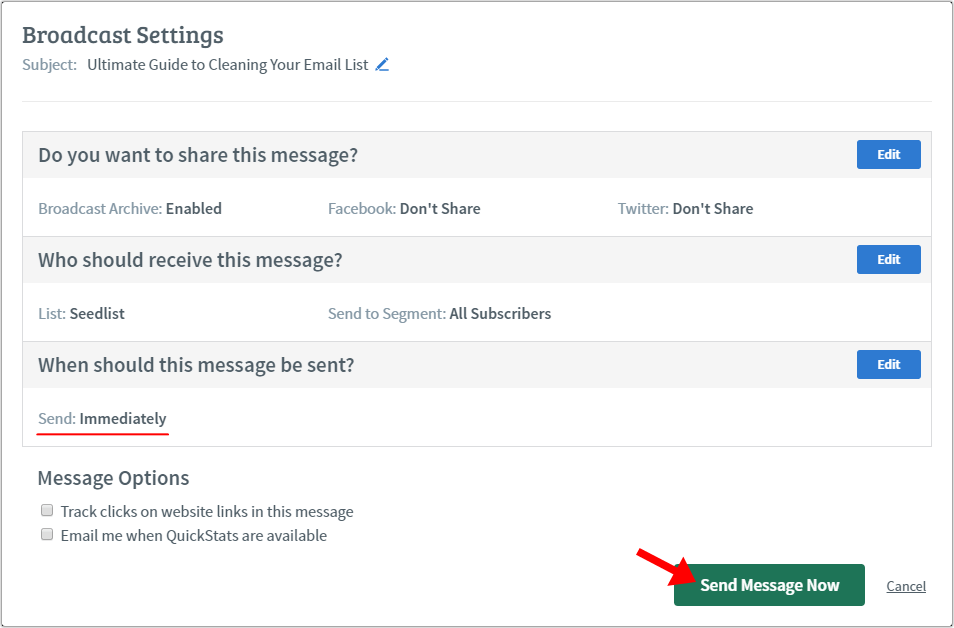
Choose your seed list in the “Current List” field at the top and the choose “Schedule a Broadcast” from the “Send Options” menu.
Make sure the sending is scheduled to be sent immediately and click “Send Message Now.”
When your campaign is sent, go to GlockApps and click “View Report.”
Related Posts
SendGrid is a powerful email delivery platform used by businesses for transactional emails, marketing campaigns, product notifications, newsletters, and automated Read more
Unsubscribing should be simple. When people no longer want to receive marketing emails, newsletters, or promotional campaigns, they should be Read more
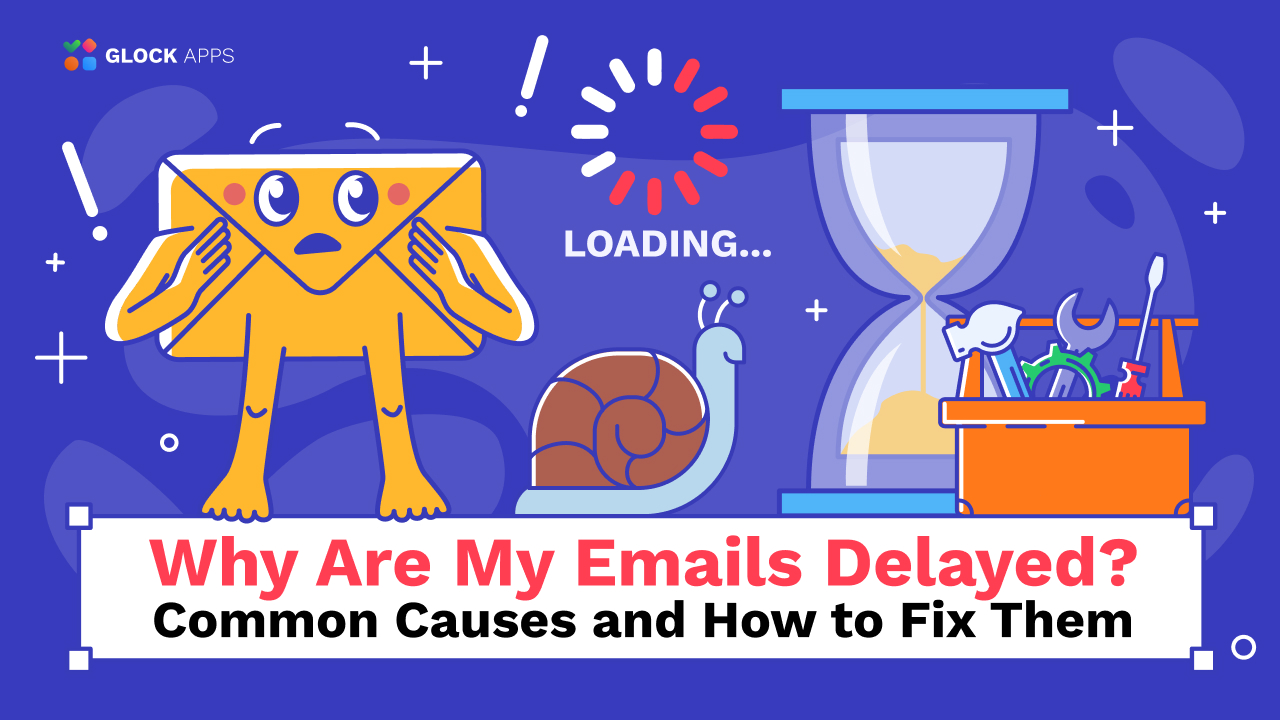
Delayed email delivery can happen for many reasons. Sometimes the delay is caused by the sender’s mail server. Sometimes it Read more
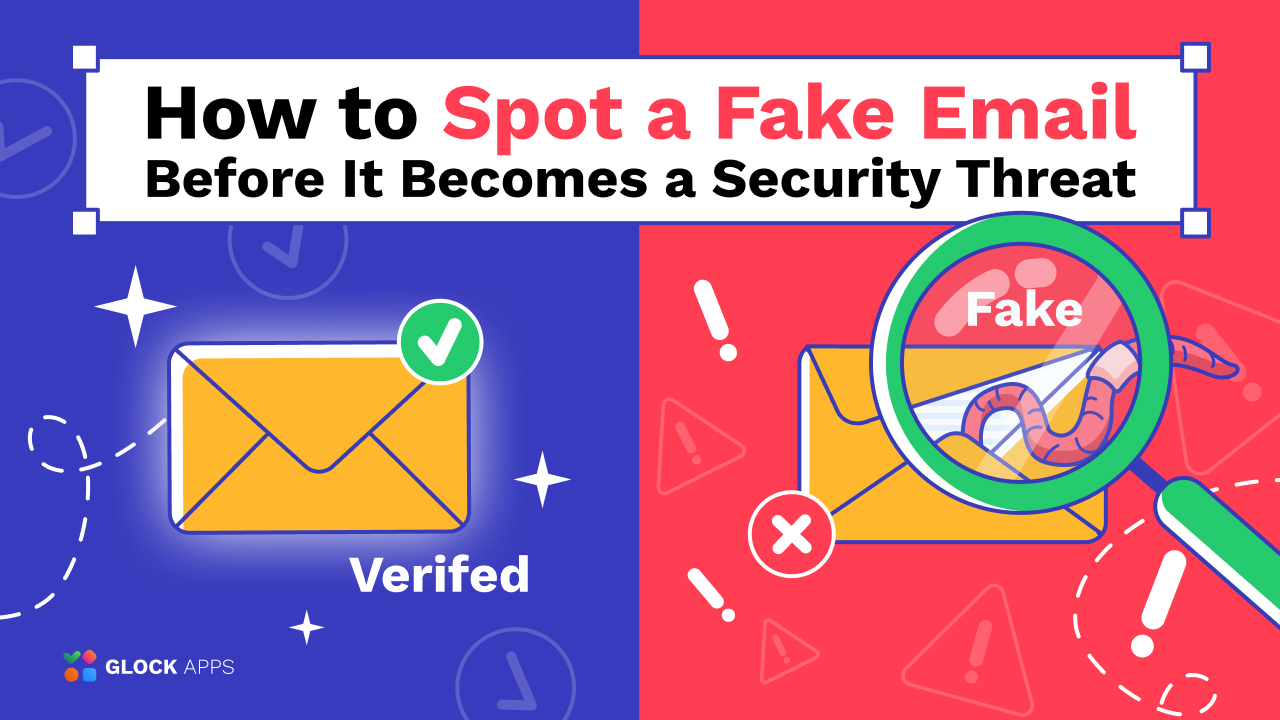
Phishing, email spoofing, business email compromise (BEC), and impersonation attacks have become increasingly common. Modern fake emails often look nearly Read more