Test Inbox Deliverability and Spam Score of a GetResponse Email Campaign
You can use the GlockApps Inbox Insight tool with any email service provider or email software to test email deliverability and spam score of your email campaign before sending it to the list of real subscribers.
In this tutorial, we’re going to guide you through the steps how to use the GlockApps free email spam checker to test GetResponse email campaigns.
Testing via Seed List
Starting Inbox Insight Test in GlockApps
Login to your account at GlockApps.
Go to Inbox Insight at the left side.
Click Start Spam Test -> Start Manual Test.
Select the spam filters and mailbox providers and click Next.
Optionally select a folder to save the report, add a note for the test, and disable the link checker and click Create.
Choose Comma as the separator of the email addresses on the seed list and click Download.

Importing Seed List in GetResponse
Login to your account with GetResponse.
Go to the Lists tab and click Create List.
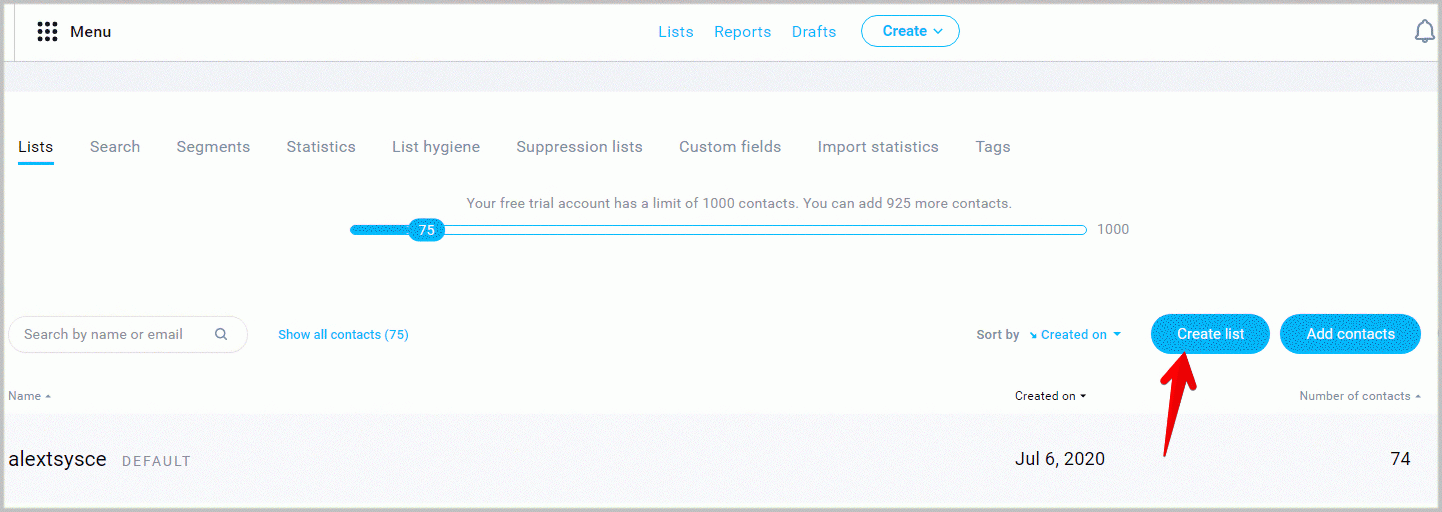
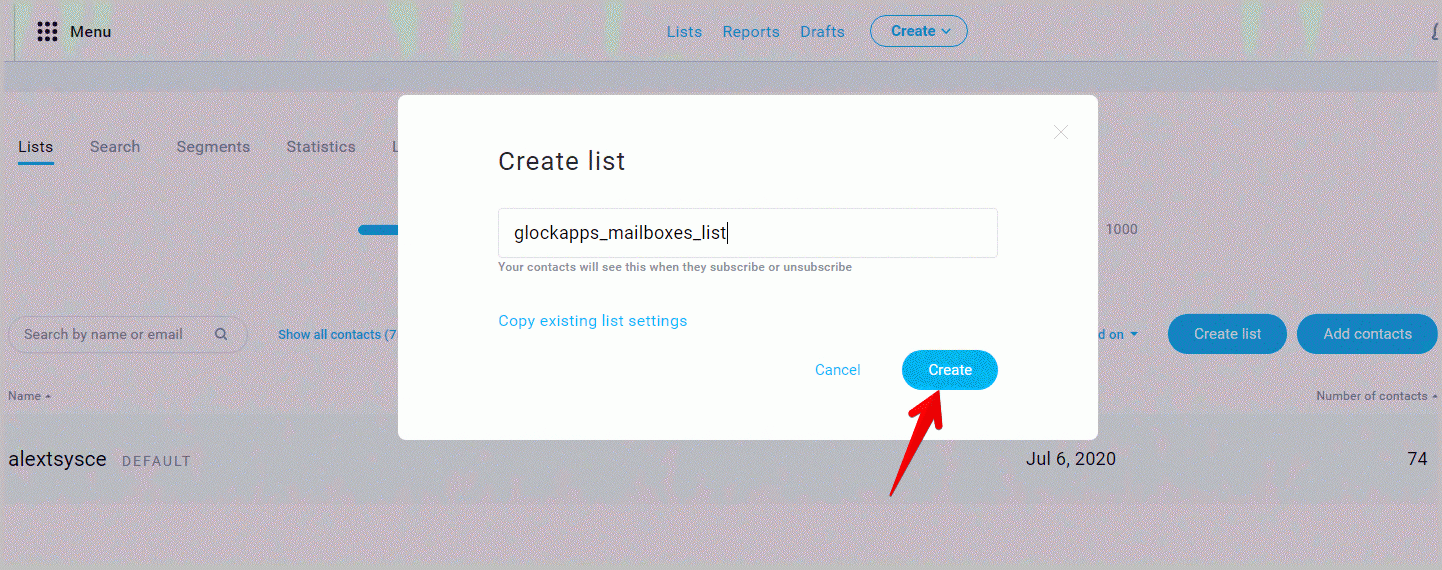
Enter a list name and click Create.
Once the list is created, go to your GlockApps account.
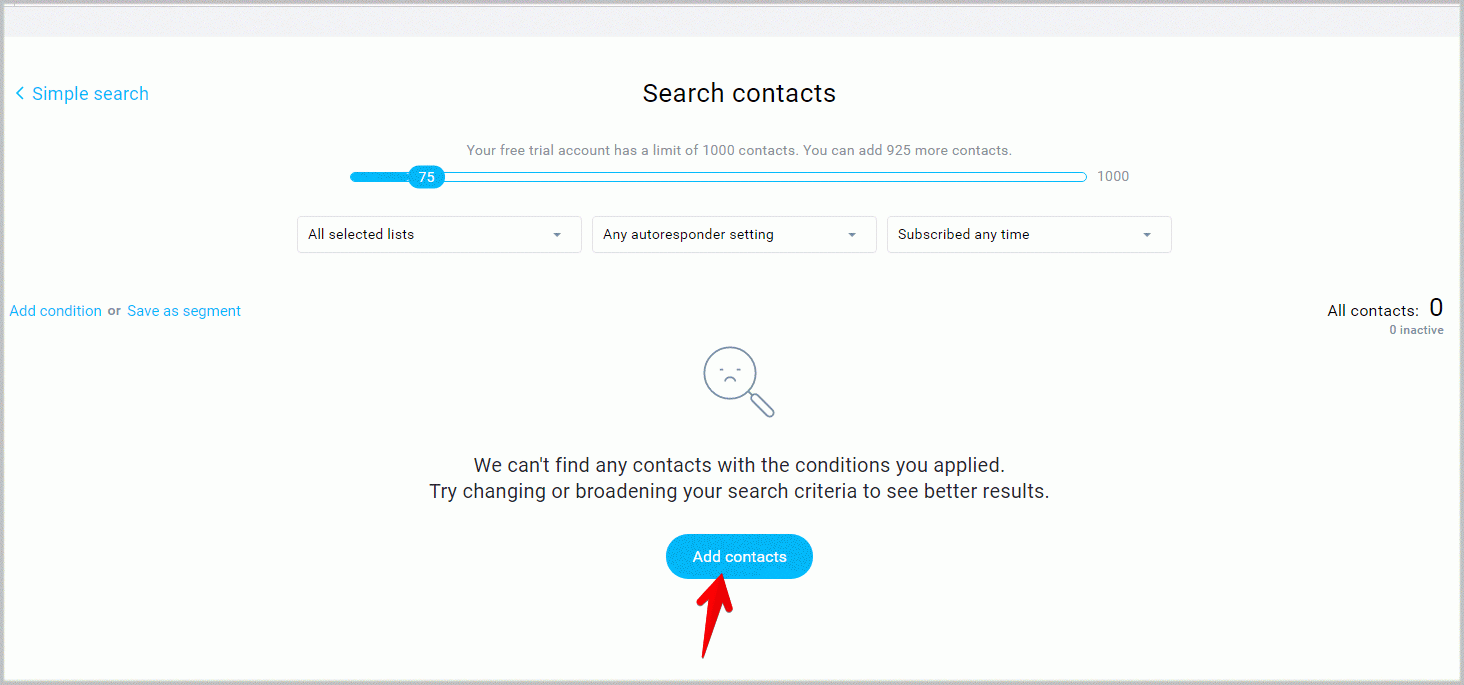
Open the list you’ve just created in GetResponse.
Click Add Contacts.
Select the list, select to upload a file, drag and drop the downloaded seed list file, choose to add and update existing contact, and check the permission to add those contacts to the list.
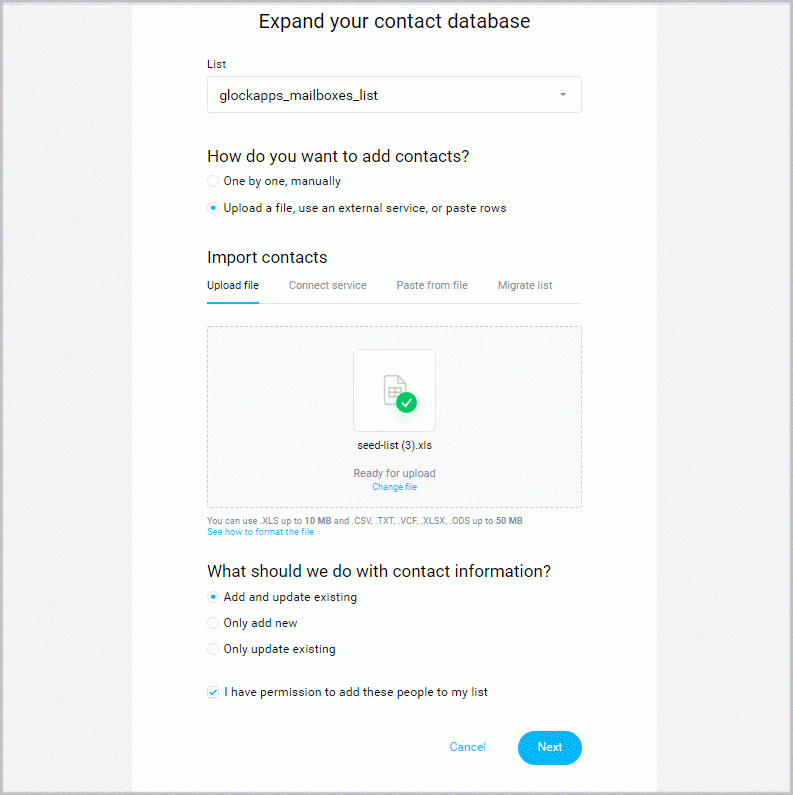
Import the seed email addresses on the next step.
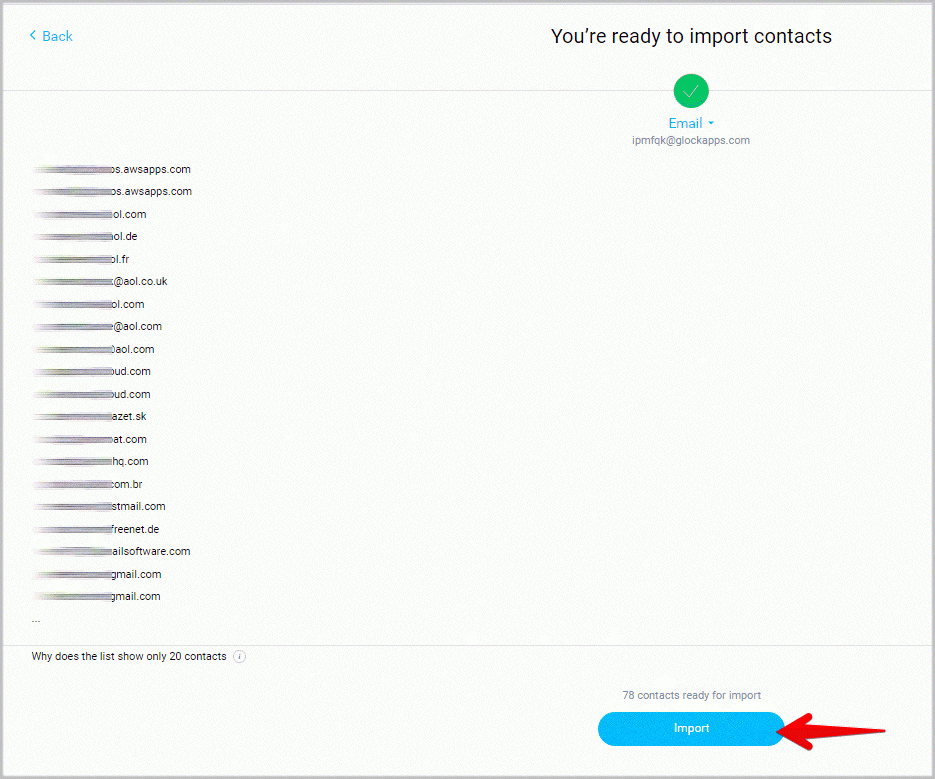
Note that it can take some time to validate the seed list.
Once this is done you will see the ‘Completed’ status.

Sending Message to Seed List from GetResponse
Return to GlockApps and copy the id string.
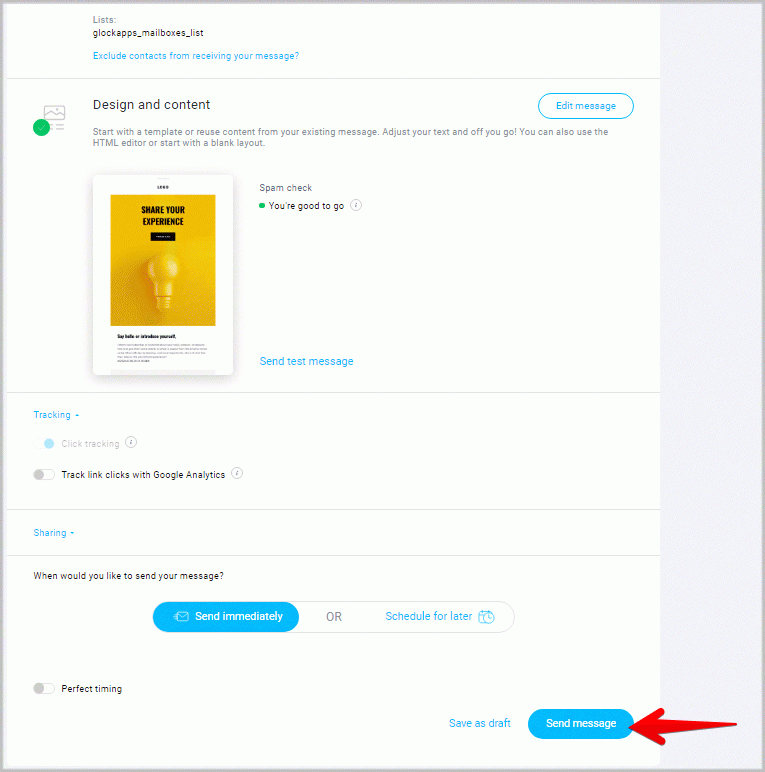
Open the message in GetResponse and paste the id string at any place in the content or in the Subject line.

Send the message with the id to the list of seed email addresses.
Once the sending is finished, go to GlockApps and click the View Report button.
Testing via Proxy Email Address
This is an alternate testing mode which makes the testing process easier.
This mode eliminates the need to create a test manually and copy-paste the id string in the message.
To test an email message via a proxy email address, you need to create a sending account with the GetResponse SMTP settings in GlockApps.
Go to Inbox Insight -> Sending Accounts in your account in GlockApps.
Click Create Sending Account and enter your sender’s information and the SMTP settings obtained from GetResponse.
Obtaining GetResponse SMTP Credentials
Log into your GetResponse account.
Click Transactional emails.
Click Settings in the top toolbar. There, you can find the server, port, and username information.
Click Generate password and give it a name. The name should help you identify what you use it for.
Then, click Generate.
After entering the SMTP server’s information, select the spam filters and mailbox providers, and click Check & Create.
If the entered information is correct, the sending account will be saved.
Sending Message to the Proxy Email Address
Copy the proxy email address associated with the sending account.
Go to GetResponse.
Create a new list and add the proxy email address to the list.
Send the message to the list with the proxy email address.
GlockApps will create a test in your account and re-send the message to the chosen seed email addresses through your GetResponse SMTP settings.
In GlockApps, go to Inbox Insight -> Reports -> Proxy Tests to view the deliverability report.
Related Posts

A seed based email test involves sending a message to a list of test email addresses set up with different Read more

An email authentication technique called DomainKeys Identified Mail (DKIM) helps safeguard email senders and recipients from spam, spoofing, and phishing. Read more

Learn how DMARC Analytics digests can help you fix email authentication issues and get more emails delivered to Inbox

Equip yourself with the best tools to maximize your email marketing success. GlockApps has developed an all-in-one solution to help Read more