How to Create Automatic Tests
How to Test Your Email Campaigns Daily on Auto-Pilot
You use GlockApps Inbox Insight to create automatic tests and monitor your message’s Inbox placement daily without intervention.
After the setup is complete, our email spam checker tool will send your message to the seed email addresses at the time interval you chose (every xx hours or xx days). You will see a deliverability report on your dashboard displaying where your email is placed in the mailbox. You can also receive alerts if your email doesn’t make it to the Inbox at any of the selected mailbox providers.
With an automatic test, you can:
- Test the same message on a regular basis without any actions on your side
- Test deliverability of different messages or sending accounts at the same time
- Quickly spot changes in your deliverability rate over time
Automatic tests are mostly helpful for transactional messages (subscription confirmations, account activations, purchase confirmations, etc.) where the content does not change often. Your customers expect transactional messages, so it is important to ensure that they are delivered to their Inbox. Therefore, you’ll want to be notified when your message is placed in the Spam folder.
To setup an automatic test, follow these steps:
1. Integrate GlockApps with Your Email Account.
If you’ve already connected GlockApps to your email account, skip this step.
Otherwise, follow these steps:
In your account, go to Inbox Insight -> Sending Accounts.
Click “Create Sending Account.”
Type your sending accout name. It can be any name in order you can recognize the sending account in the dashboard.
Next, select the integration method.
To integrate with your Microsoft account (Outlook, Hotmail, or Office365), select “Outlook” and click “Continue with Microsoft”. Click here for the step-by-step guide.
To integrate with your Gmail or Google Workspace account, select “Gmail” and click “Continue with Google”. Click here for the step-by-step guide.
To enter the SMTP settings manually, choose “Custom SMTP” and complete the fields in the form:
From name – the name that will be associated with your email address.
From email – the email address your emails will be sent to the seed list from.
SMTP server – the name of the SMTP server.
Port – SMTP port number (465 or 587).
Security protocol – none or SSL. The “none” option works as STARTTLS.
SMTP username – login for your account with the SMTP server. As a rule, it’s the full From email address.
SMTP password – password for your account with the SMTP server. If your SMTP user doesn’t require authentication, type nopassword in the Password field. The username can be any or empty. With nopassword, the username is ignored.
You can refer to your email service provider’s documentation regarding the SMTP settings to be used.
Important! If your SMTP server only accepts the connections from allowed IP addresses, add the GlockApps IP address 44.213.216.19 to your allowed senders list or whitelist.

Click “Continue” to save the sending account.
If the connection is successful, your sending account will be created with no error. If the connection is not successful, an error message will be returned by the SMTP server. Read the error and correct the SMTP settings.
2. Create an Automatic Test.
Go to the Inbox Insight dashboard.
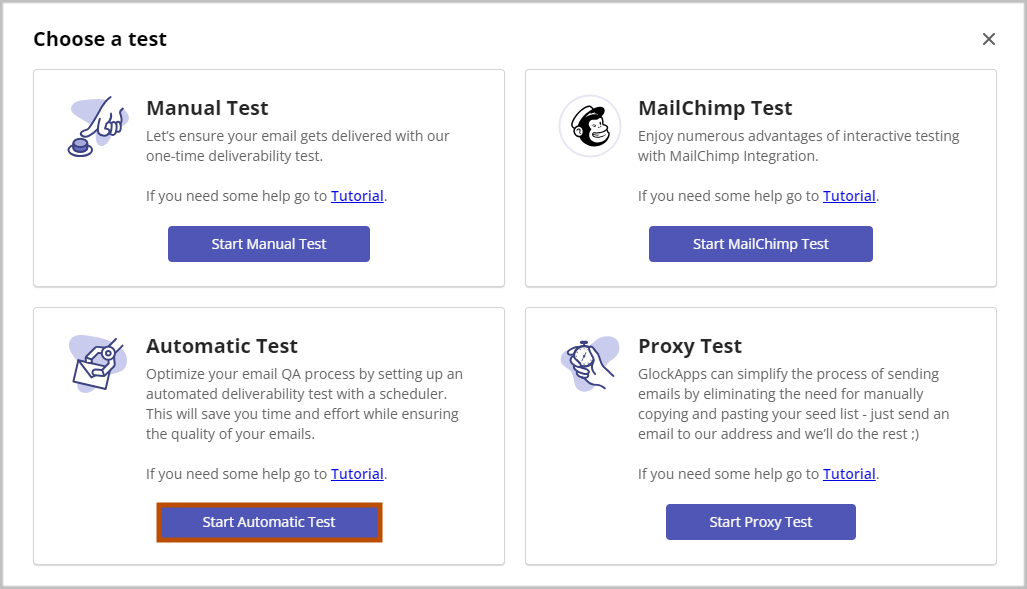
Click on Start Spam Test -> Start Automatic Test.
Add Message
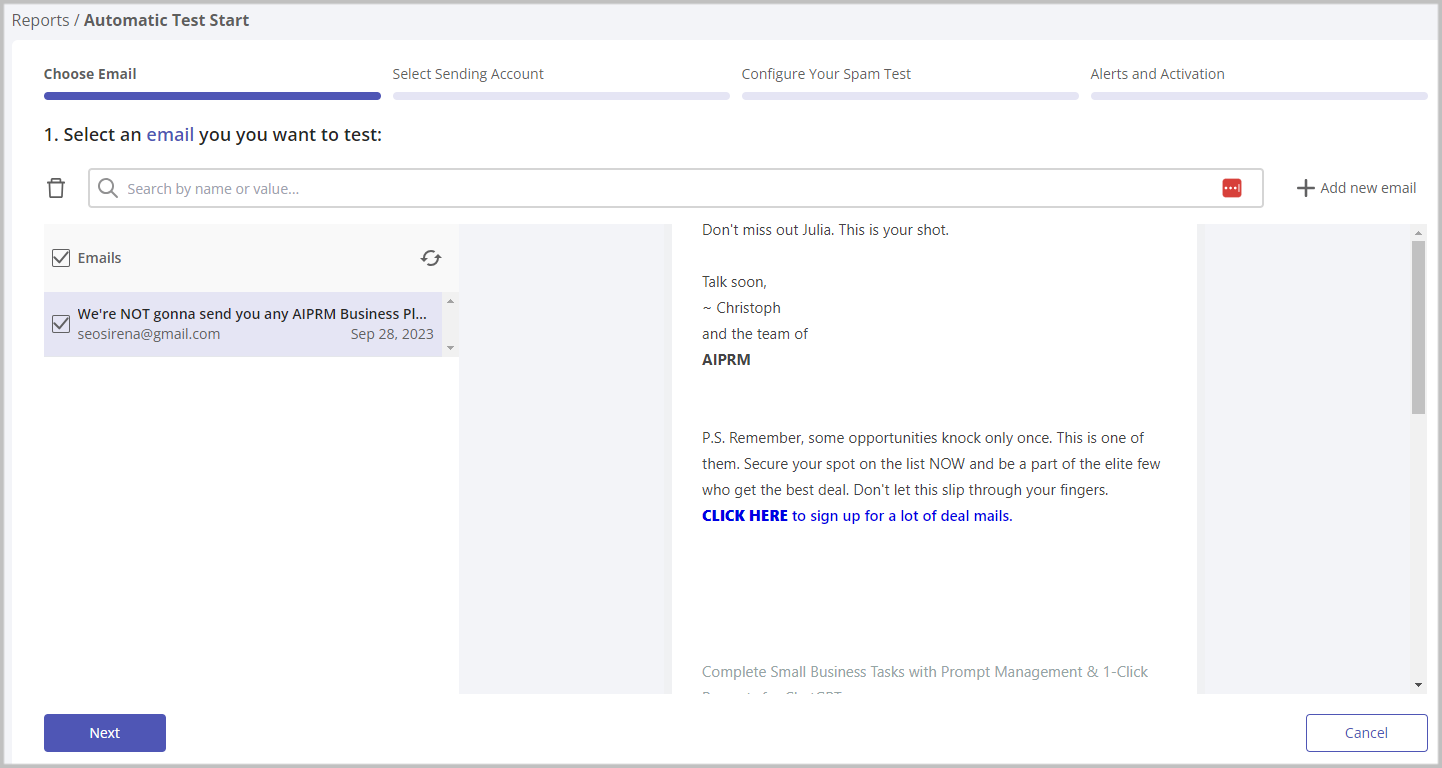
The system displays the list of the messages you have already tested. To create an automatic test for any of these messages, select it and click “Next”.
To create an automatic test for a new message, click “Add new email”.
Copy the provided email address and send the message to it using your email service provider.
Click “Done” to continue.
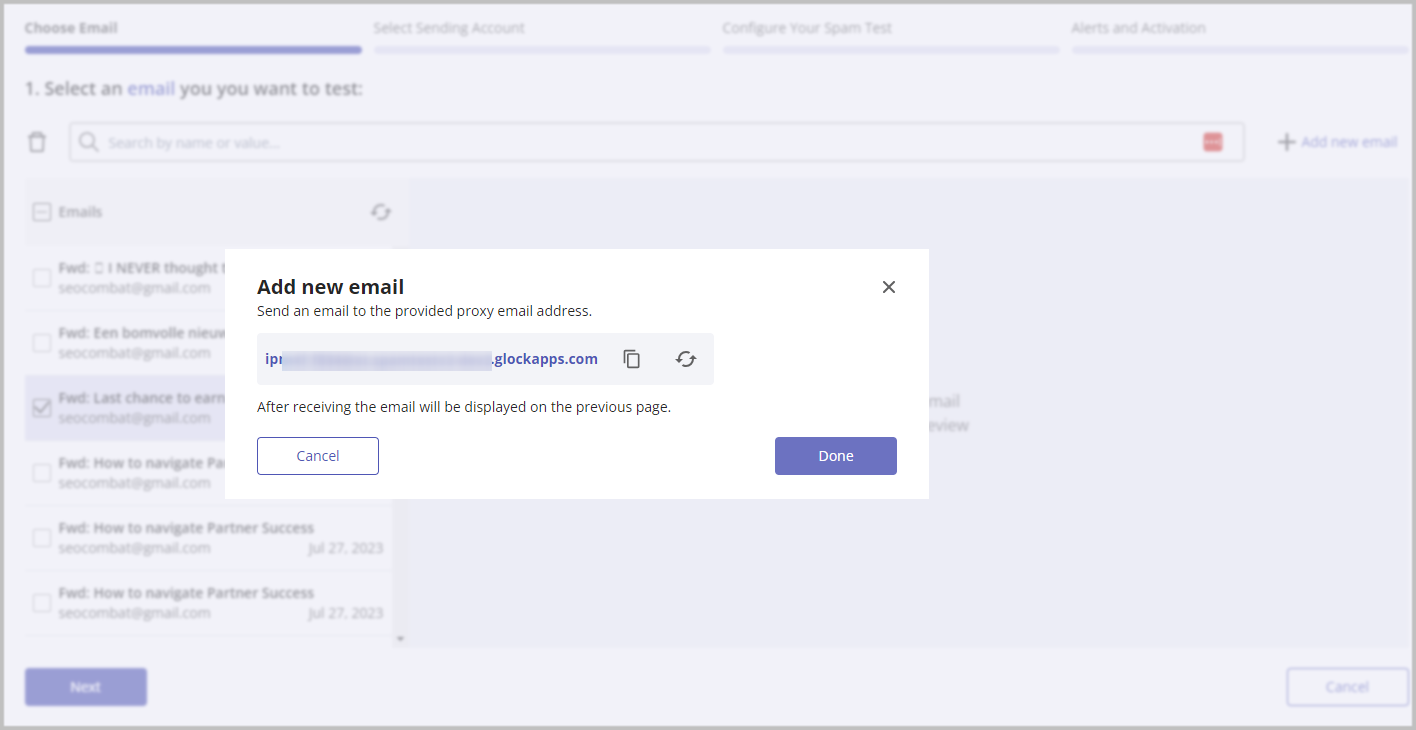
The sent message will appear on the list. If it doesn’t, click “Refresh“.
Select the message and click “Next”.
Select Sending Account, Spam Flters and Inbox Providers
In the menu, select the sending account to be used to send the message to the seed list in this automatic test.
Next, select the spam filters and inbox providers for your seed list.
Click “Next”.

Configure Additional Settings
Select the Folder
By default, the test is saved to the root Home folder. In the menu, you can select a different folder to save the test to. Folders allow to easily sort tests for your convenience.

Add Description
Optionally, you can write a description or a note for your test.
Enable/Disable Link Checker
To ensure the validity of each URL (excluding the unsubscribe link) in your message, GlockApps conducts a thorough check. It even goes the extra mile to extract target URLs if you use redirects and scrutinizes the domain in the target URL against domain blacklists, which include Spamhaus DBL Domain Block List, involvement DNSBL, and SURBL multi (Combined SURBL list).
Additionally, GlockApps may follow the unsubscribe link if you use a very specific anchor text and unsubscribe a seed email address on your list. To prevent this, disable the link checker.
Choose Testing Interval and Throttling
Click “Set Up Time and Throttling” to set the testing interval and throttling.
Here you can set the starting date and time, testing interval and the sending mode: send all emails simultaneously or make a delay between the messages.
Click “Done” and then click “Next” to go to the final step.

Alerts and Test Activation
Finally, you can create a condition for alerts to be sent to you after the automatic test returns the report. For instance, you can receive alerts when the total Inbox rate or a particular provider’s Inbox rate drops below a desired value.
To save and activate the automatic test, click “Save and Activate”.

Important! Every run of an automatic test consumes one test credit. Thus, the 3-hour interval will make 8 tests and consume 8 credits per 24 hours. Choose the testing interval wisely in order to not run out of test credits before your subscription renewal takes place. When there are no test credits on the balance, the automatic tests will be de-activated by the system.
How to View Automatic Test History
To view the automatic test report, click on the message Subject line under Automatic Tests. By default, the system displays the last report.
At the top of the report, there is a diagram of the report’s 30-day history. The diagram shows your Deliverability rate over time.
To view your detailed report from any specific date, scroll your mouse over the top of the history diagram, and click a date you’d like to examine.
How to Edit Automatic Test Settings
To change the automatic test settings, click the Settings icon at the right side.
In the settings you can change:
- message;
- sending account;
- throttling setting;
- spam filters and providers;
- folder;
- note text;
- link checker;
- testing interval;
- alert settings.
To save the changes, click “Save“, then click “Just Save“.
How to Run Automatic Test Now
To force the automatic test run in the middle of the chosen interval:
- click on the Settings icon for the test;
- scroll the page down and click Save;
- click Save & Test Now.
How to De-Activate/Re-Activate Automatic Test
Put a check mark next to the test(s) you want to de-activate.
Click “Deactivate” on the menu bar.
To re-activate inactive automatic tests, select them and click “Activate“.
How to Delete Automatic Test
Put a check mark next to the test(s) you want to delete
Click “Delete” on the menu bar.
How to Duplicate Automatic Test
Put a check mark next to the test(s) you want to delete
Click “Duplicate” on the menu bar.

Important note!
ISPs update their filtering algorithm regularly. When a mailbox provider receives an email, it stores information about the sender and the outgoing mail servers they use to send large volumes of emails. They track how the recipients engage with the emails received and over time, each sender develops a reputation, good or otherwise.
Automatic tests from GlockApps allow you to see your current sender reputation and know if any ISPs or popular filters are flagging your email as spam. You’ll be notified via email if there is a problem with your email’s deliverability.
Related Posts
What is Gmail's automatic unsubscribe? Discover how to unsubscribe from emails Gmail shows, how the Gmail unsubscribe button works, and Read more
Email is one of the most business-critical communication channels. When incoming mail fails, the consequences can include lost leads, missed Read more

Nostalgia marketing taps into memories, feelings, and cultural moments that make people feel safe, understood, and emotionally connected. In times Read more
Cold emails are electronic messages sent to a user with whom the sender doesn’t have prior relationship to initiate the Read more