HubSpot Integration: How to Test HubSpot Email Deliverability with GlockApps
1. Automated GlockApps Integration with HubSpot
- Run a Manual Test Using HubSpot
- Set Up Automatic HubSpot Tests
2. Manual GlockApps Integration with HubSpot (The Alternative Option)
- Part I: Import GlockApps Seed List into HubSpot CRM
- Part II: Send a Test Email to Your Seed List
Conclusion
HubSpot is an all‑in‑one growth platform that brings together marketing, sales, customer service, and CRM tools in a single, unified system. It enables email sending through its marketing email tools and transactional email capabilities, using HubSpot’s email delivery infrastructure and API-based sending methods.
If you want to test email deliverability through HubSpot using GlockApps, this tutorial will guide you step-by-step, from uploading your seed list to sending a test email and analyzing results. This is a crucial practice for marketers looking to ensure inbox placement and minimize spam folder issues.
1. Automated GlockApps Integration with HubSpot
With GlockApps you now have a direct HubSpot integration that makes it possible to run deliverability tests using your existing HubSpot Marketing Emails without manually creating and uploading a GlockApps seed list.
To connect your HubSpot account, go to Connected Mailboxes in GlockApps and create a new sending account. Enter a name for the account, select HubSpot from the available ESP options, and click Connect with HubSpot.
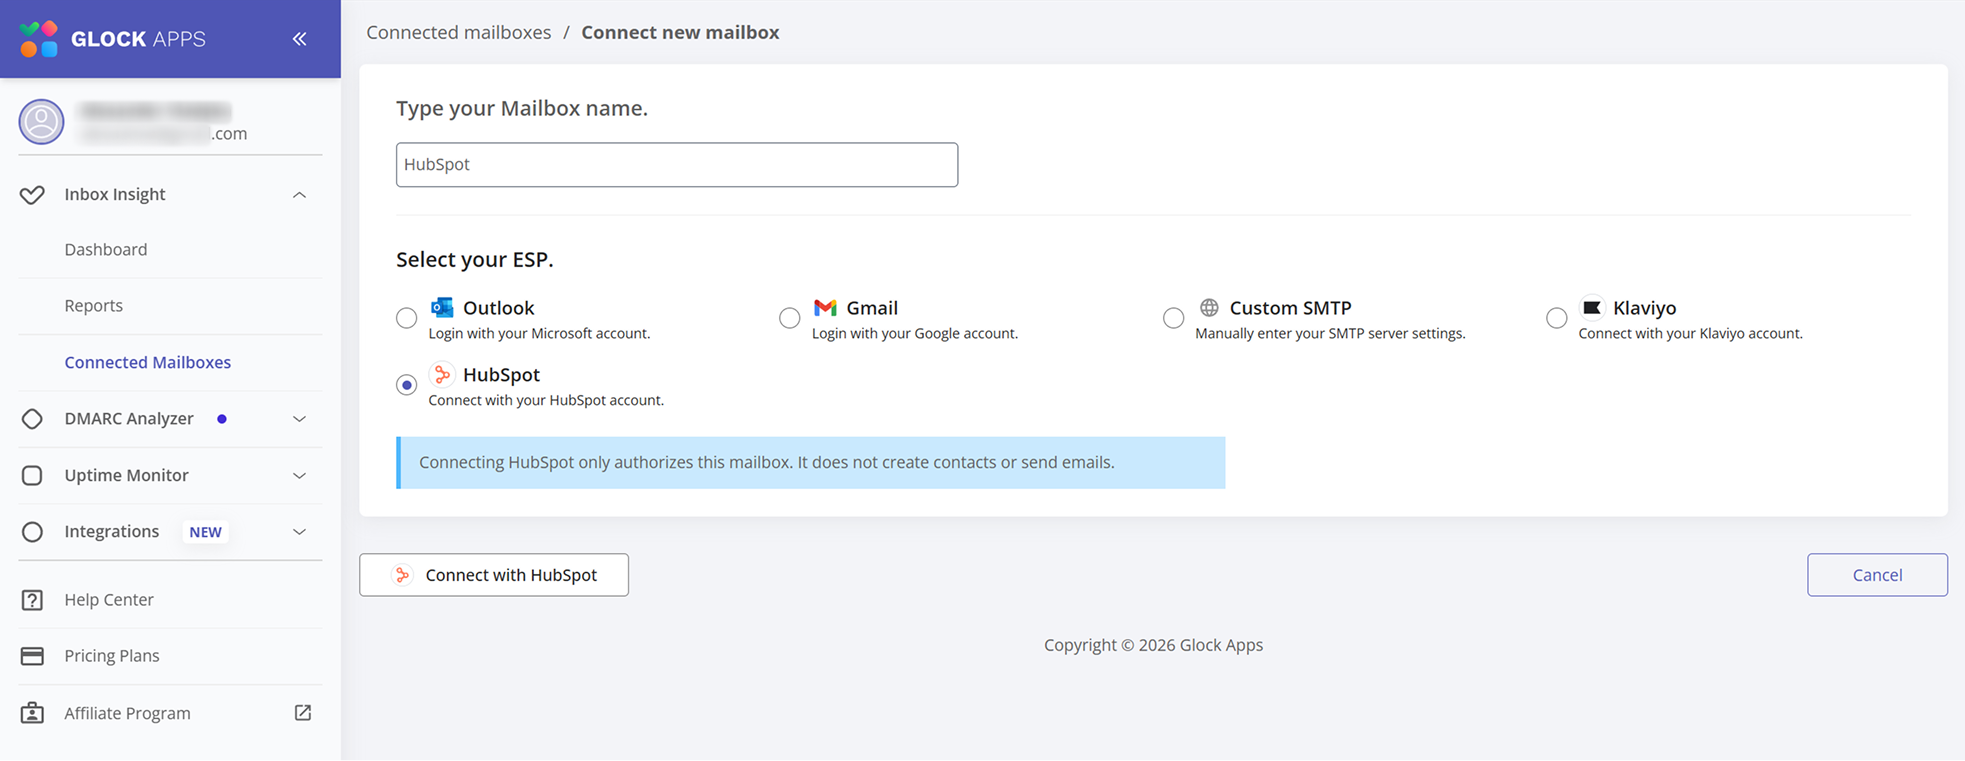
A HubSpot authorization window will open. Sign in to the HubSpot account you want to connect.
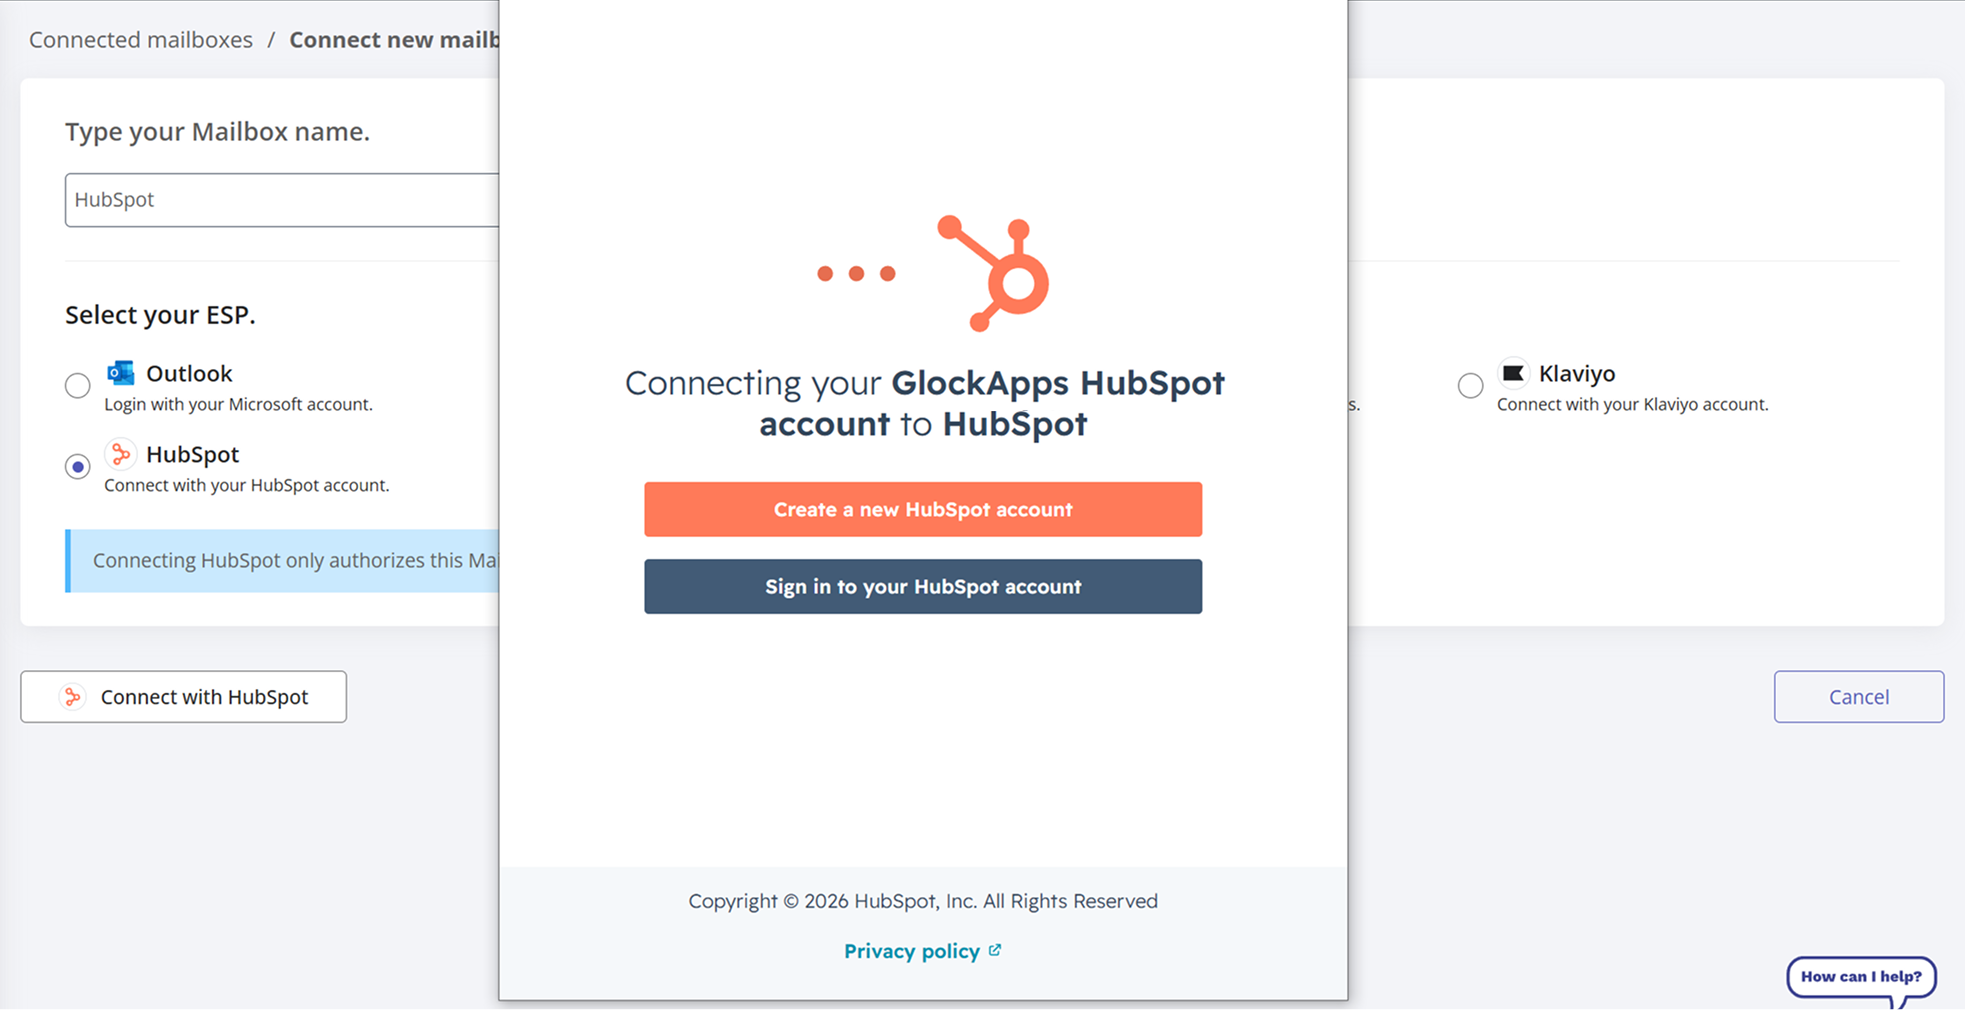
Next, review the permissions requested by GlockApps and click Connect app to authorize the integration.
Once the account is connected, you can use HubSpot to run manual one-time tests or configure automatic recurring tests in GlockApps.
Please note that Smart Tests are not available for the HubSpot integration.
Run a Manual Test Using HubSpot
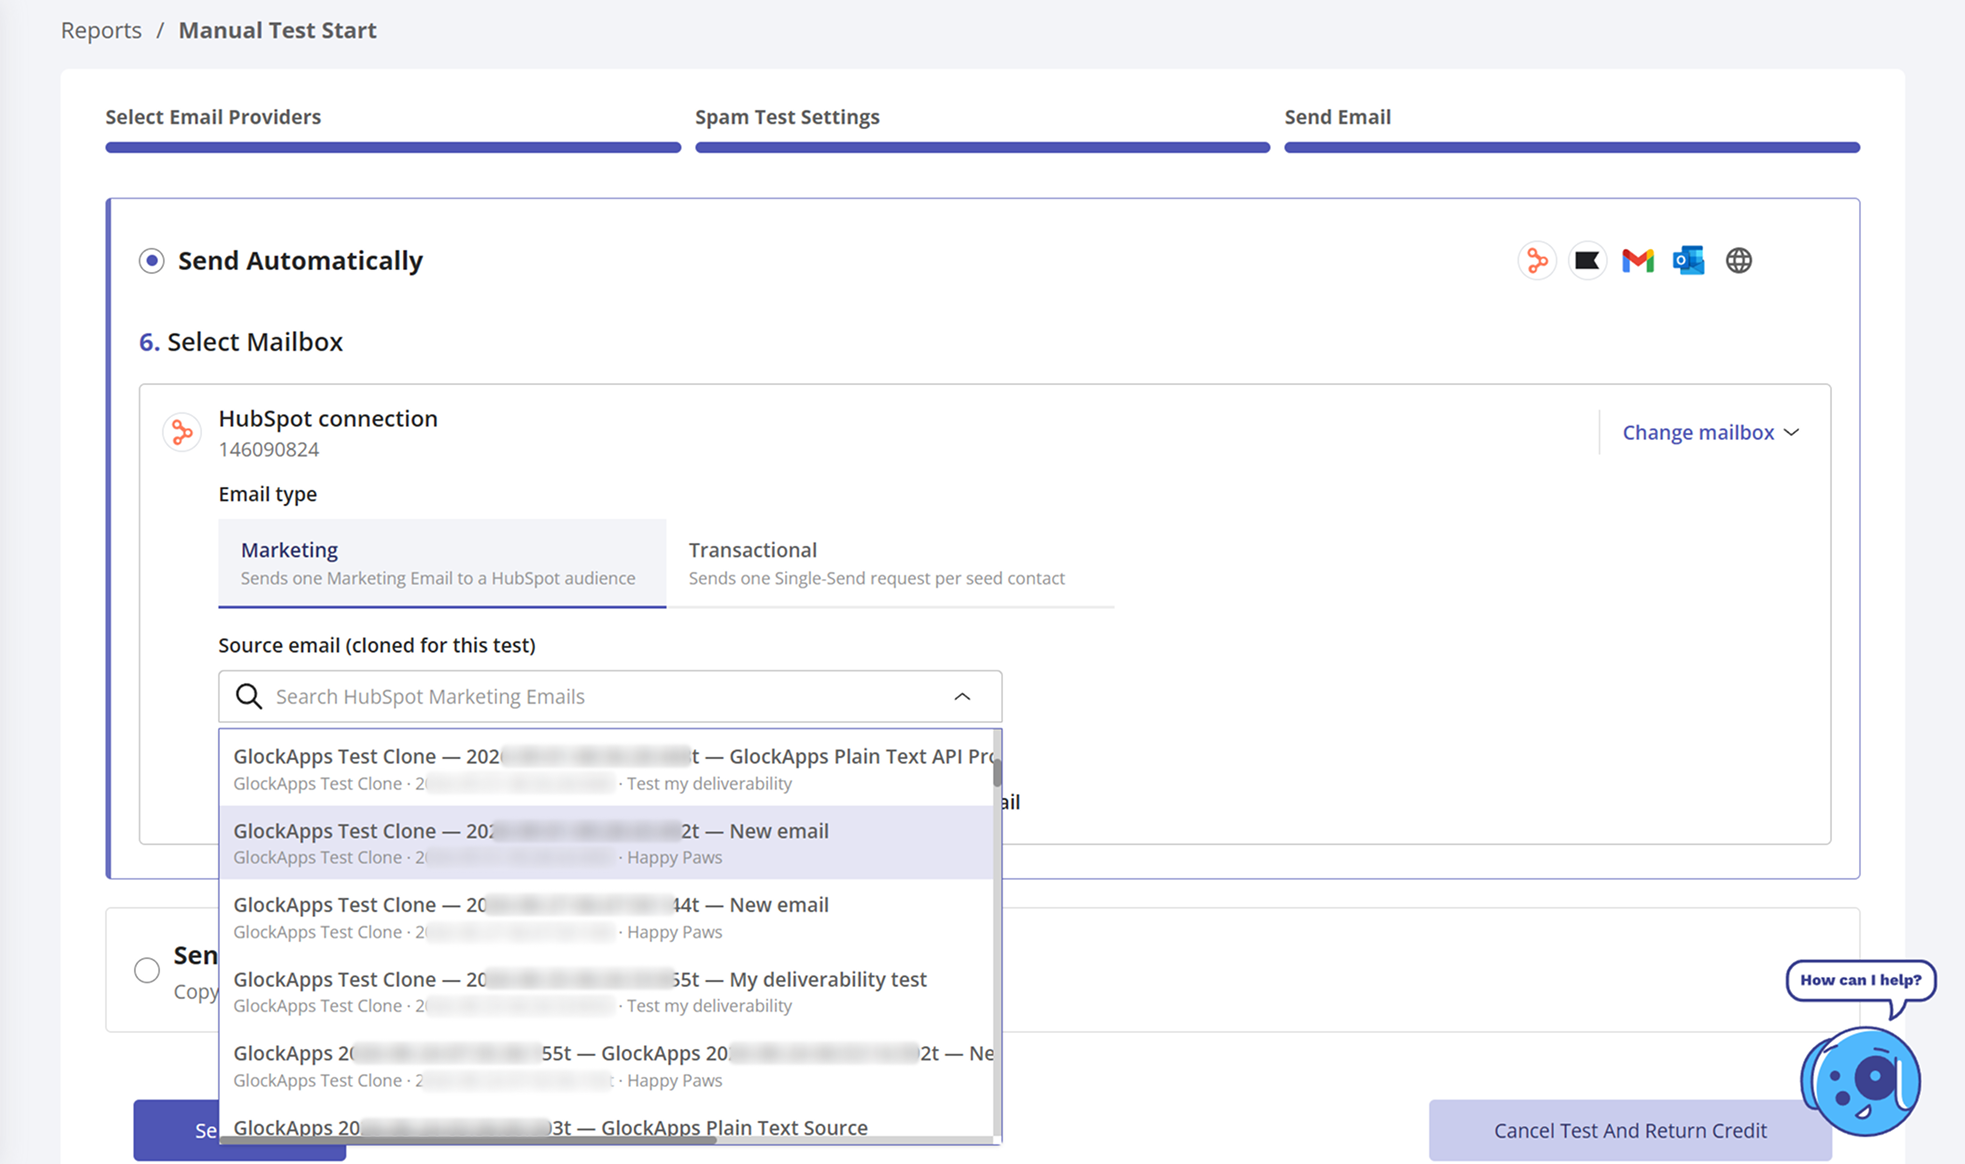
To run a one-time test, create a manual spam test in GlockApps, select Send Automatically, and choose your connected HubSpot account as the sending mailbox.
You can test two types of HubSpot emails:
- Marketing Email – sends one Marketing Email to the HubSpot audience prepared for the test.
- Transactional Email – sends a Single-Send request to each GlockApps seed contact.
Select Marketing or Transactional under Email type, then choose the source HubSpot email you want to test.
For transactional messages, switch the email type to Transactional and select the appropriate source email from the list.
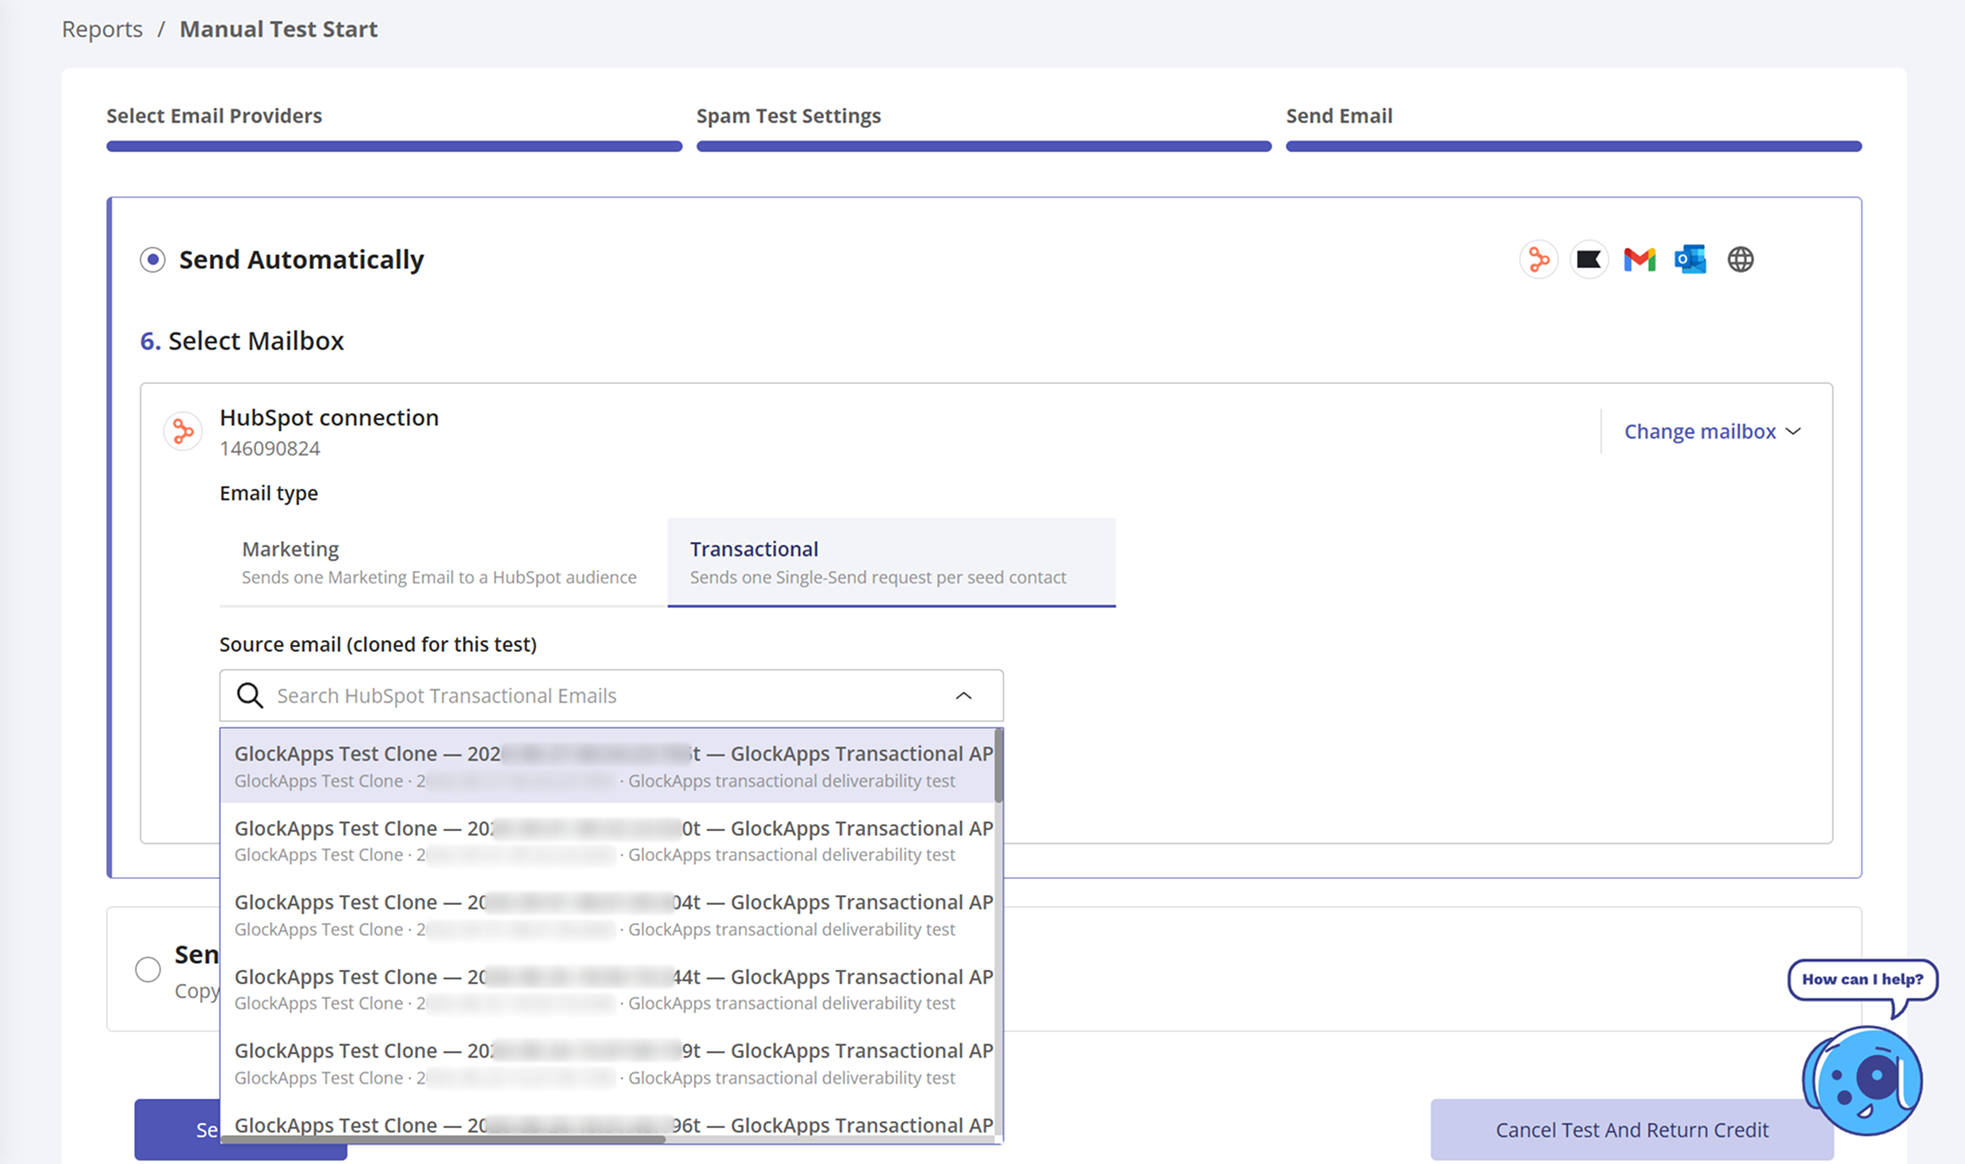
GlockApps clones the selected HubSpot email specifically for the test, so the original source email remains unchanged. The cloned version is then used to send the test messages to the GlockApps seed addresses.
Complete the remaining test settings and launch the test to receive your deliverability report.
Set Up Automatic HubSpot Tests
You can also use the HubSpot integration for recurring automatic tests.
When creating an automatic test, select your connected HubSpot mailbox and then choose whether you want to test a Marketing or Transactional email. Select the HubSpot source email that should be used for each test run.
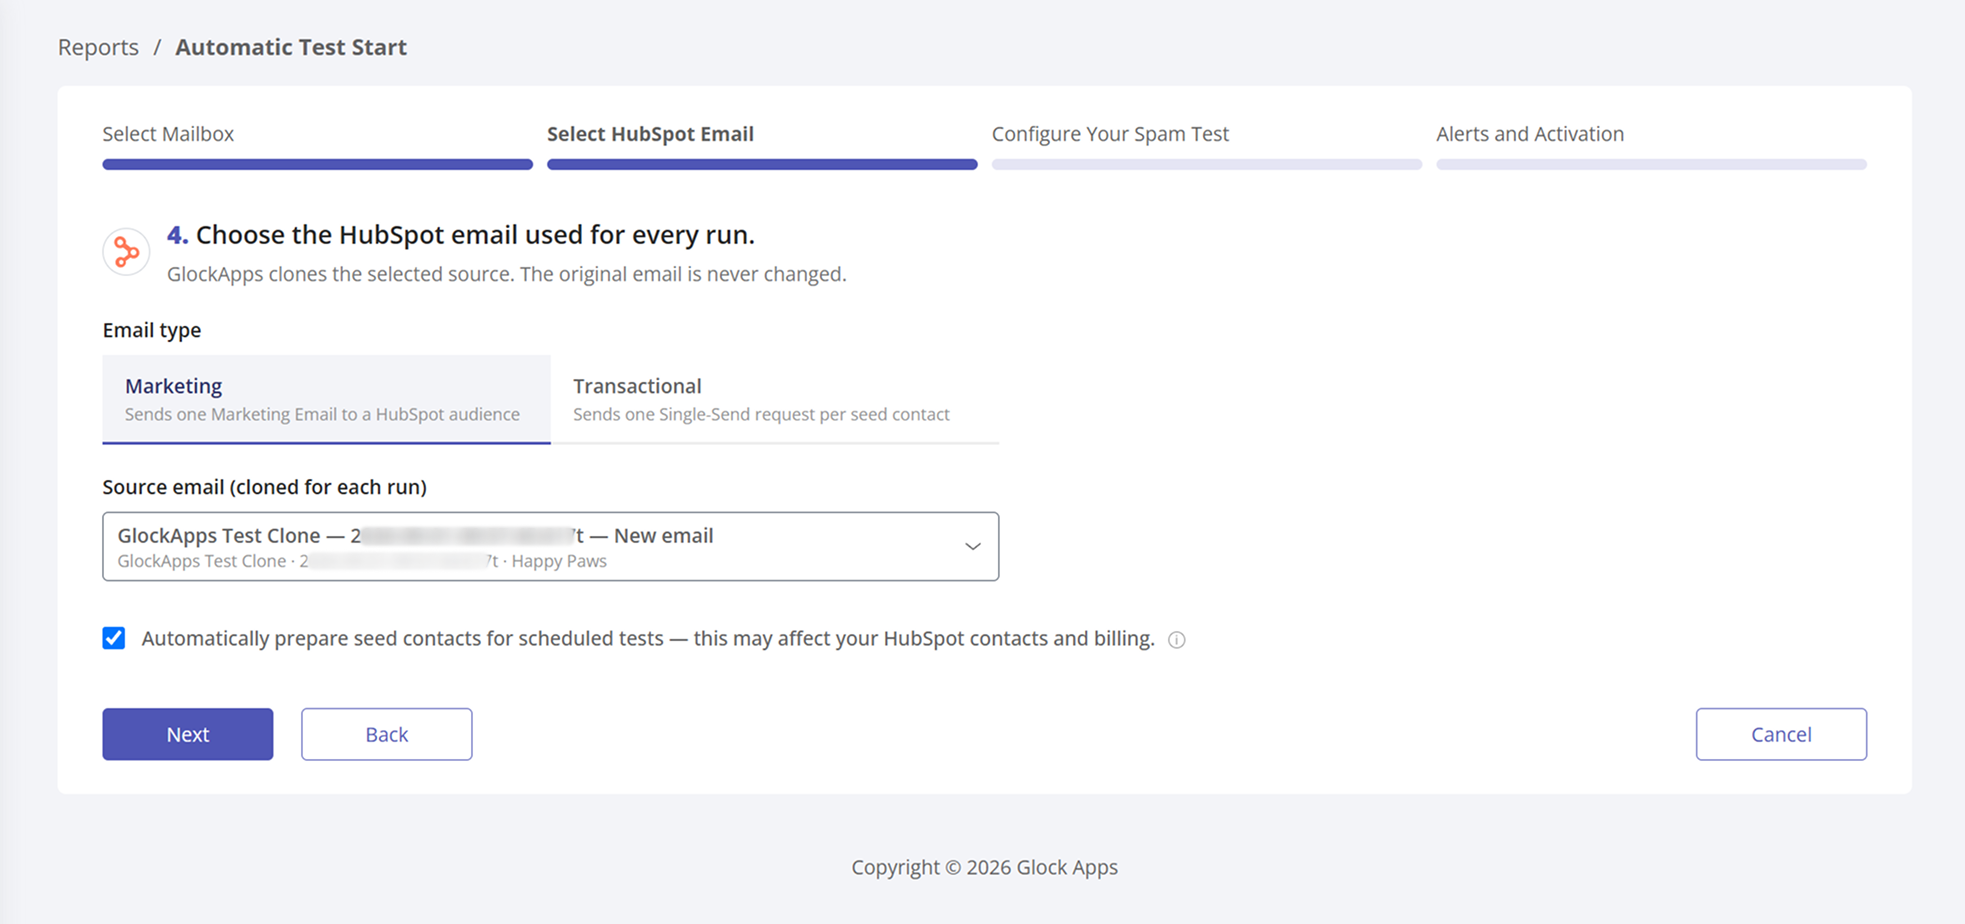
GlockApps clones the selected source email for every test run, which means your original HubSpot email is never modified.
For Marketing Email tests, you can also enable automatic preparation of the GlockApps seed contacts required for scheduled tests. Keep in mind that creating or managing these contacts in HubSpot may affect your HubSpot contact count and billing.
After selecting the email, complete the remaining spam test settings, configure alerts, and activate the automatic test.
2. Manual GlockApps Integration with HubSpot (The Alternative Option)
Part I: Import GlockApps Seed List into HubSpot CRM
To get accurate test results, you must import a clean seed list of GlockApps mailboxes that is kept separate from your main contact list.
Step 1: Start a New Import
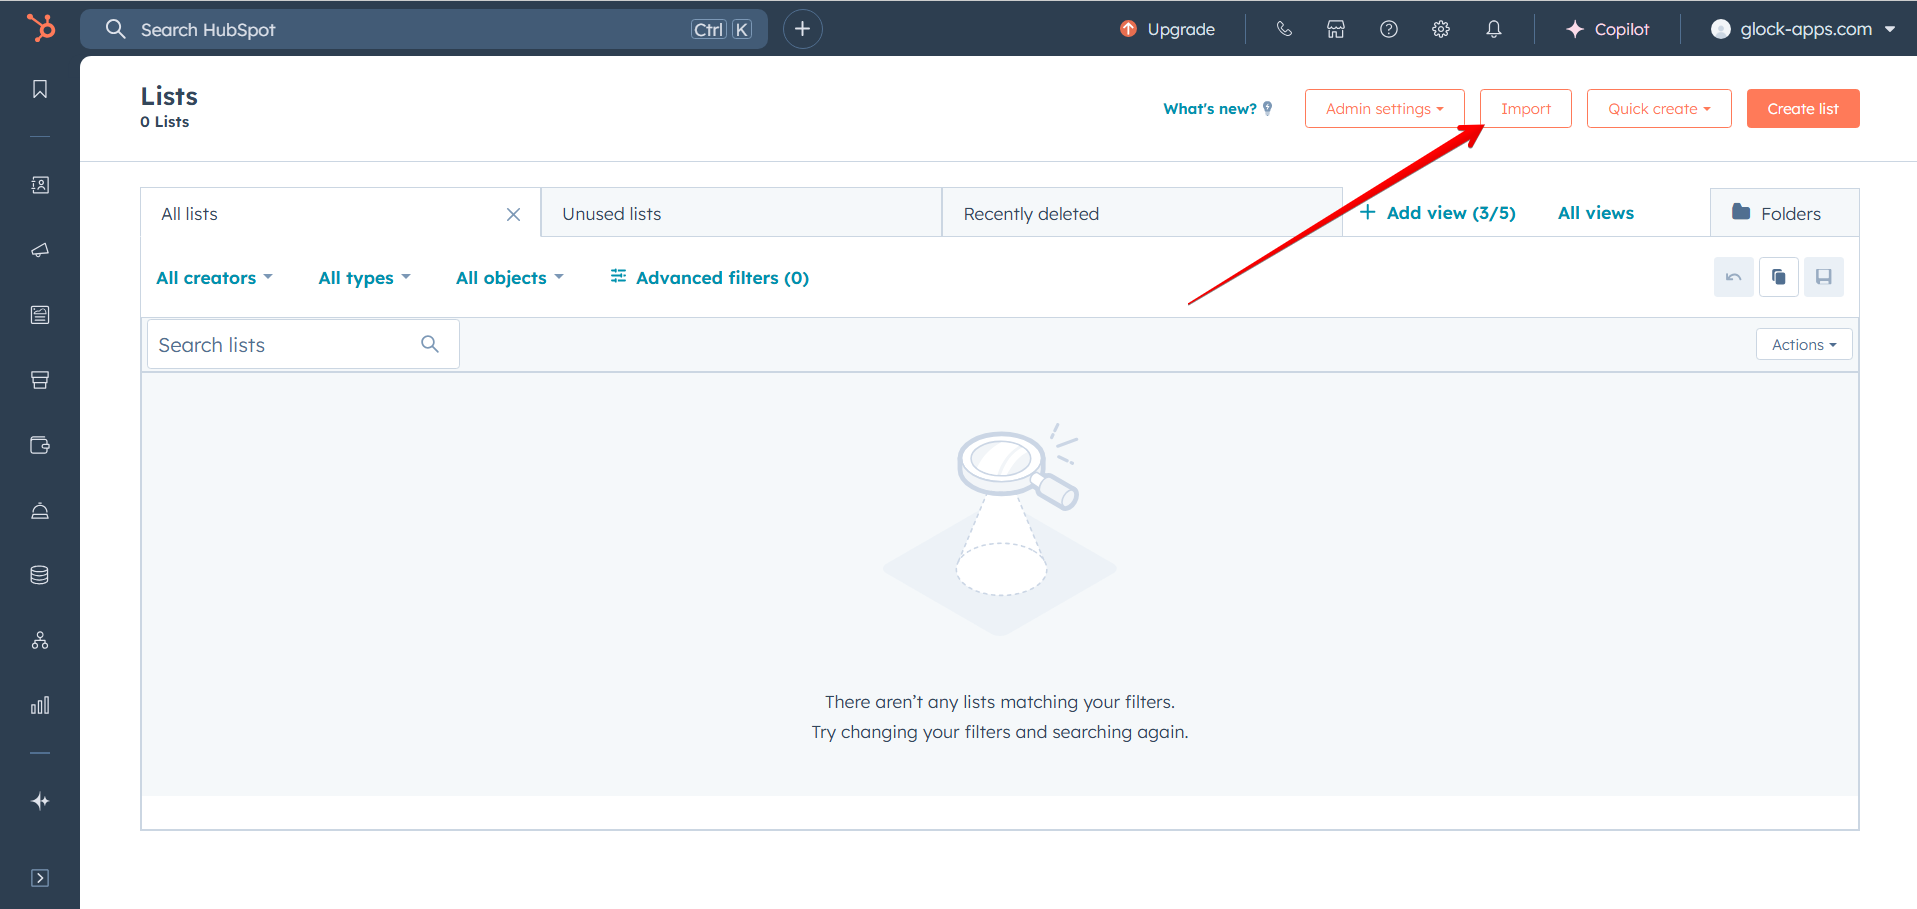
- Navigate to CRM → Lists in your HubSpot dashboard
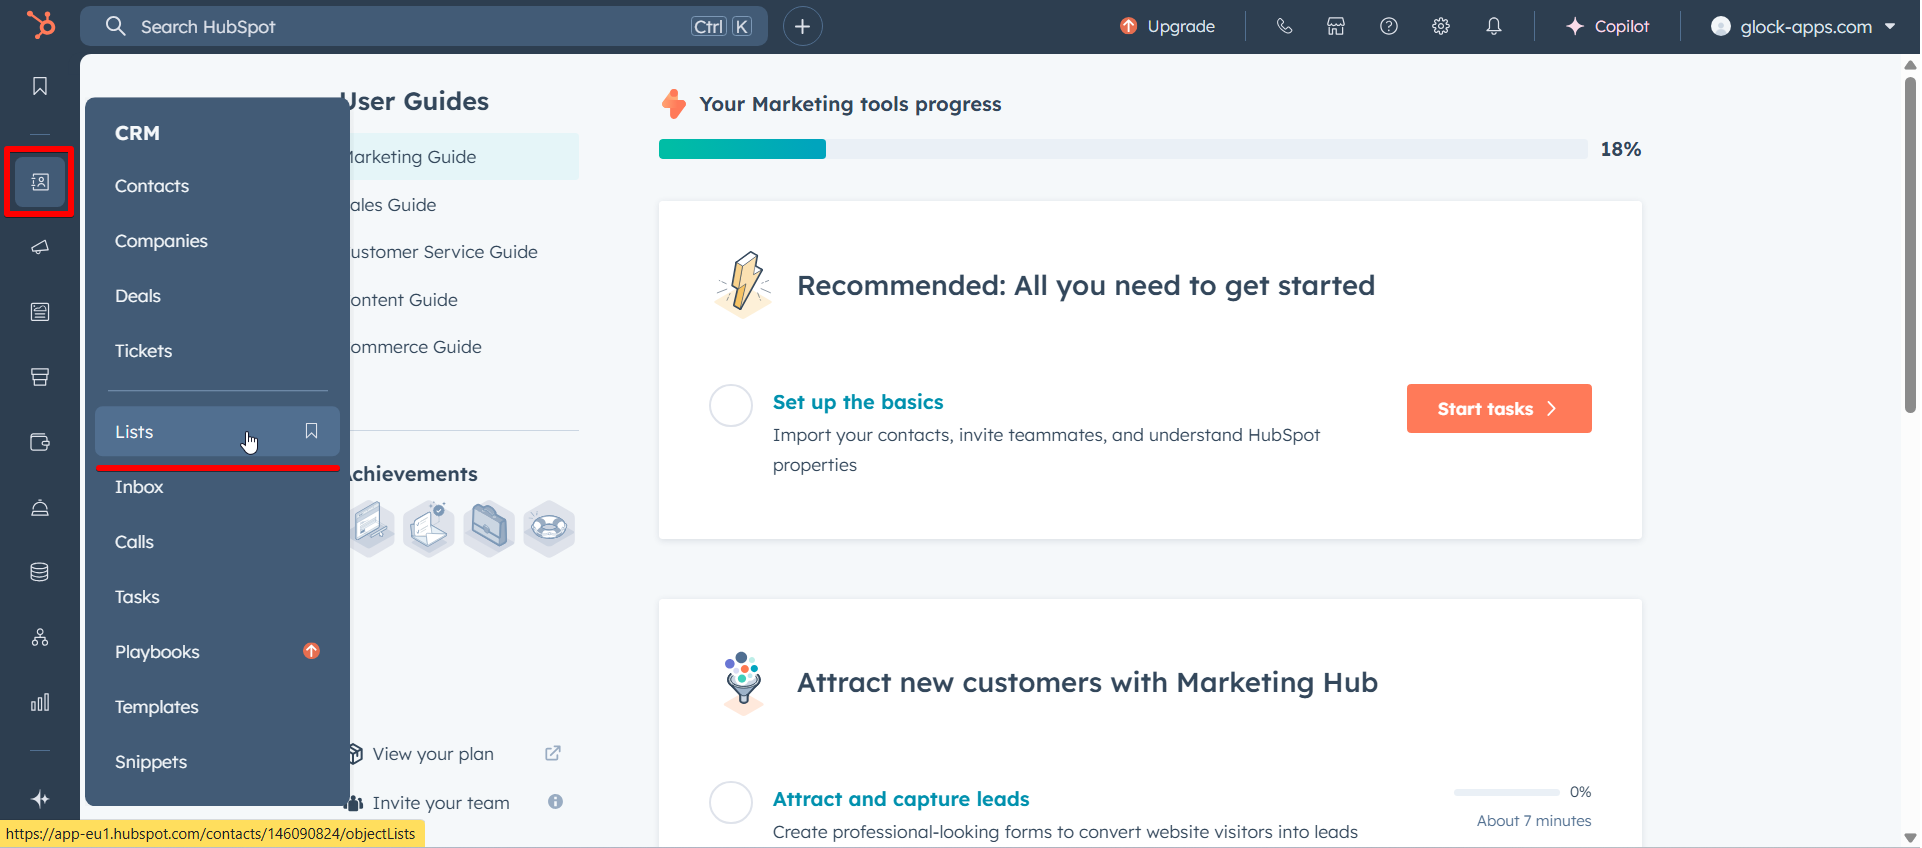
- Click the "Import" button
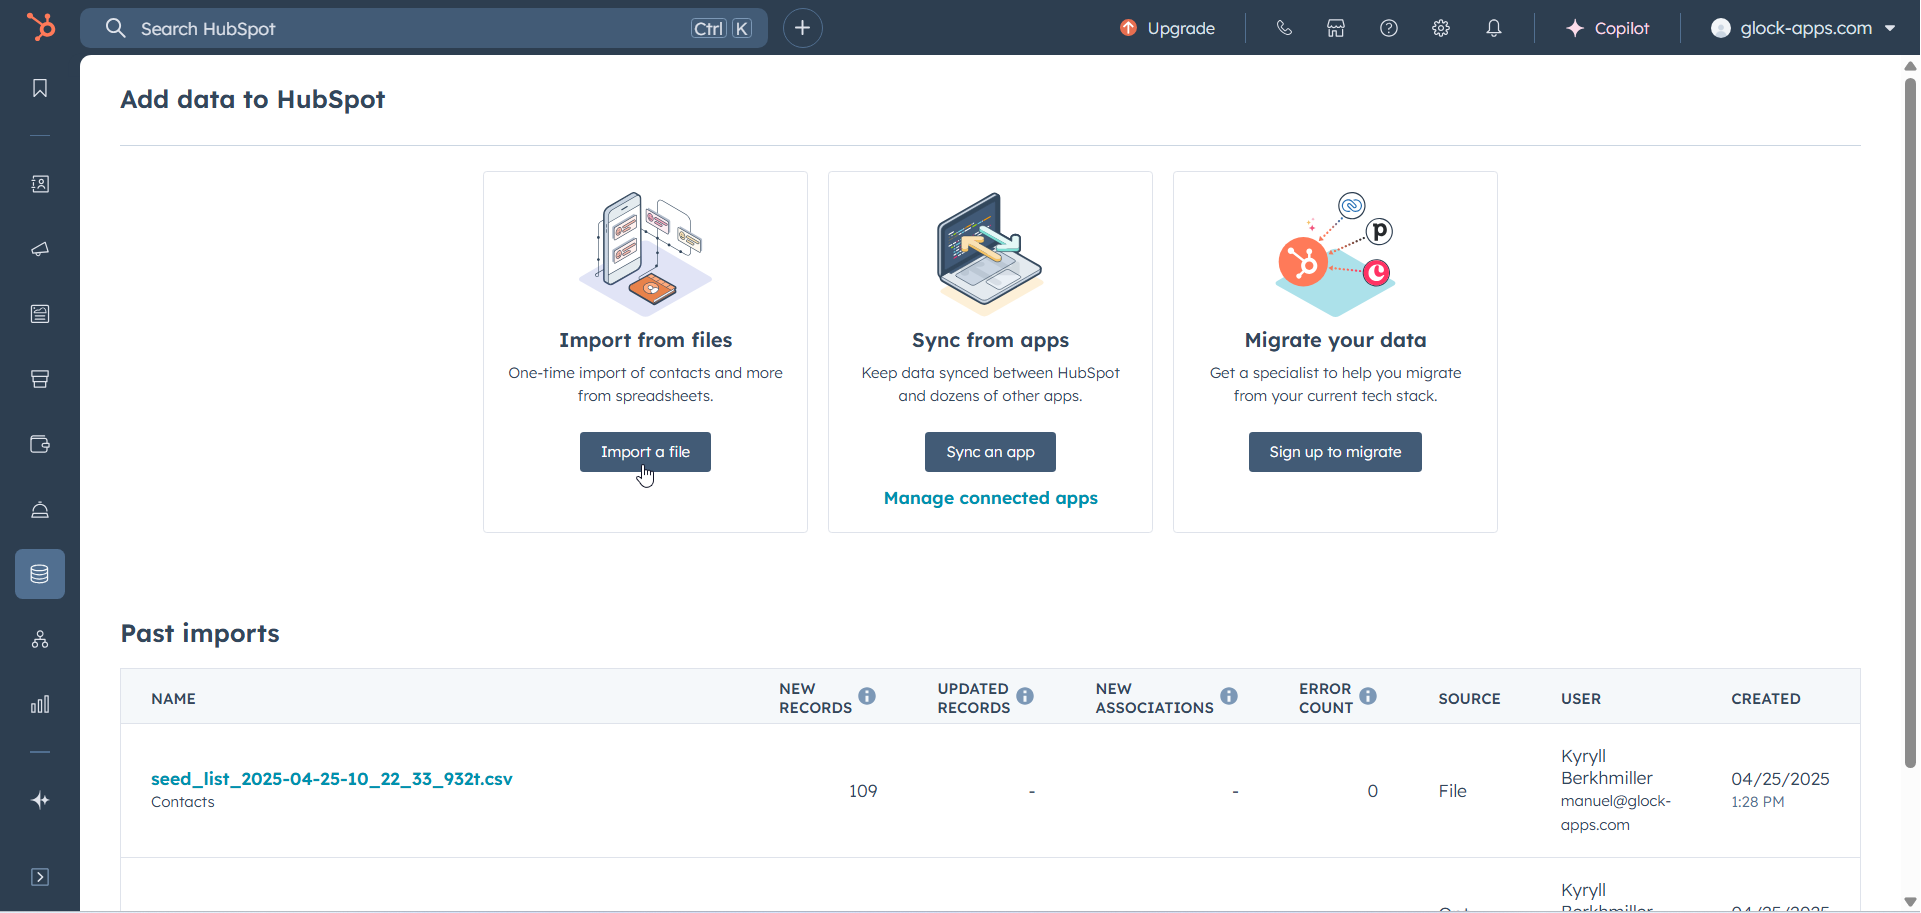
- Choose "Import a file"
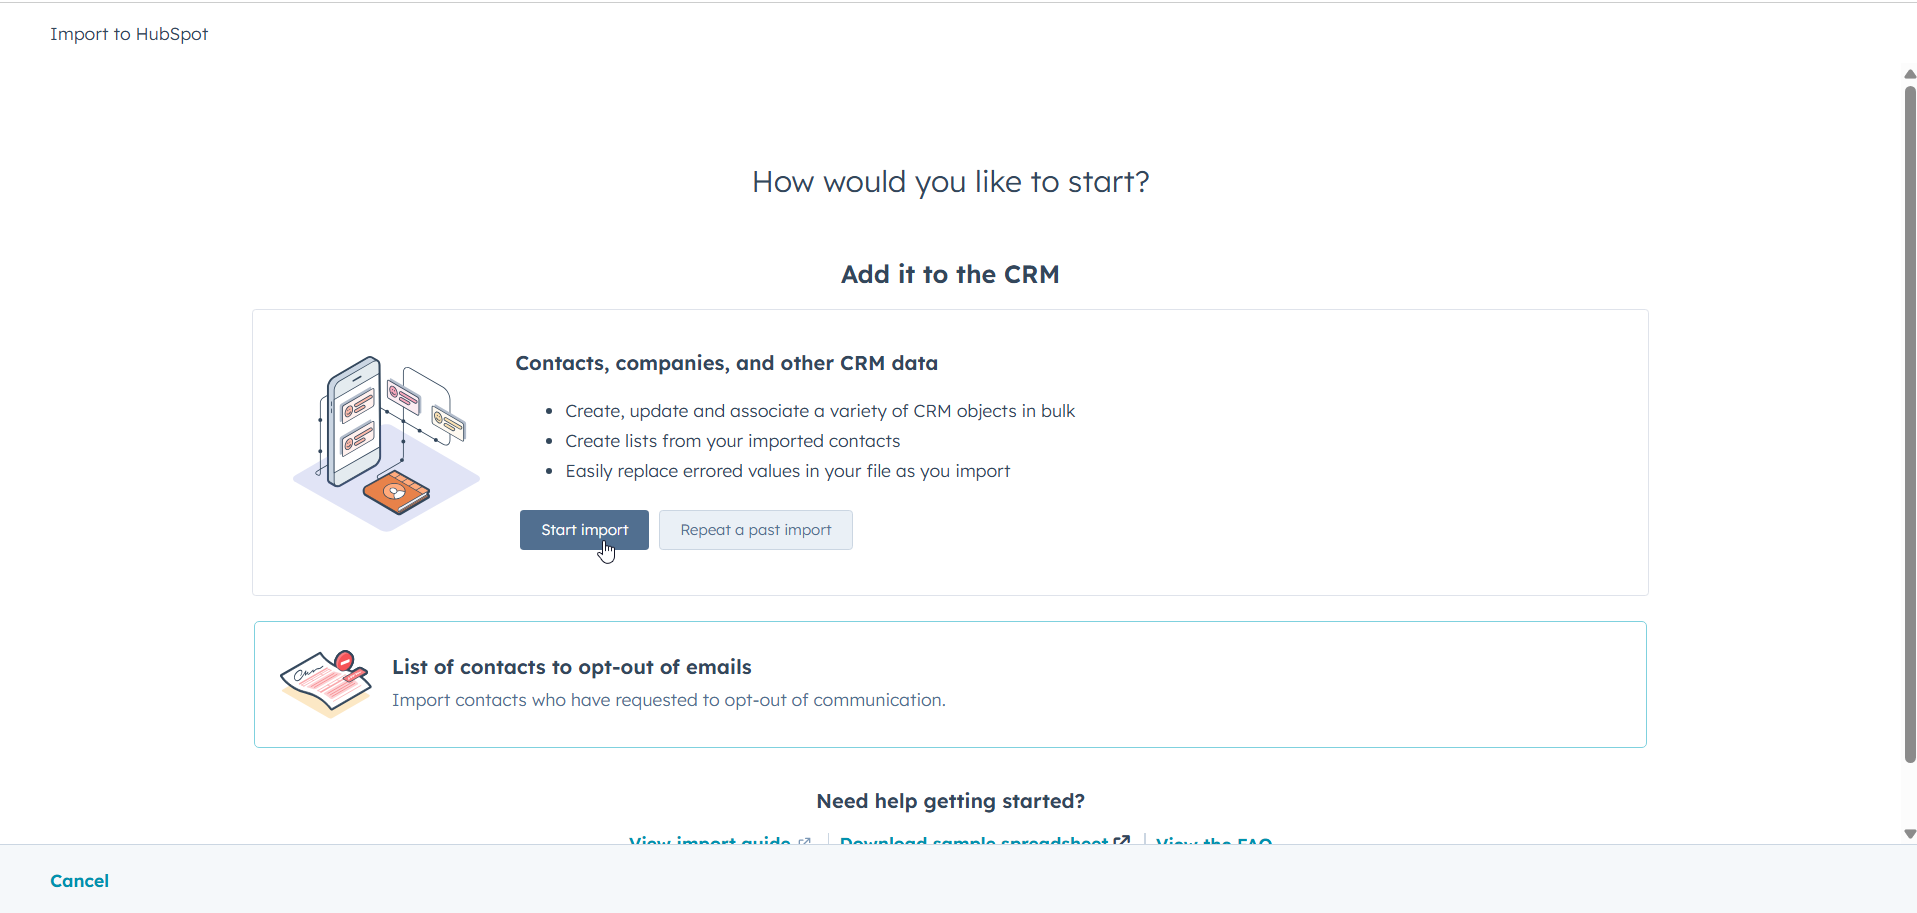
- Click "Start Import"
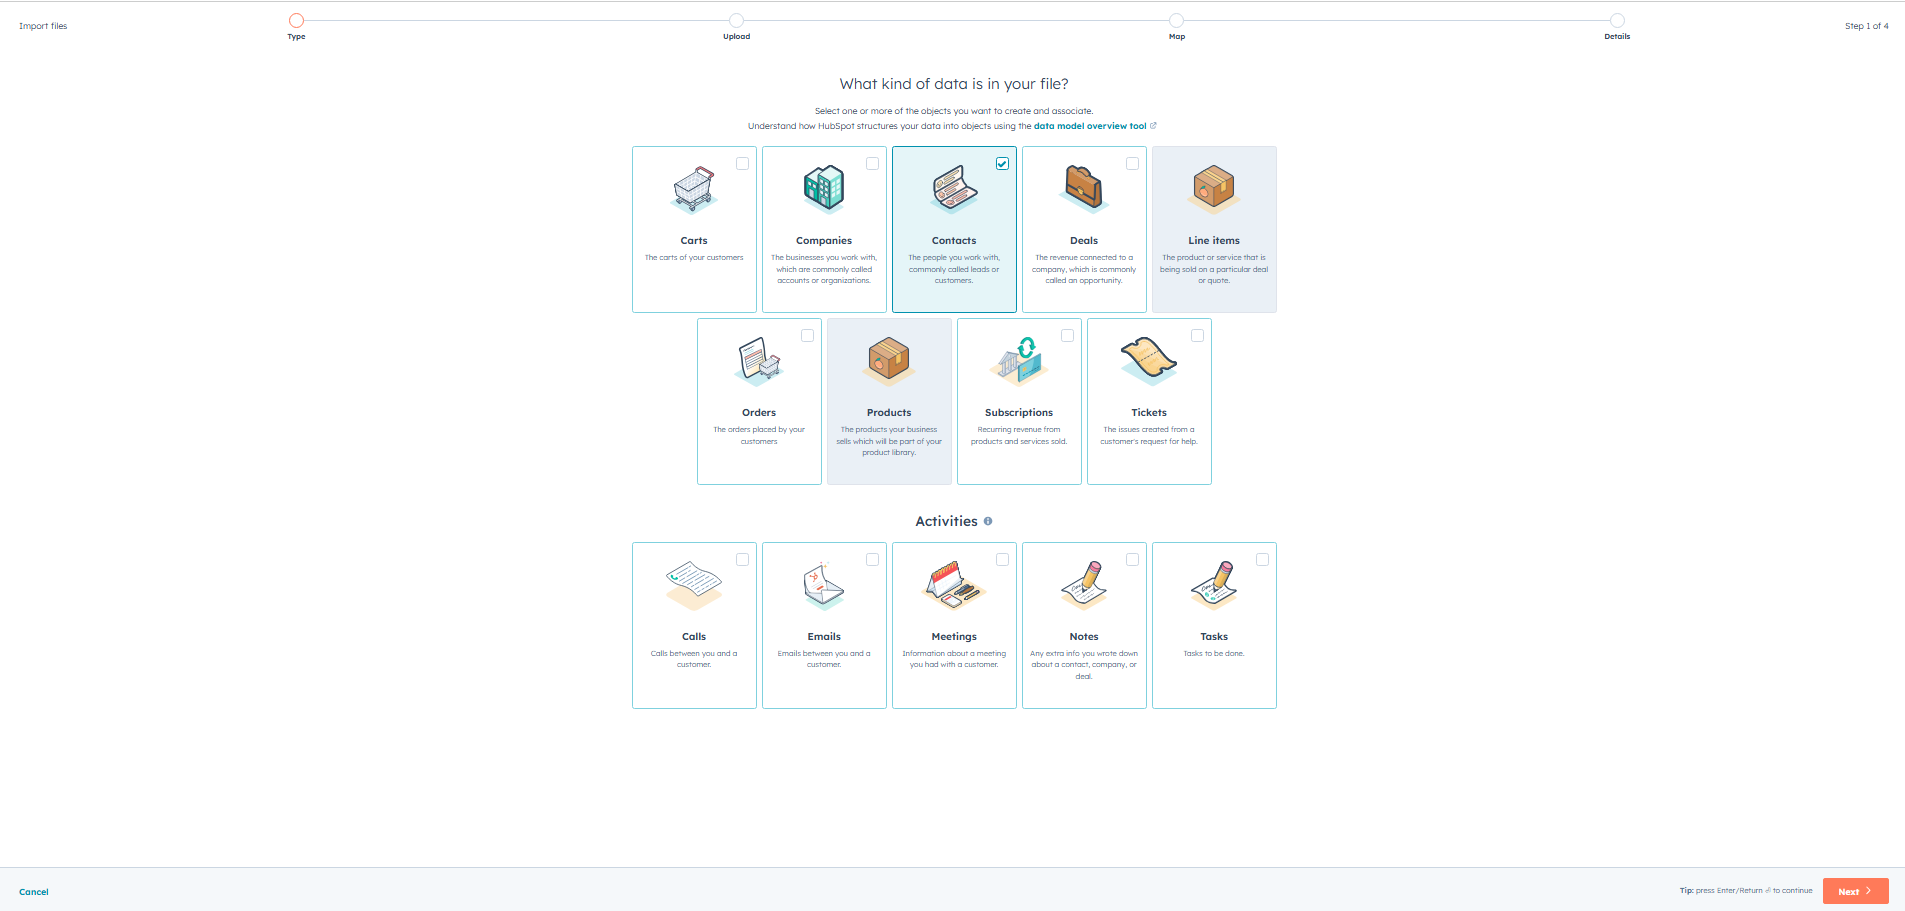
- Select “Contacts” as the type of data. Leave the “Activities” option unchecked.
Now it's time to gather your seed list from GlockApps.
Step 2: Get Your Seed List from GlockApps
- Open GlockApps in a new tab.
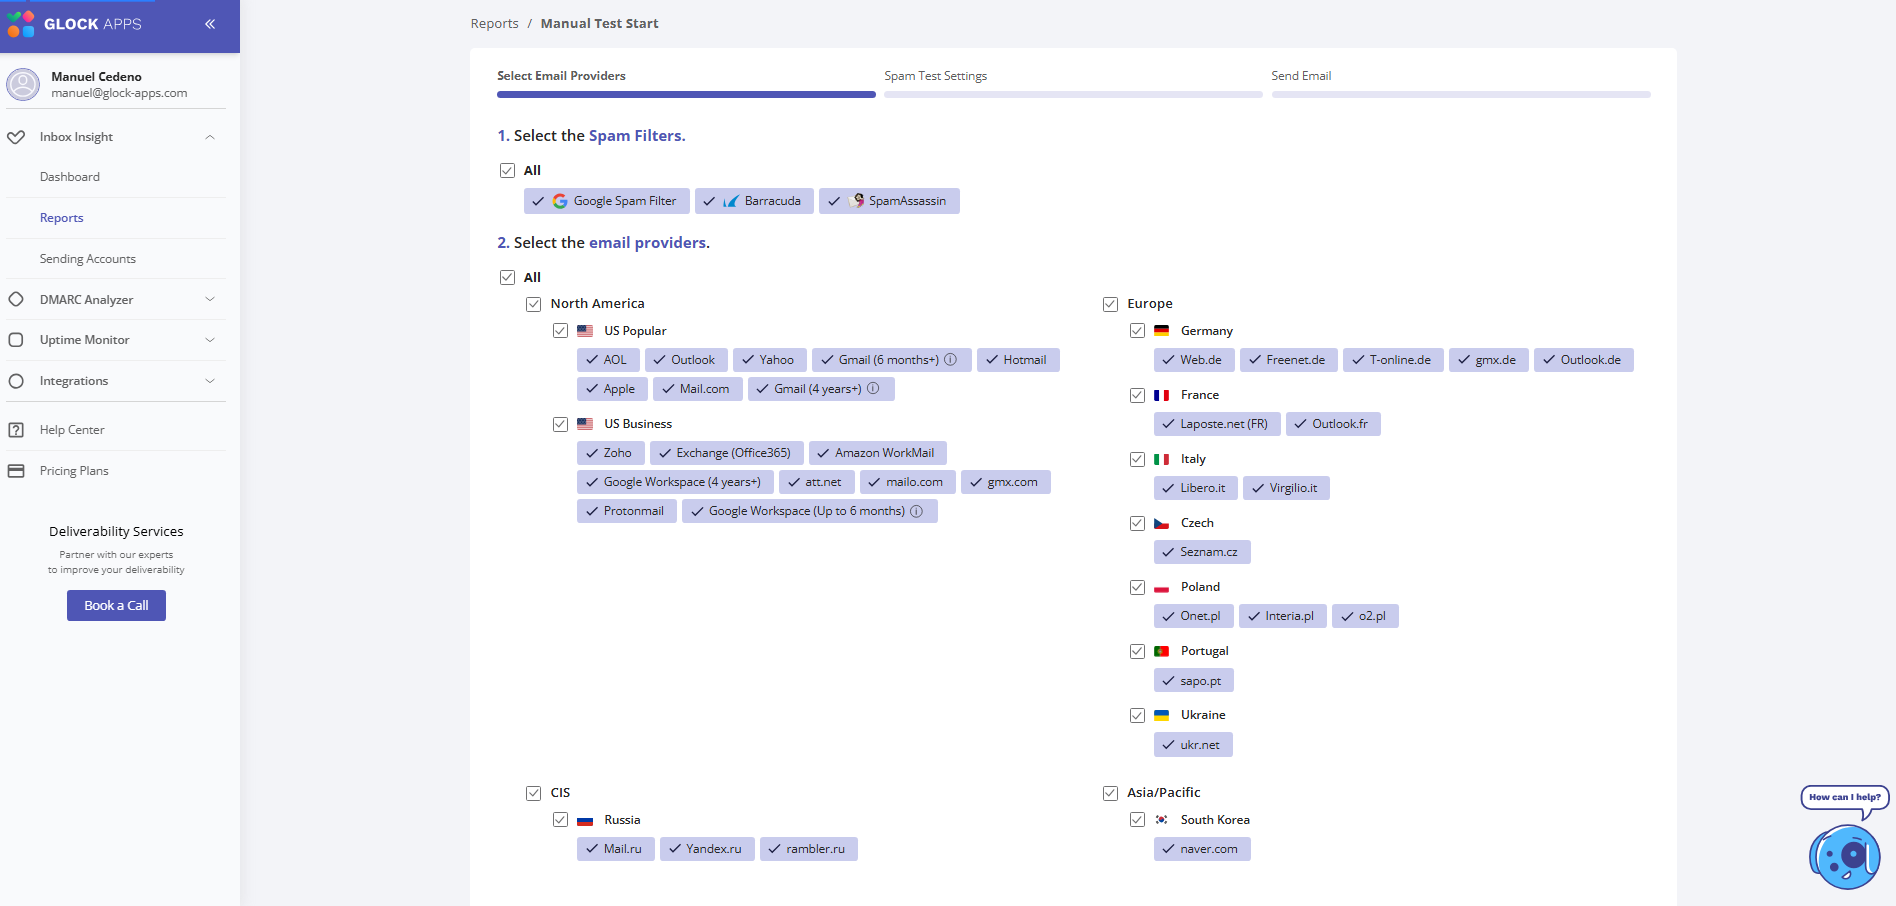
- Navigate to Reports → Start Test, and choose the ESPs (e.g., Gmail, Outlook) you want to test.
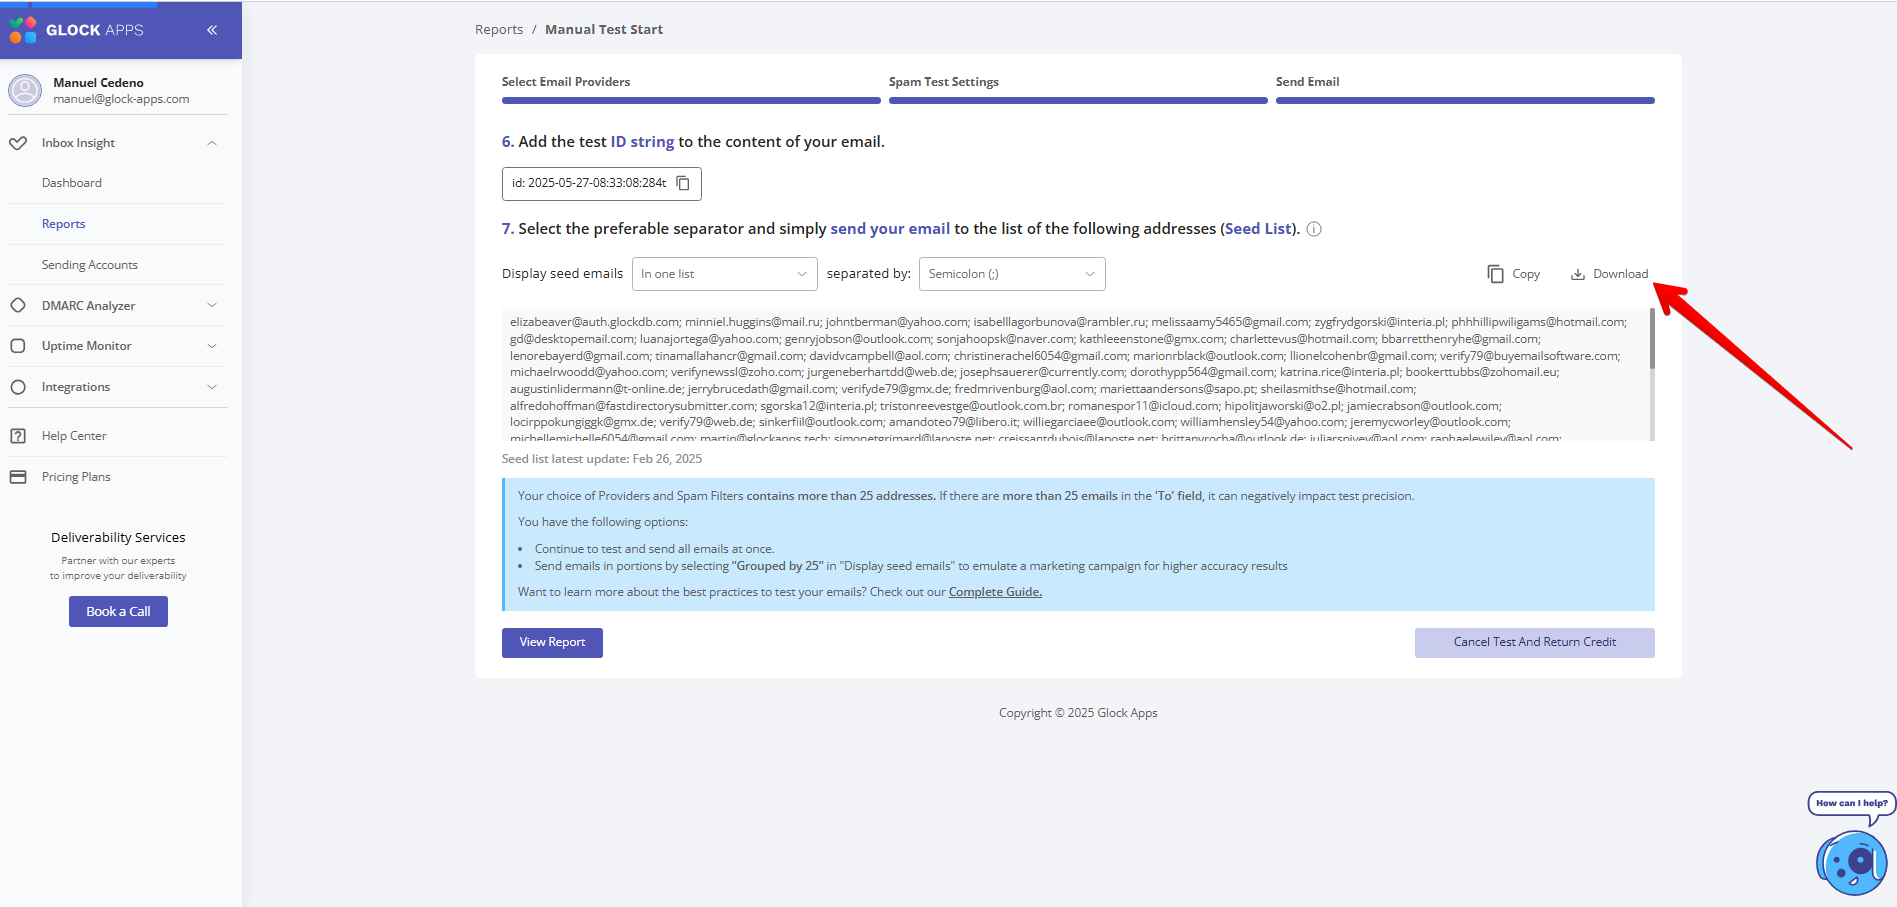
- Once your seed list appears, click "Download" — it will be saved as a CSV by default.
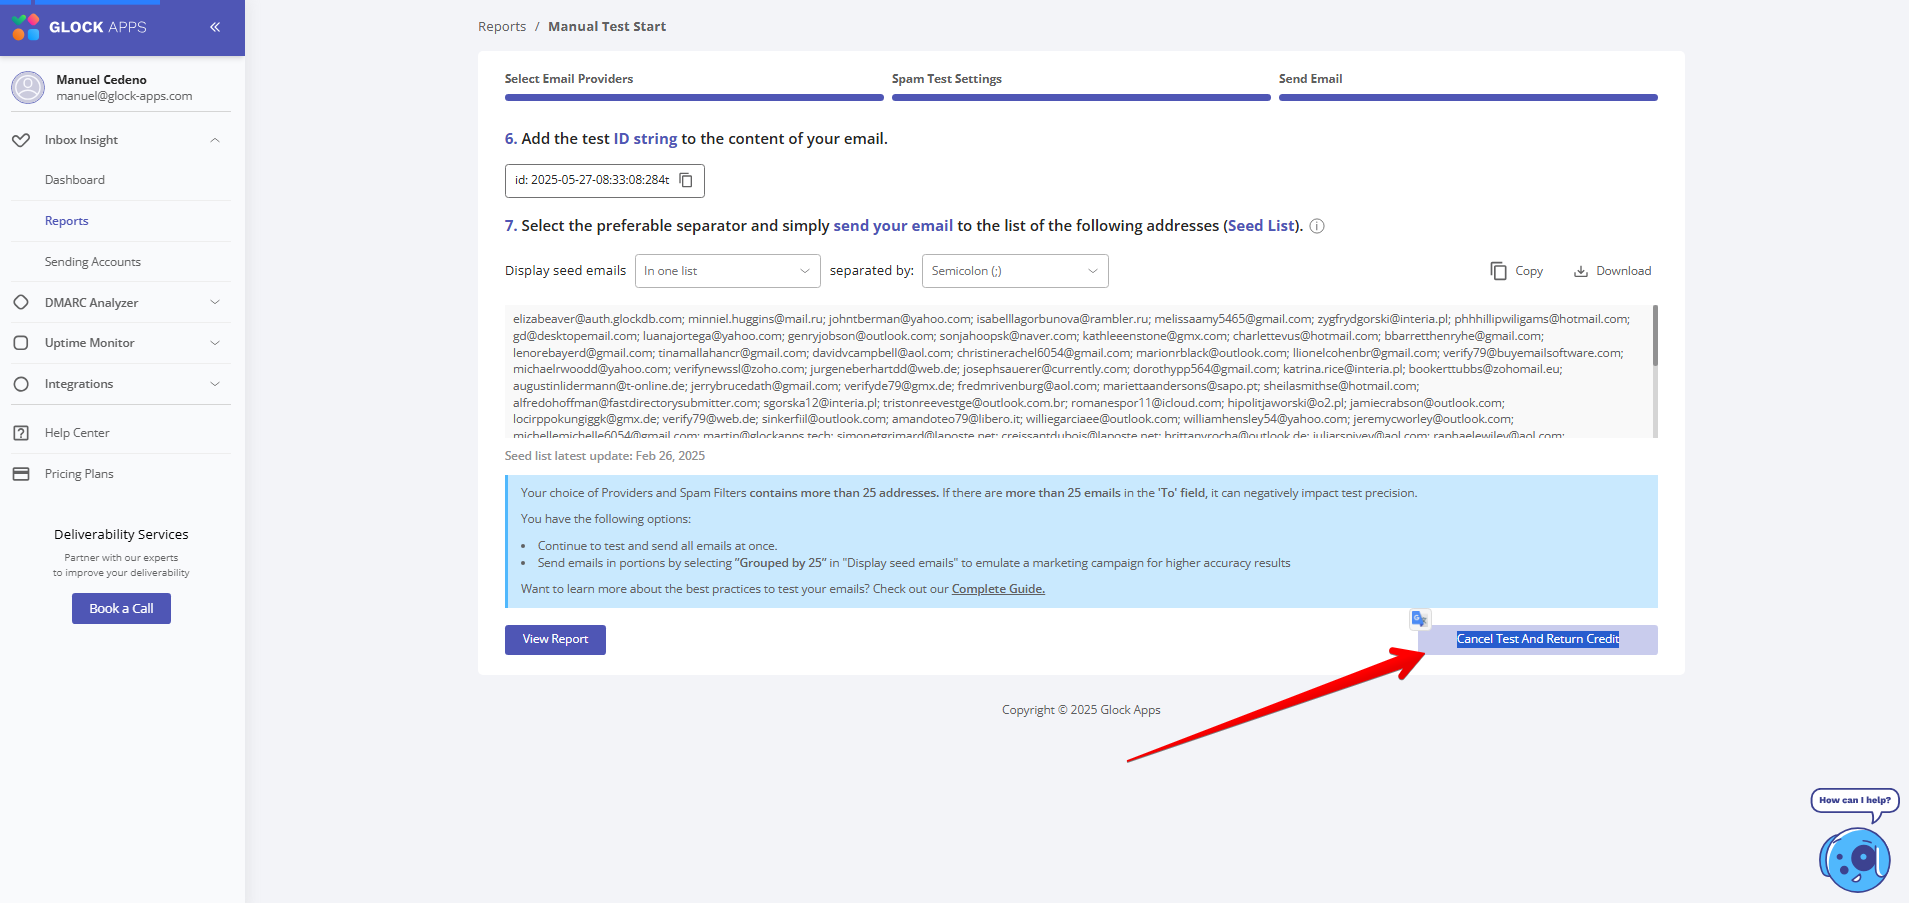
- Optional: To preserve credits, go back to GlockApps and click "Cancel Test and Return Credit".
Step 3: Upload the Seed List File to HubSpot
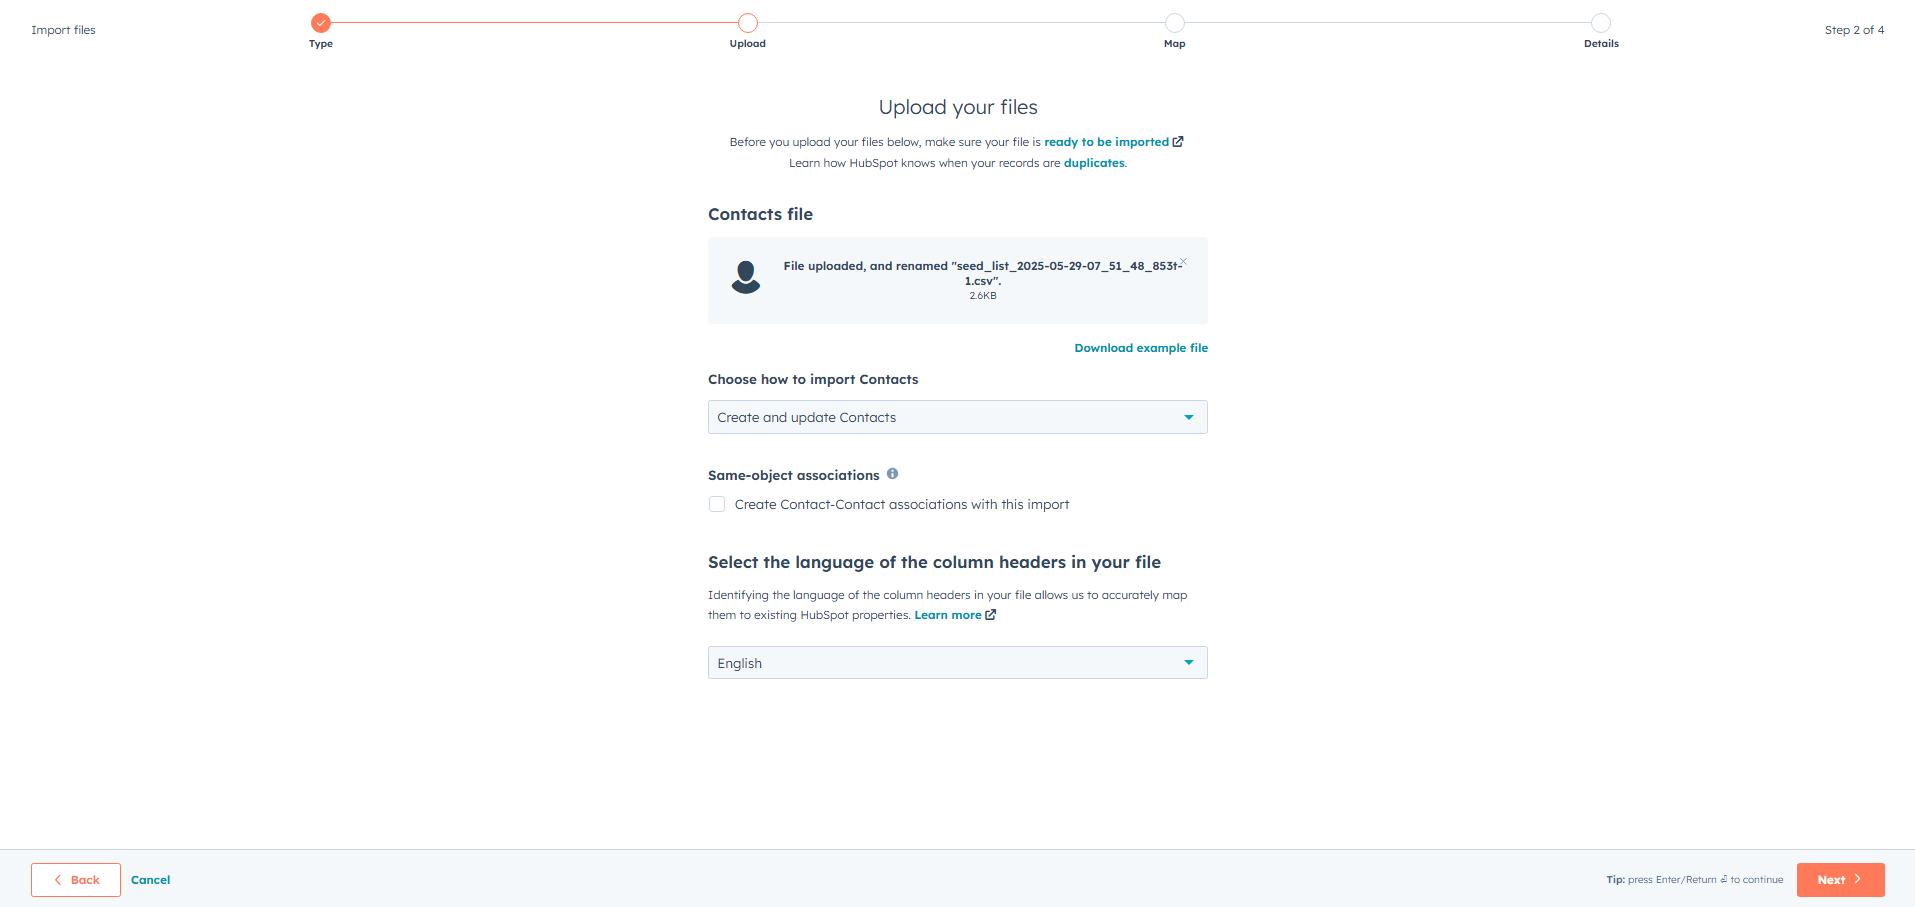
- Return to the HubSpot tab and upload the CSV you downloaded.
- Import settings:
- Choose "Create and update Contacts"
- Do not check the box for "Same-object associations"
- Select "English" for column headers
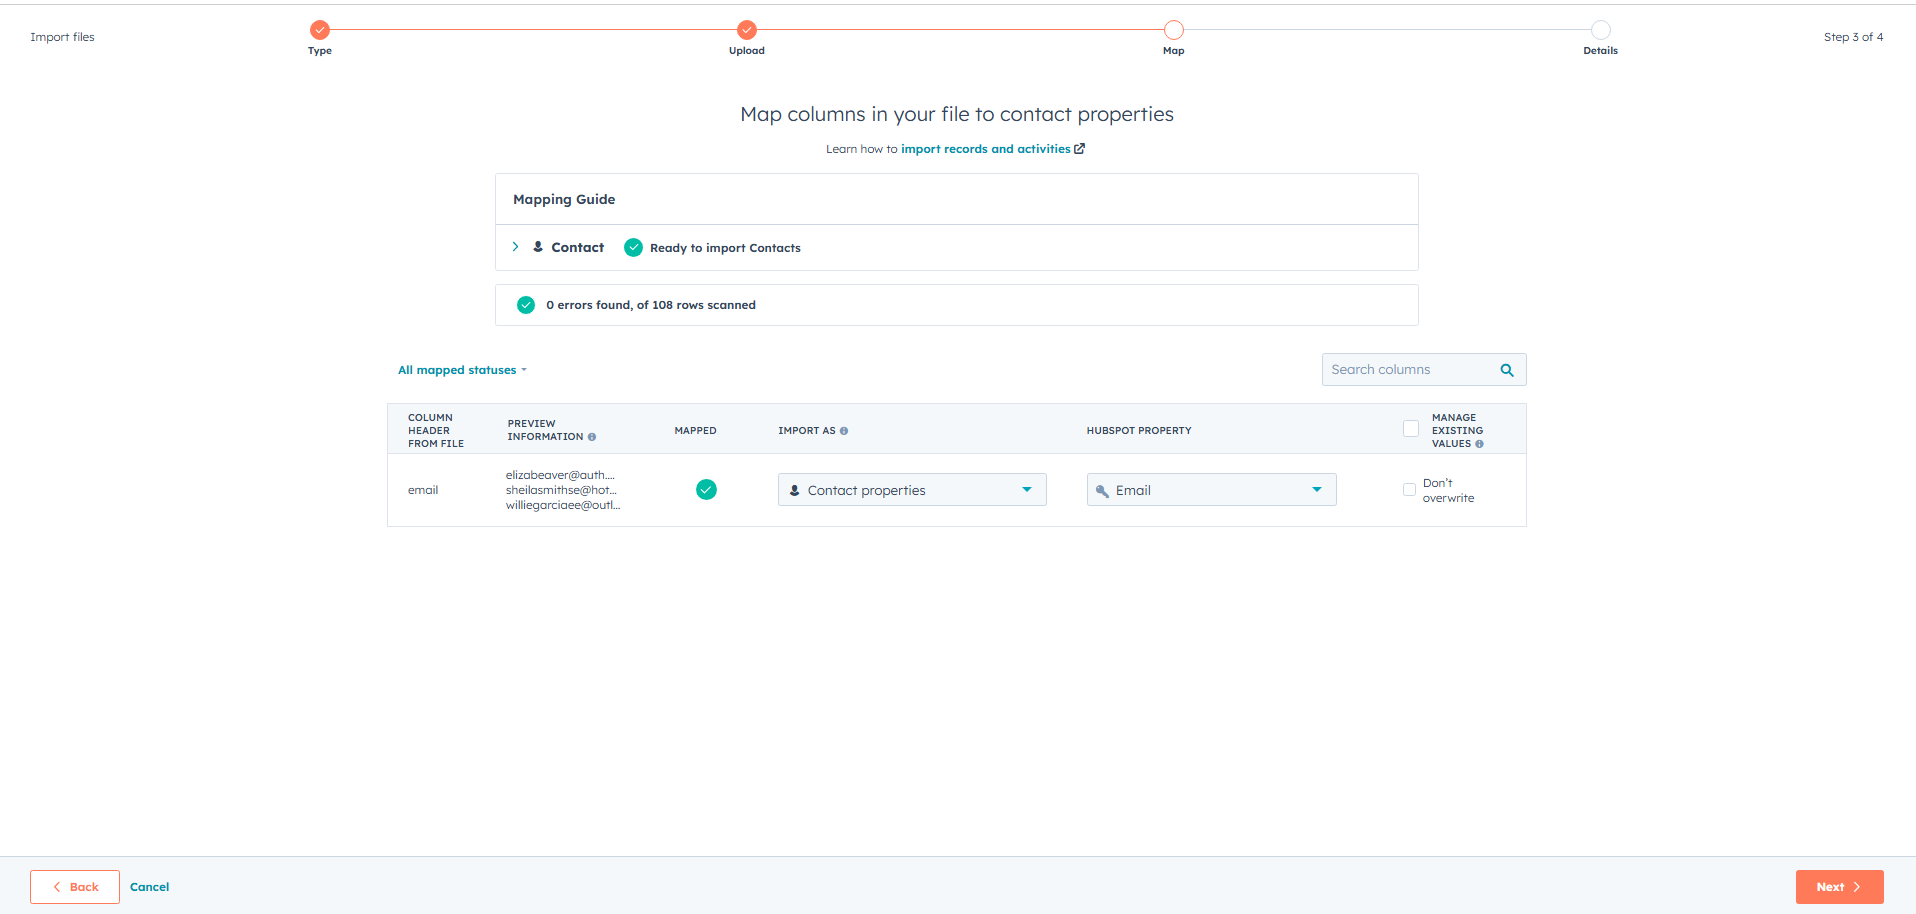
- HubSpot should auto-detect the email column. Confirm that the property is mapped to “Email.”
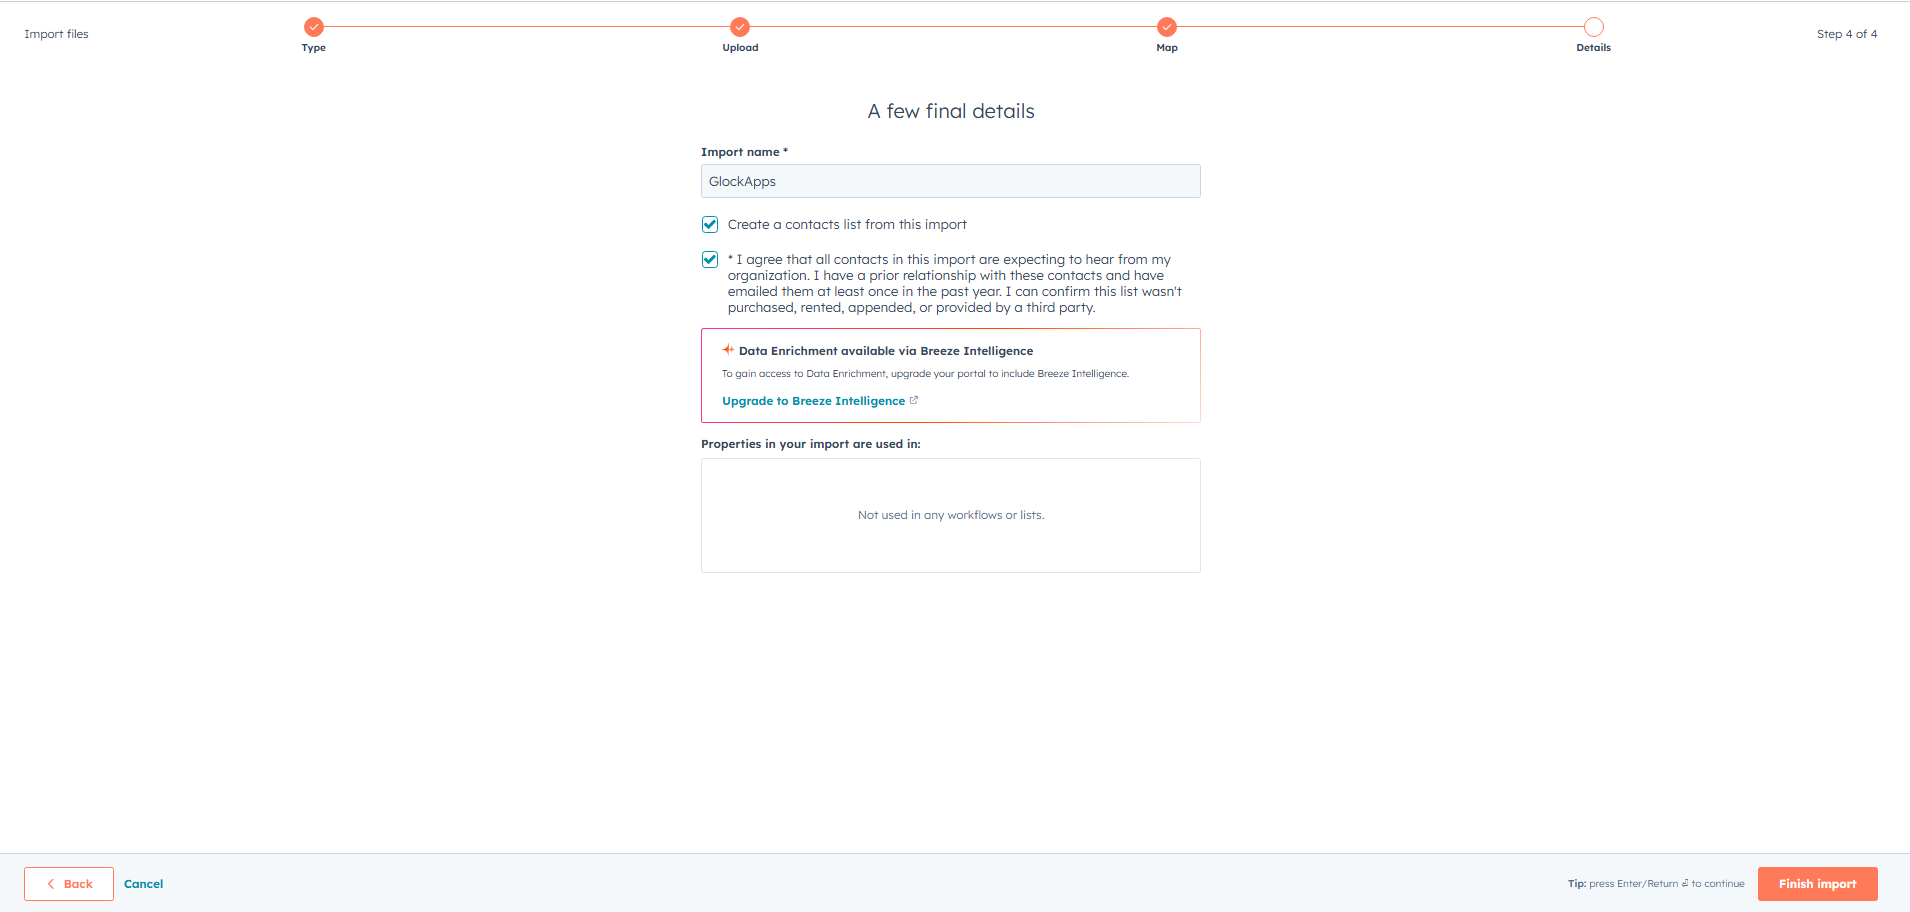
- Name the import and tick both checkboxes for consent.
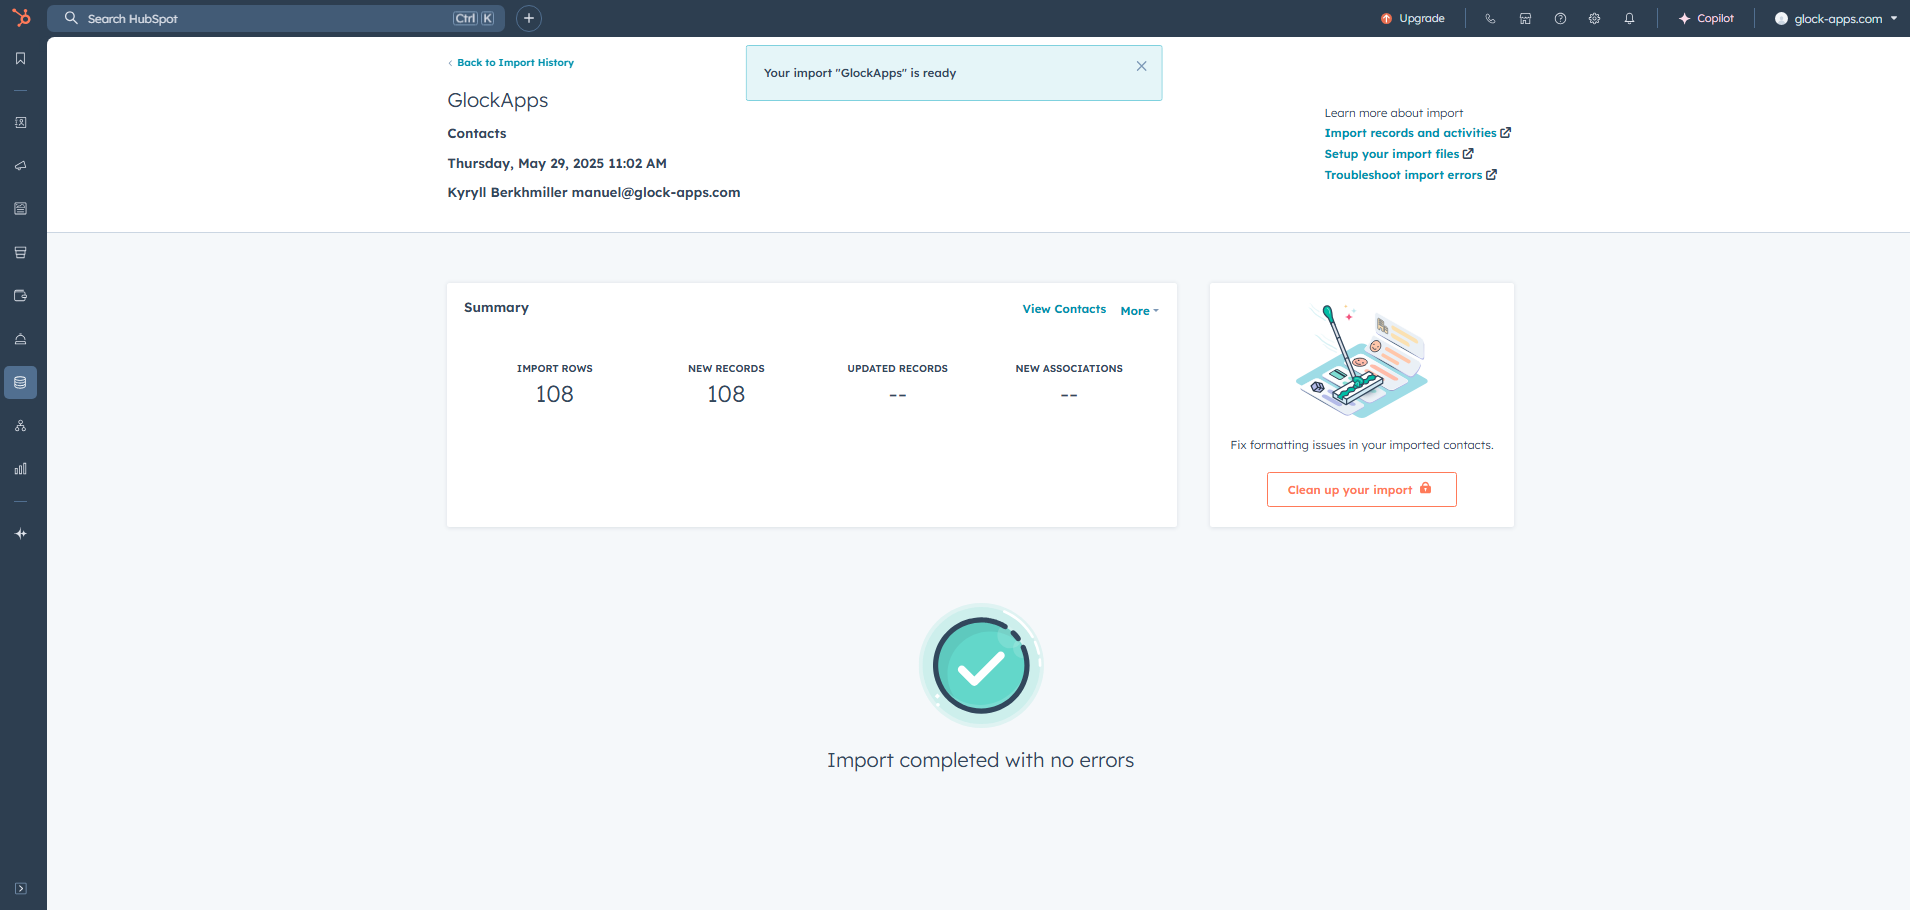
- Click "Finish"
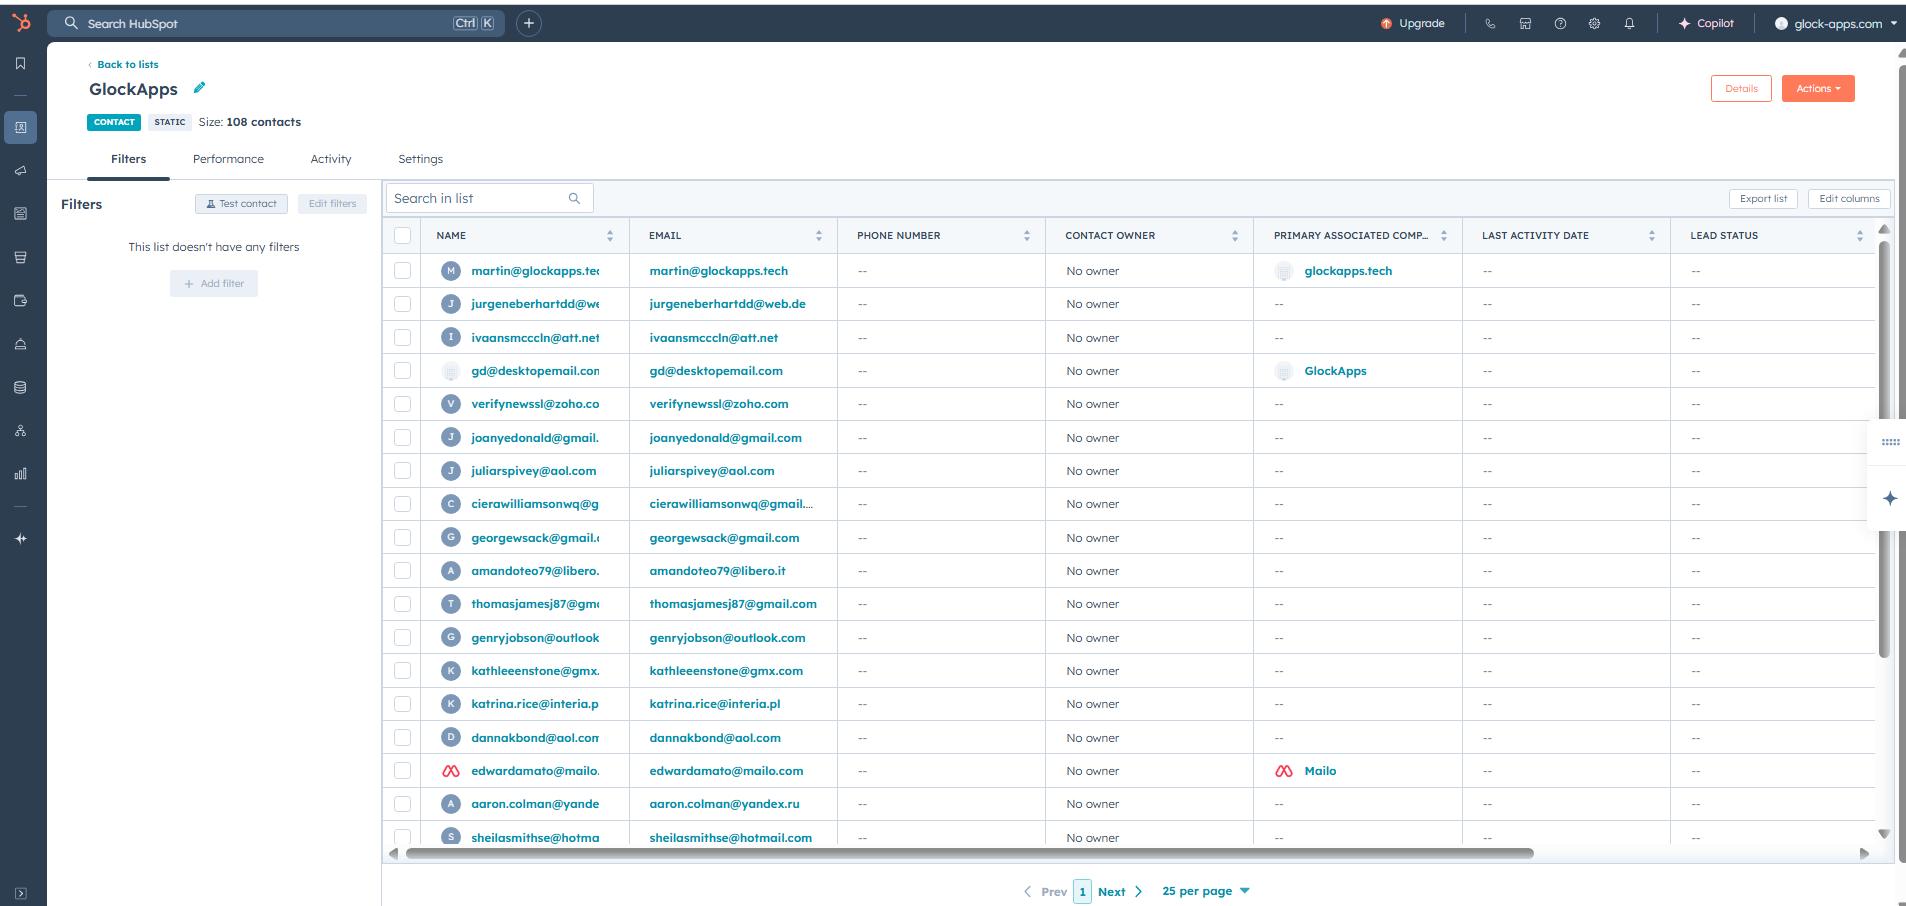
To verify your import, go to CRM → Lists, and click the list you just created to view contact details.
Part II: Send a Test Email to Your Seed List
With your seed list now in HubSpot, you’re ready to send a test email to evaluate deliverability through the HubSpot email sending infrastructure..
Step 1: Create a Test Email.
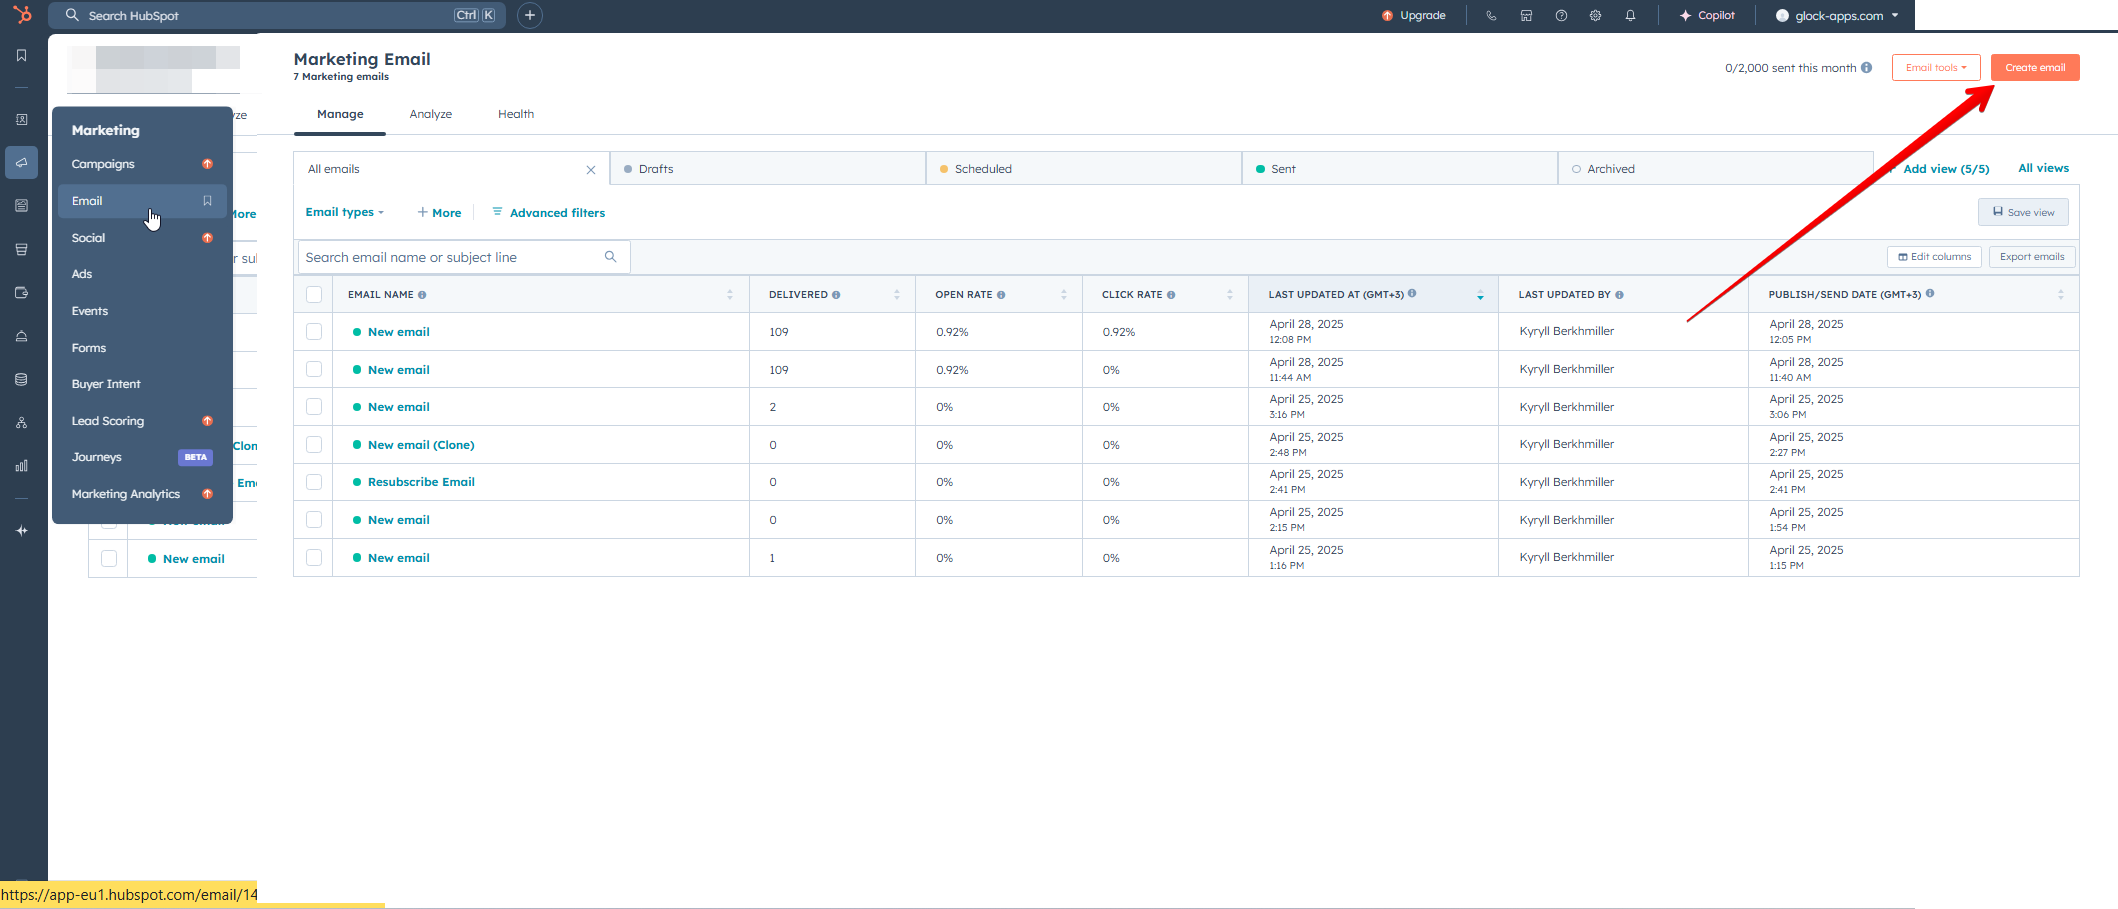
- Navigate to Marketing → Email, then click "Create Email"
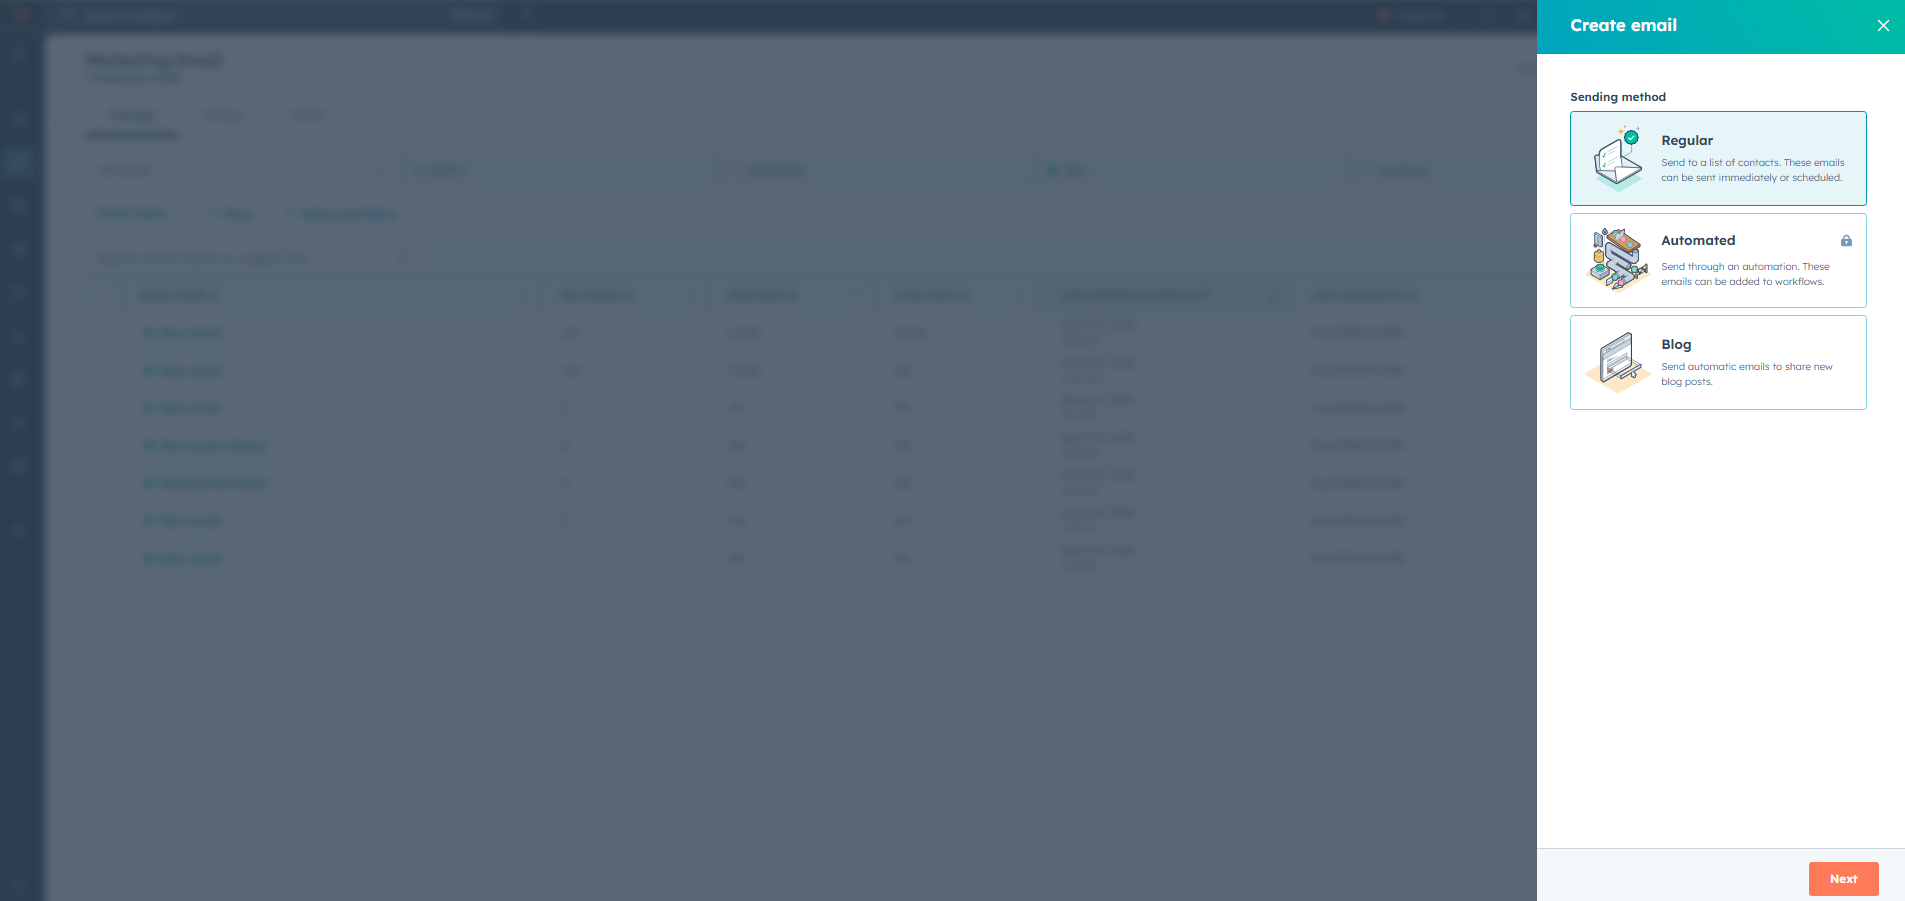
- Choose "Regular" email type.
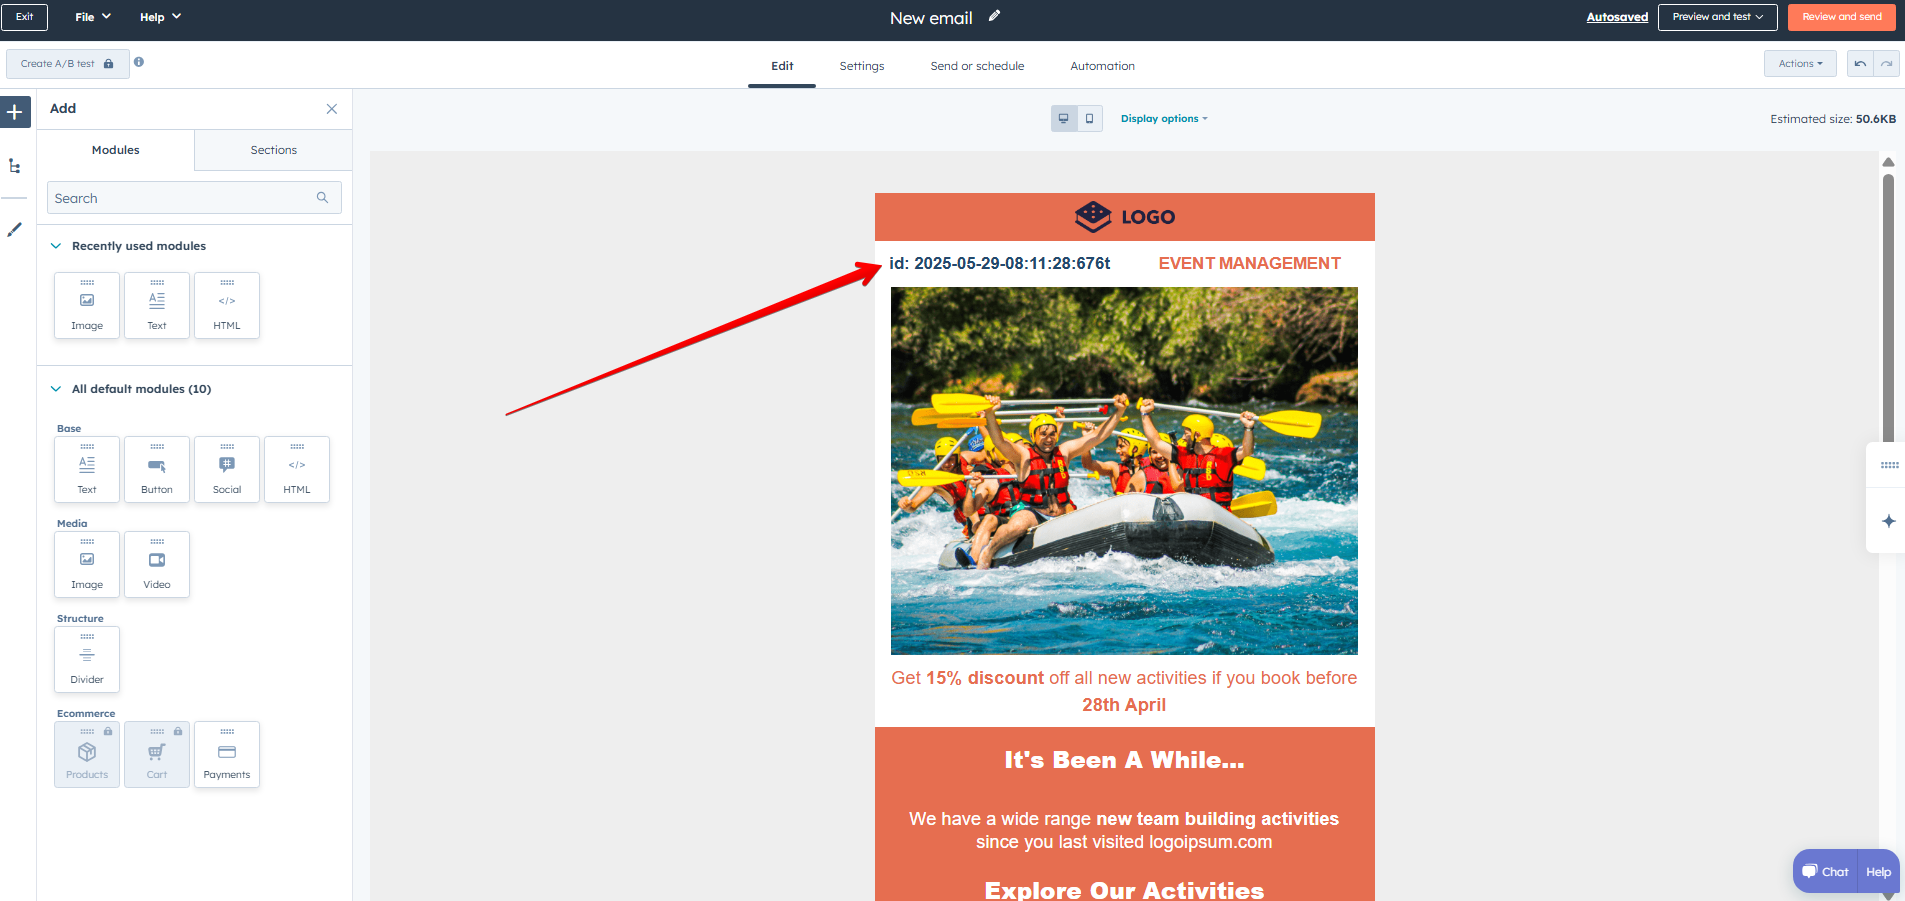
- Design your email using any template. The key requirement: add your GlockApps Test ID to the content.
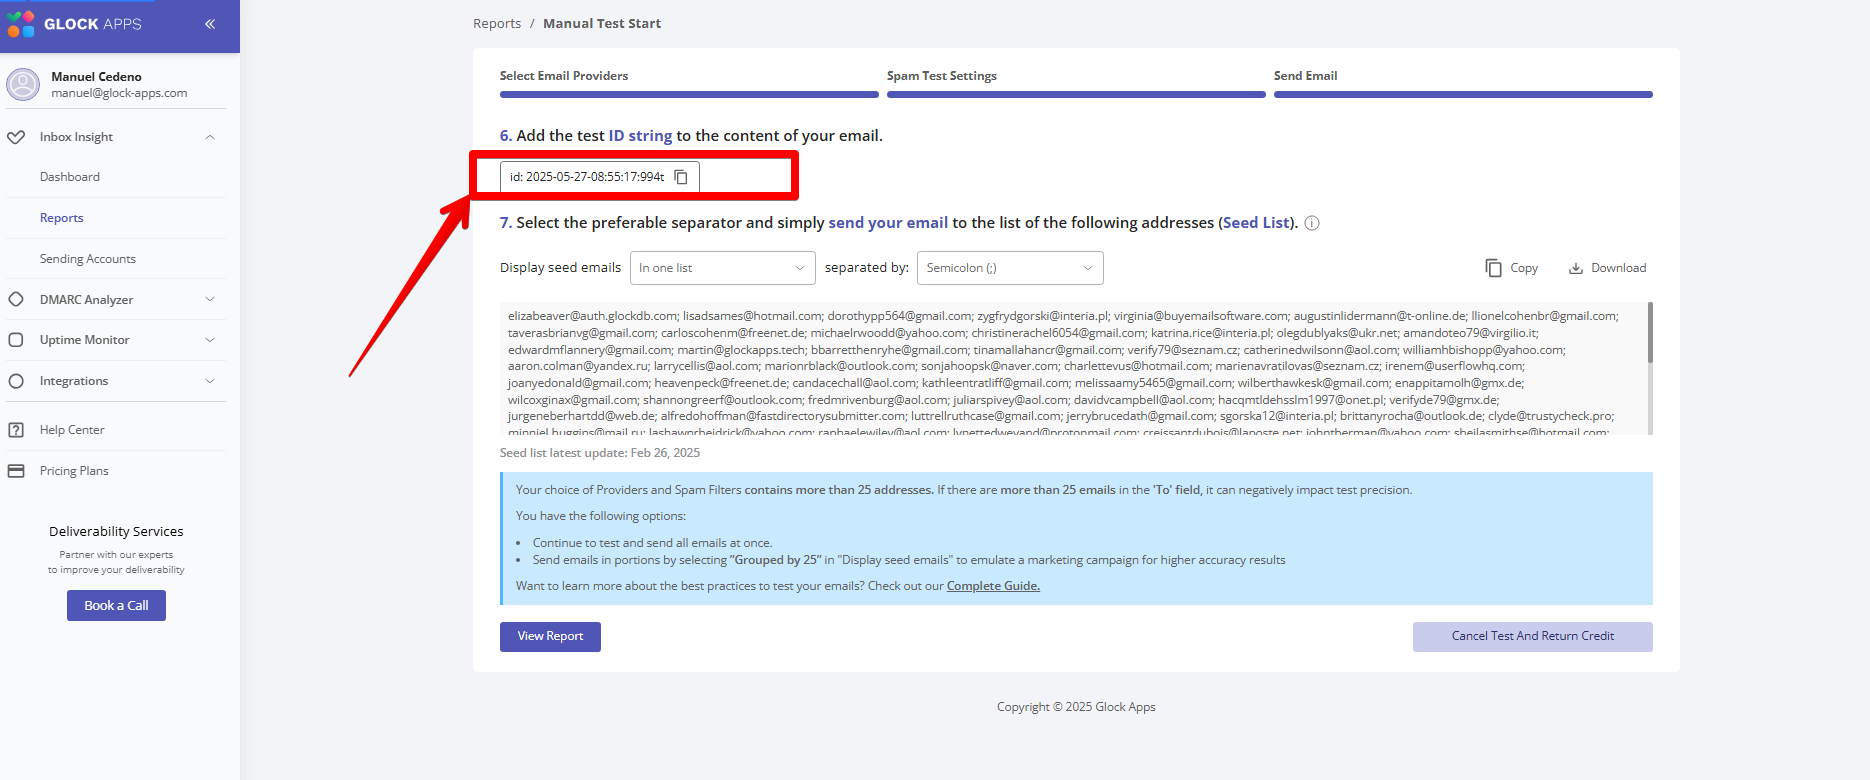
To get your Test ID:
- Go back to GlockApps, start a test, and copy the ID shown at the end of the setup process.
Step 2: Configure Email Settings
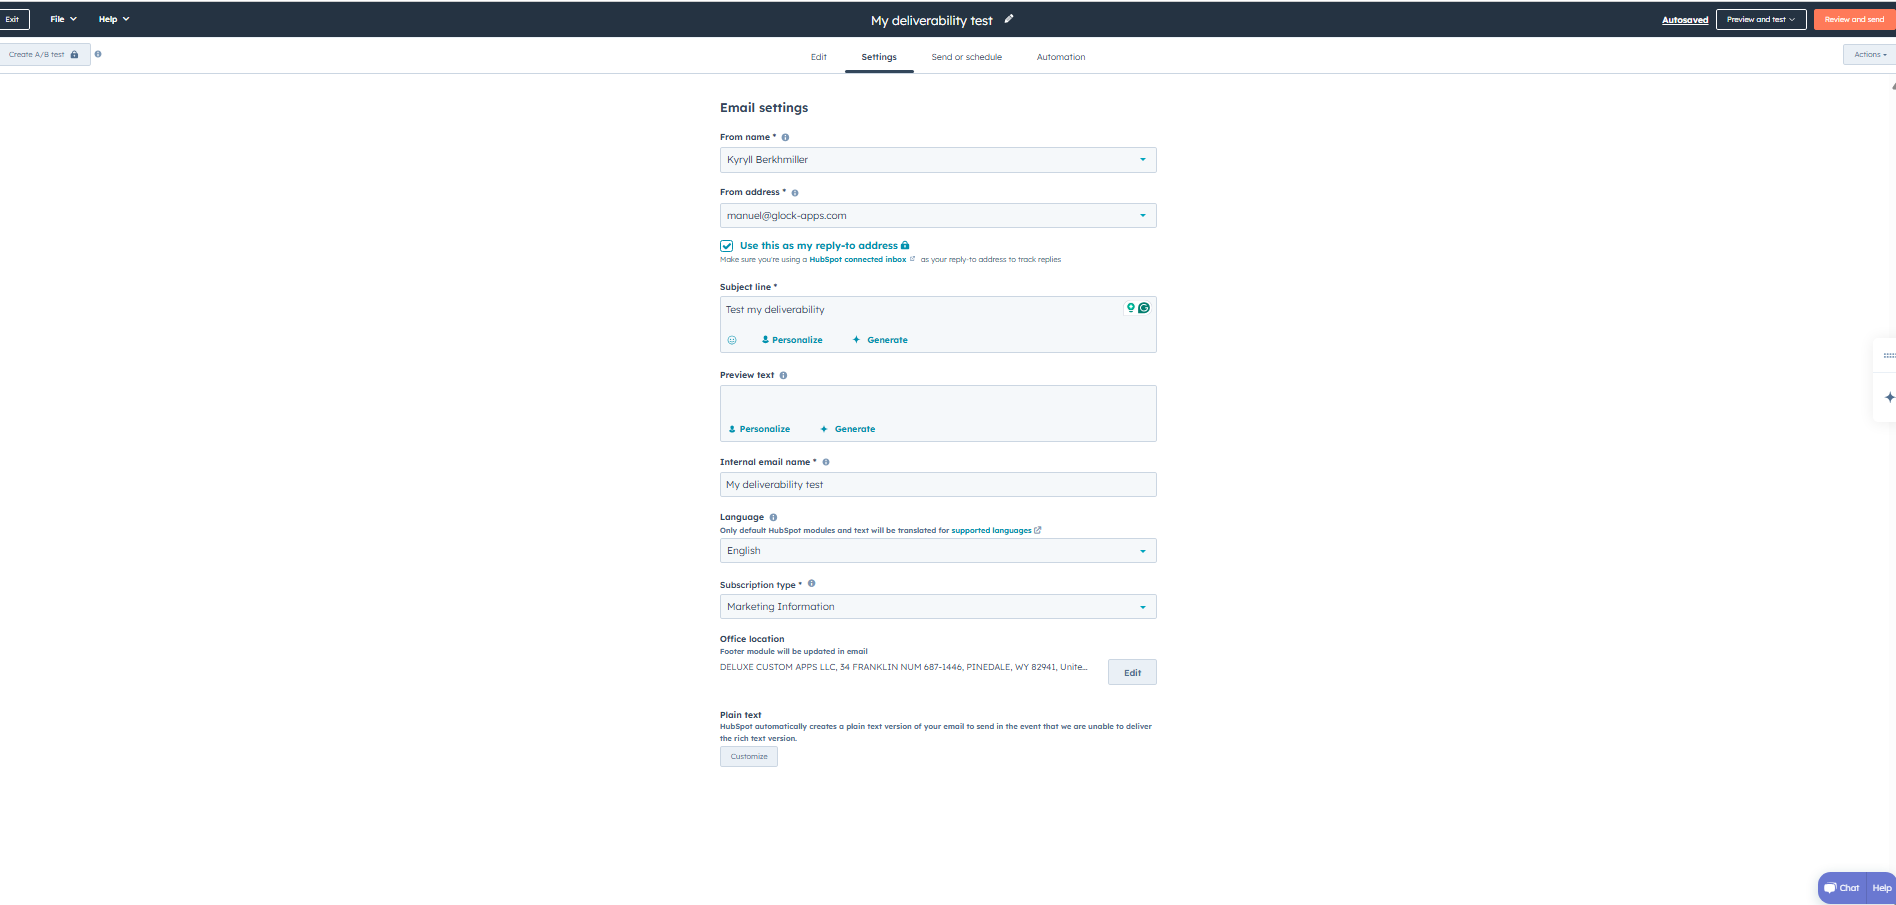
- Go to the Settings tab:
- Enter your From Name and From Email
- Add a Subject Line
- Ensure your Office Location is filled in (required by HubSpot)
Step 3: Send the Test Email
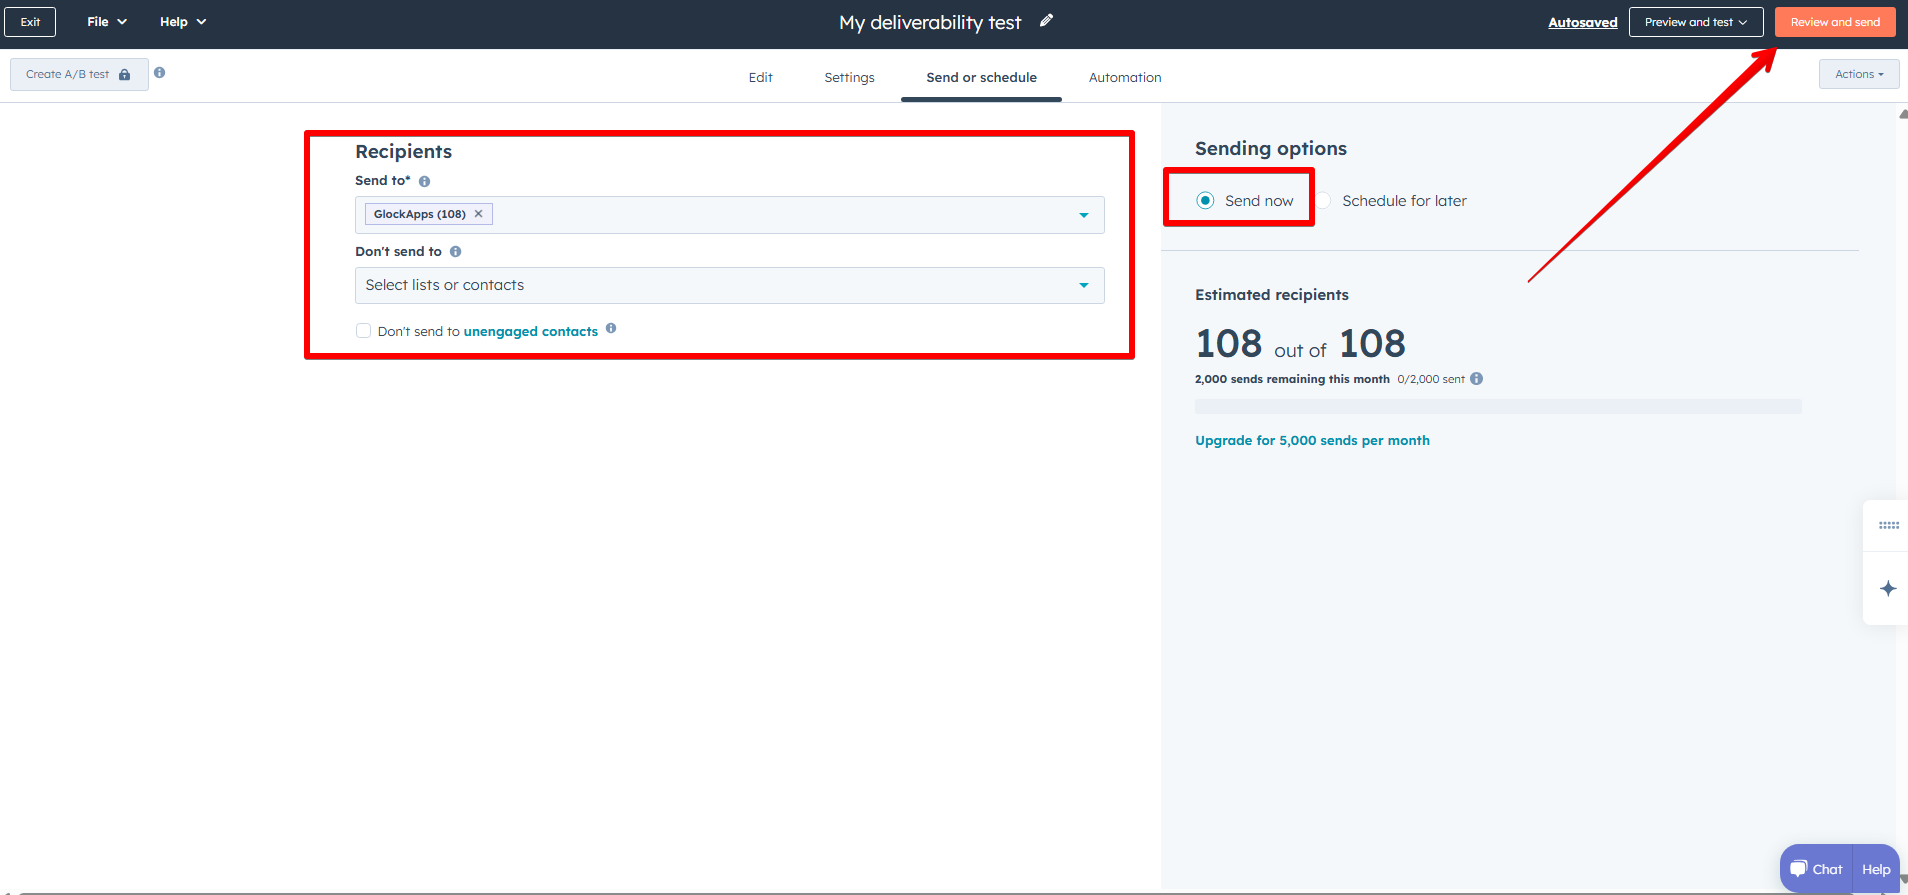
- Go to the "Send or Schedule" tab.
- Choose your previously created GlockApps list as the recipient list.
- Important: Turn off “Don’t send to unengaged contacts” — this could prevent emails from reaching seed addresses.
- Choose “Send Now”, then click “Review and Send.”
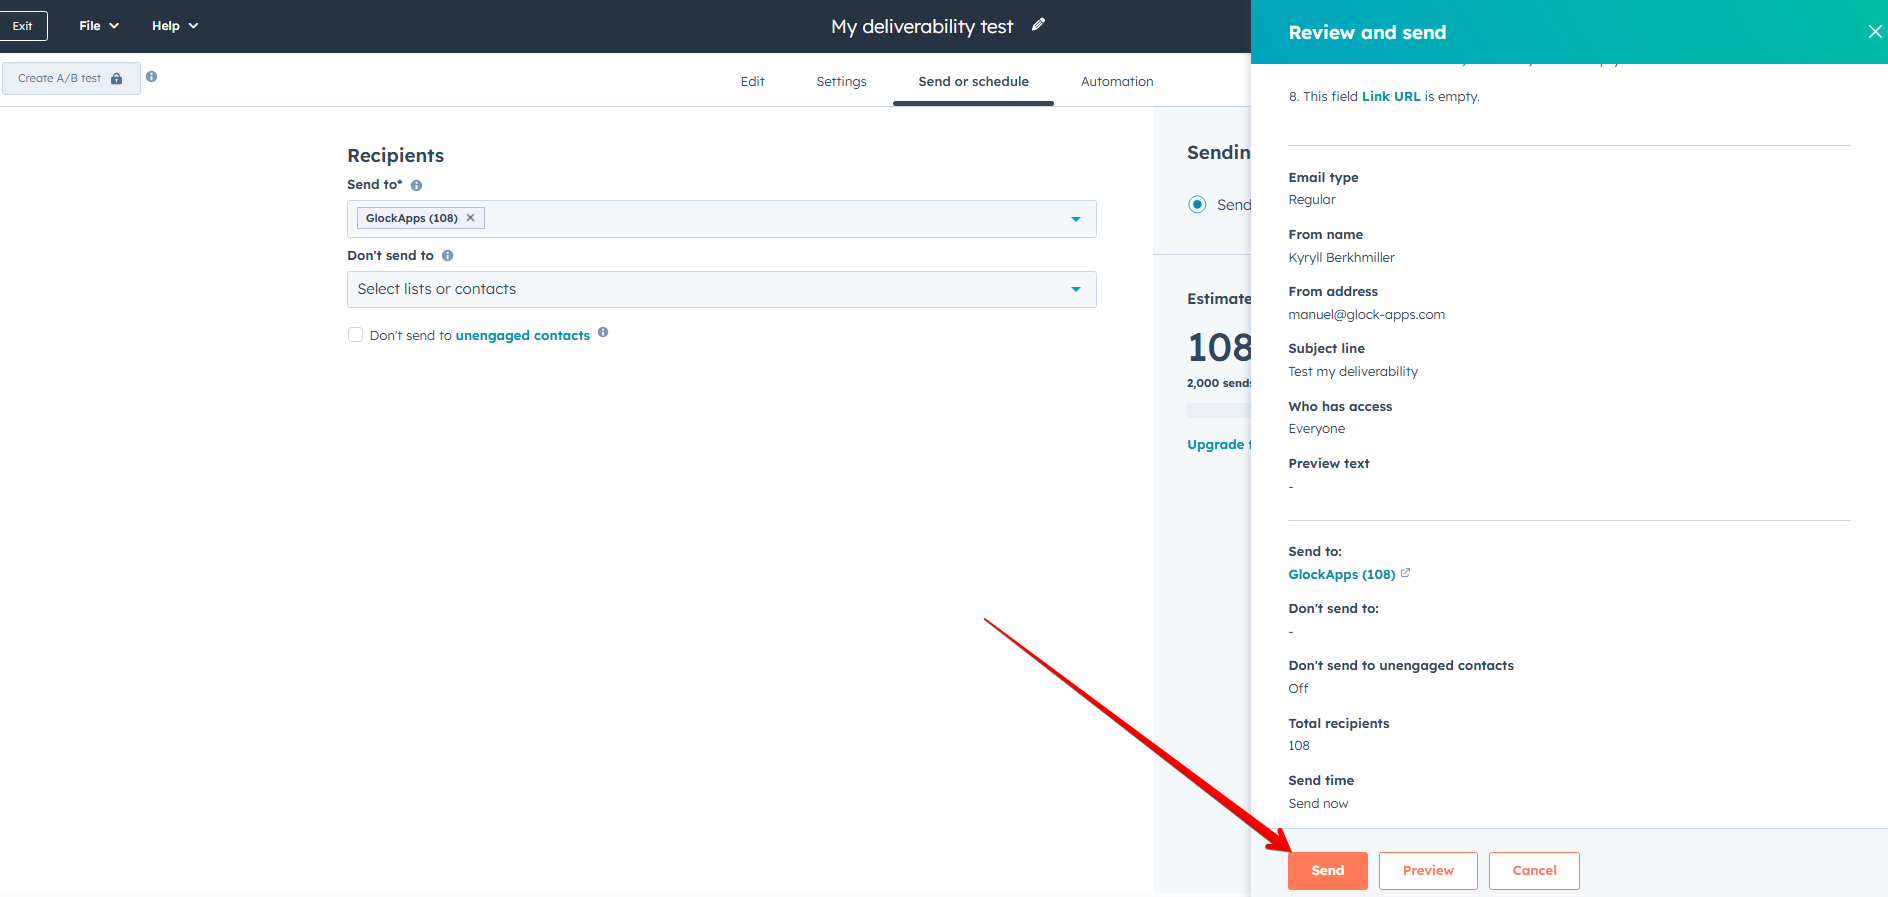
- Confirm and click “Send.”
Step 4: View Sending Results and Analyze
- After the email is sent through HubSpot SMTP infrastructure, you will be redirected to a results screen showing how many emails were delivered.
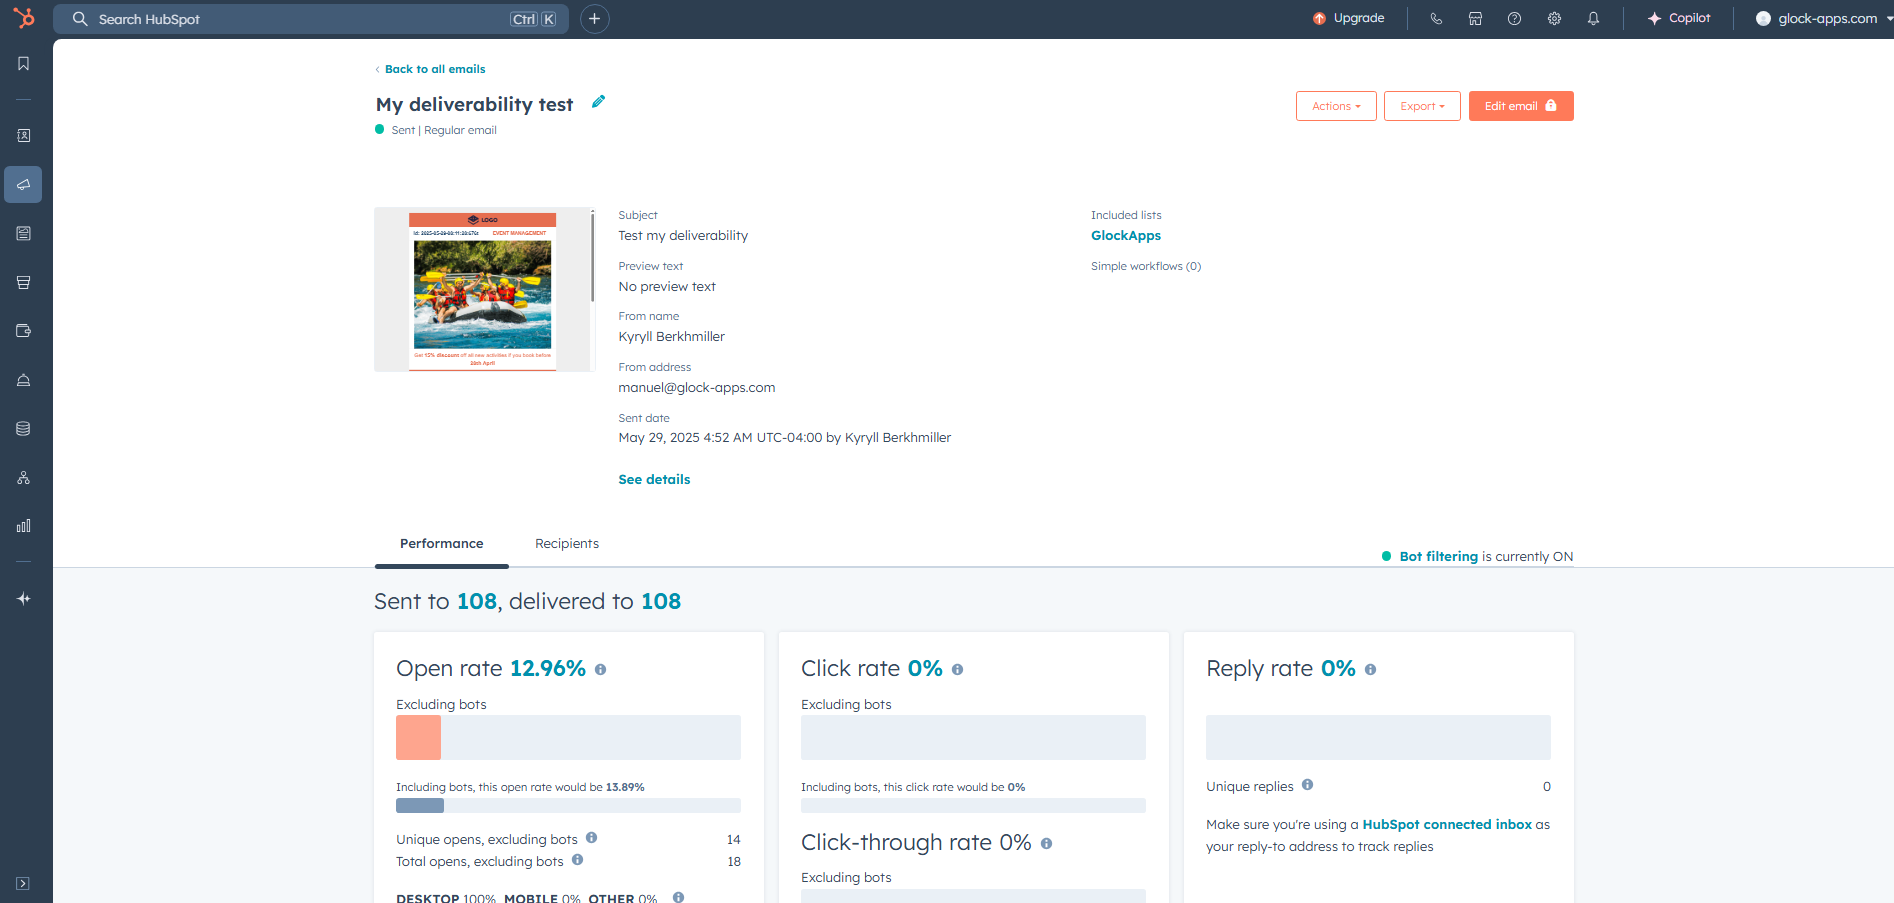
- Return to GlockApps to view full deliverability results for the spam test.
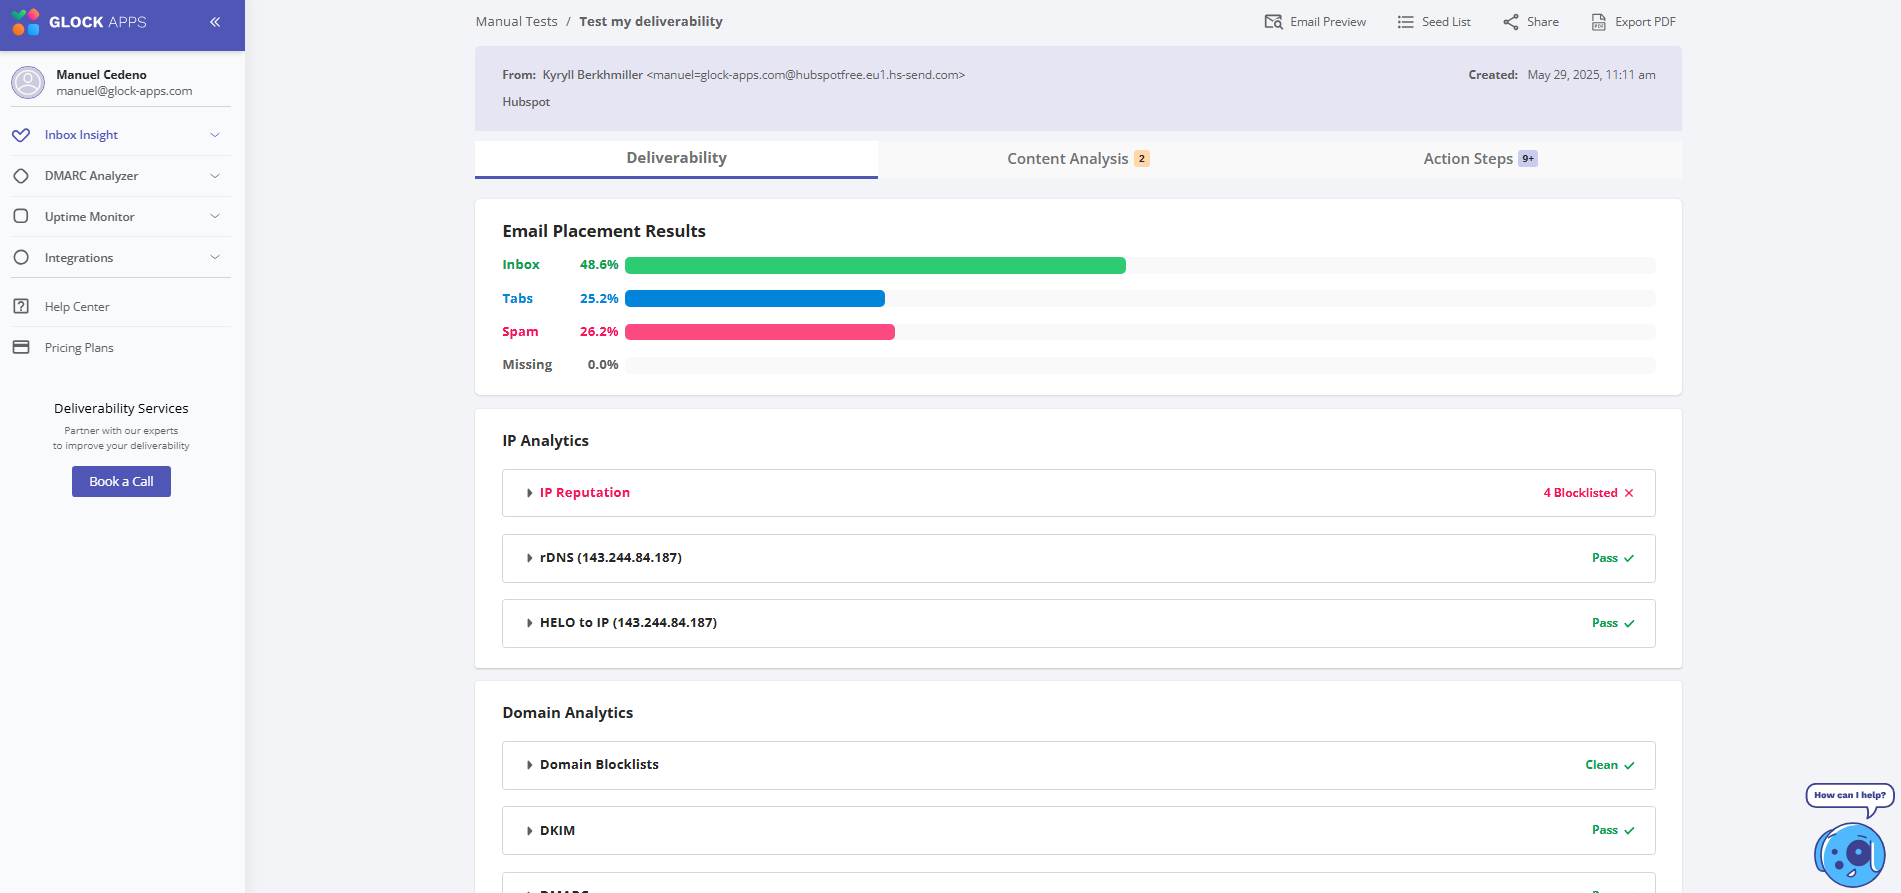
Note: Deliverability test results in GlockApps may take up to 10 minutes to appear when using HubSpot, as the platform sends emails sequentially.
Important: If HubSpot fails to send emails to certain mailboxes due to "unsubscribed" status, follow this guide to manage or resubscribe those contacts:
Conclusion
HubSpot integration with GlockApps allows you to accurately test email deliverability across a wide range of ESPs. By following this workflow, you ensure your messages are hitting inboxes, not spam folders. Regular testing like this helps you maintain a healthy sender reputation and improve your campaign performance.

