An IP Uptime Monitor checks the given IP address against the most popular public blacklists. If you send emails from a dedicated IP address, you’ll want to make sure that the IP reputation is good and that no blacklisting issue affects your ability to deliver email campaigns to the user’s Inbox.
To set up an IP uptime monitor, go to the Uptime Monitor tool and click “Create Monitor”.
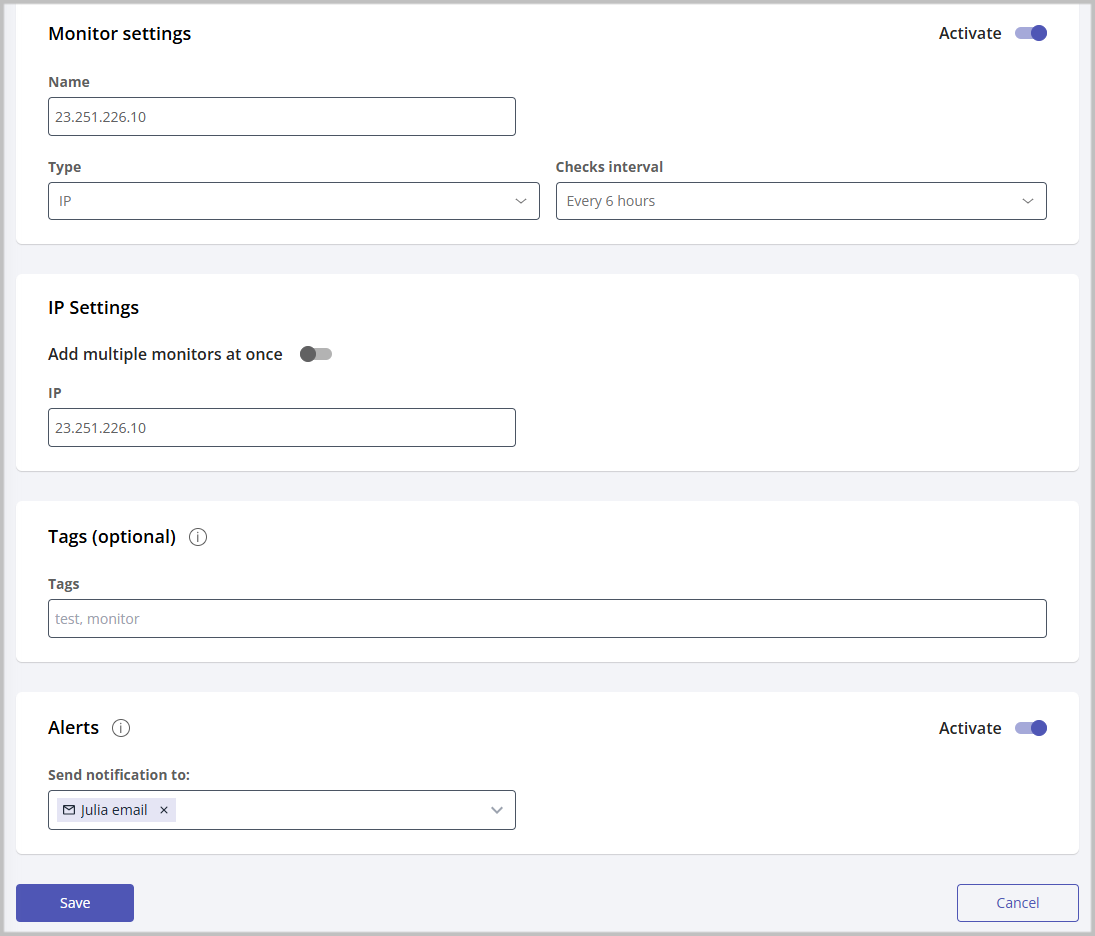
Monitor Settings
Set the “Activate” option to On and fill in the fields:
Name – enter a monitor name. You use the IP address as the monitor name.
Type – select IP.
Checks Interval – select the IP address checking interval. Free monitors work every 2 hours. The interval for paid monitors starts with 1 minute.
Region – select the region: US East (N. Virginia) or Europe (Ireland). GlockApps uses two servers located in two regions and using different IP addresses.
IP Settings
IP – enter the IP address that will be monitored.
To add more than one IP address, turn the “Add multiple monitors at once” to On and paste the list of IP addresses. GlockApps will create a monitor for each IP on the list.
Tags
Enter a tag for the monitor (optional). Tags allow you to filter the monitors.
Alerts
Set “Activate” to On if you want to receive alerts when a blacklisting issue is detected.
Alerts can be sent via one or multiple channels set up in Alert Channels. The default channel is set up via email.
Select the alert channel(s) and click “Save”.
What Do the Monitor Statuses Mean?
When the monitor is working, it shows the status of the IP address on the progressive bar.
Click on the monitor name to get a detailed report.
The meanings of the statuses are:
Clean – the IP address is not found on any of the blacklists available in the GlockApps database
Blacklisted in XX – the IP address is found on XX blacklists
Inactive – monitor is inactive
When the IP address is blacklisted, the information about the blacklists that have the IP on record is shown in the Response Text area. There you can find the URL of the page that gives detailed information about the listing.
The Events panel provides a detailed log of the IP checks. Here you can get the following information:
Event – shows the IP status for the indicated date and time (Clean or Blacklisted)
Date – shows the date and time of the event (IP check)
Duration – shows how much time the event status lasts. The tool shows the event status one time per day if it didn’t change. The time when the event status is shown is not fixed. It is calculated approximately. But if a new check detects the status change, it shows the new status immediately.
Response – shows the response returned by the IP monitor.
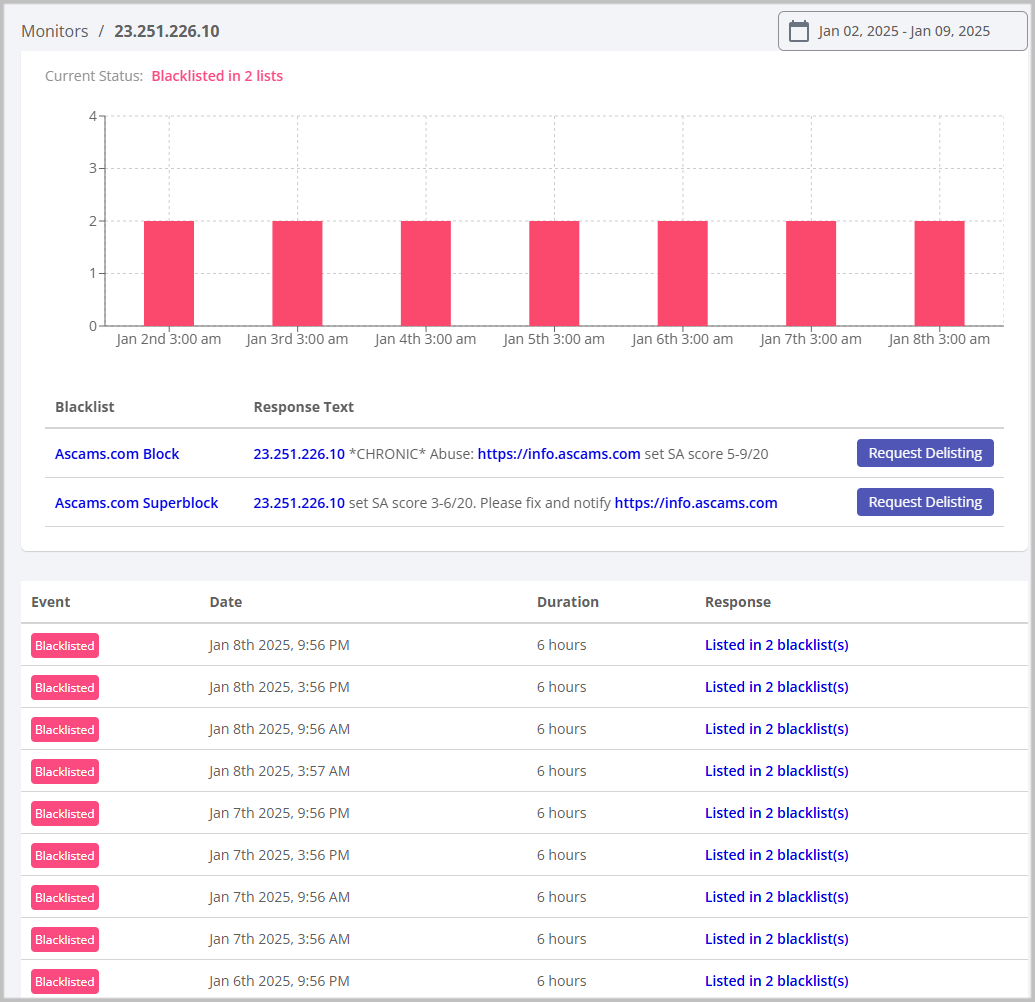
How to Fix IP Blacklisting Issue
Click on the “Request Delisting” button and read about the de-listing process on the blacklist website. Some blacklists automatically remove the IP from their database some time after the IP stops sending emails reported as spam. If they do, you don’t need to follow the delisting process.
If the listing doesn’t automatically expire, you have to follow the de-listing process to get your IP off the blacklist. It may be different for each blacklist. Carefully read the instructions on the blacklist website.
To stay away from the blacklists in the future, you’ll want to verify your email lists and email campaigns. Are you sending messages to confirmed email recipients? Are you sending the content they requested? Are you sending to valid email addresses? Are you sending too much? Following best email practices will minimize the risk of your IP getting on the blacklists again.
For more information, read: How to Remove IP Address from Blacklists