Klaviyo Integration: How to Test Klaviyo Email Deliverability with GlockApps
1. Automated GlockApps Integration with Klaviyo:
- Run a Manual Test Using Your Klaviyo Campaign
- Set Up Automatic Klaviyo Tests
2. Manual GlockApps Integration with Klaviyo (The Alternative Option):
- Part I: Create a New List in Klaviyo Using Only GlockApps Mailboxes
- Part II: Create and Send a Test Campaign in Klaviyo
Conclusion
Klaviyo is a powerful email marketing platform designed specifically for e‑commerce and growth‑focused businesses, offering deep behavioral tracking and automation alongside its core Klaviyo integration capabilities. It is widely used for creating personalized, behavior-driven email campaigns based on customer actions and purchase data.
If you're serious about email deliverability and inbox placement, GlockApps is one of the most reliable tools on the market. Let’s take a look at Klaviyo integration with GlockApps to run accurate spam tests and see exactly where the messages are landing across different ISPs. This guide will show you exactly how to create a GlockApps seed list in Klaviyo, build a test campaign, and interpret your deliverability results.
1. Automated GlockApps Integration with Klaviyo
At GlockApps, we now offer a direct Klaviyo integration that makes it possible to run deliverability tests without manually creating and uploading a GlockApps seed list to Klaviyo.
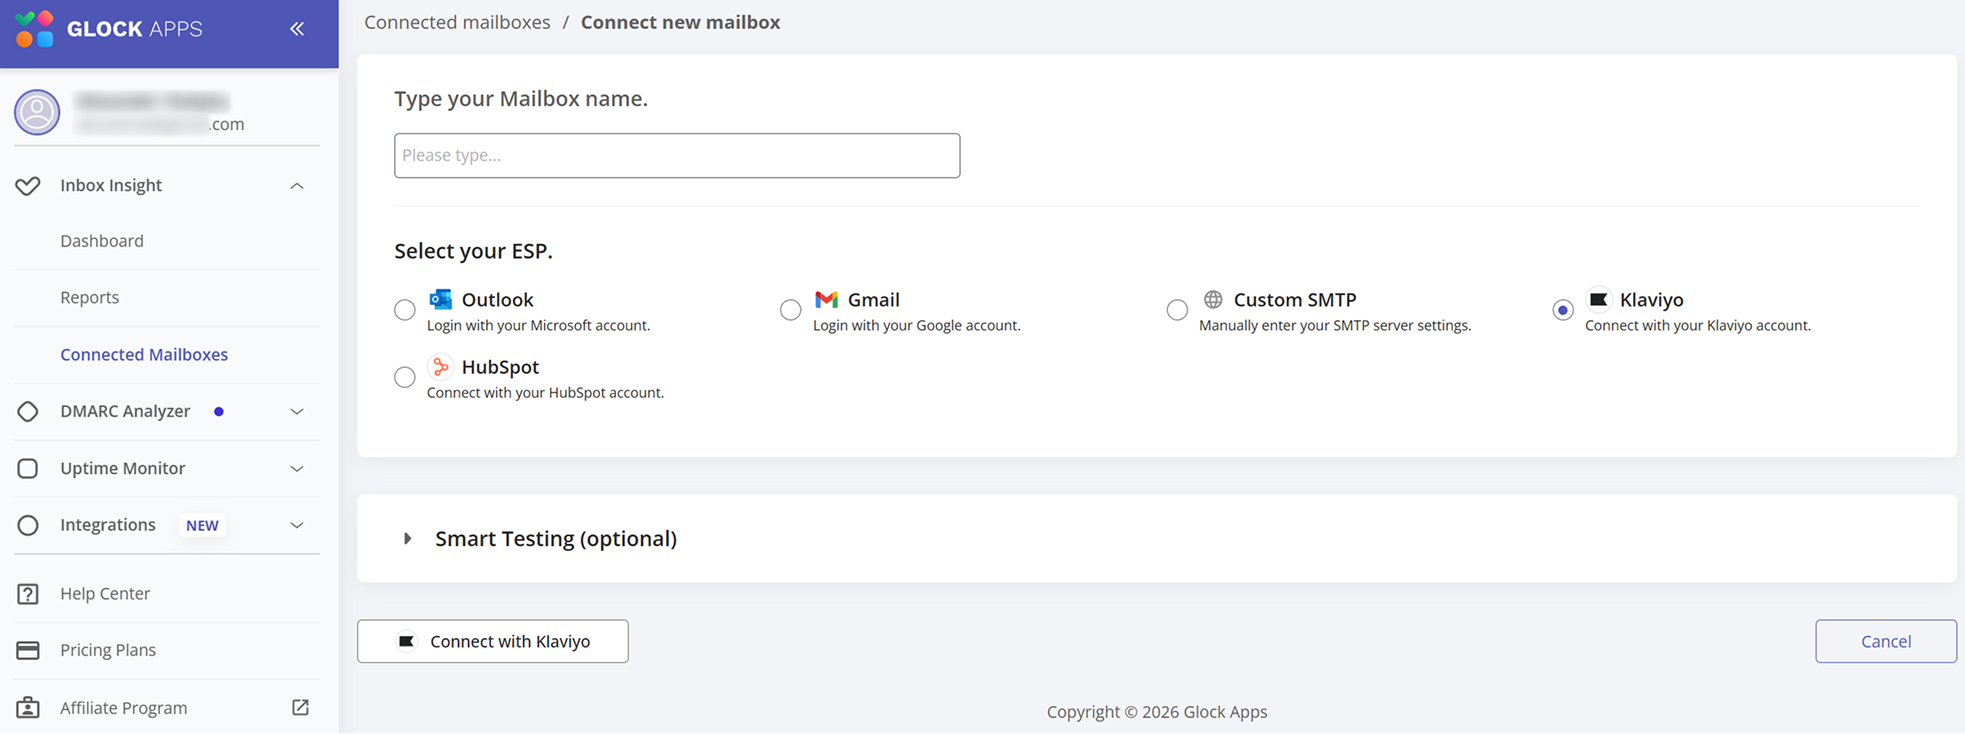
To connect your Klaviyo account, go to Connected Mailboxes in GlockApps and create a new sending account. Enter a name for the account, select Klaviyo from the available ESP options, and click Connect with Klaviyo.
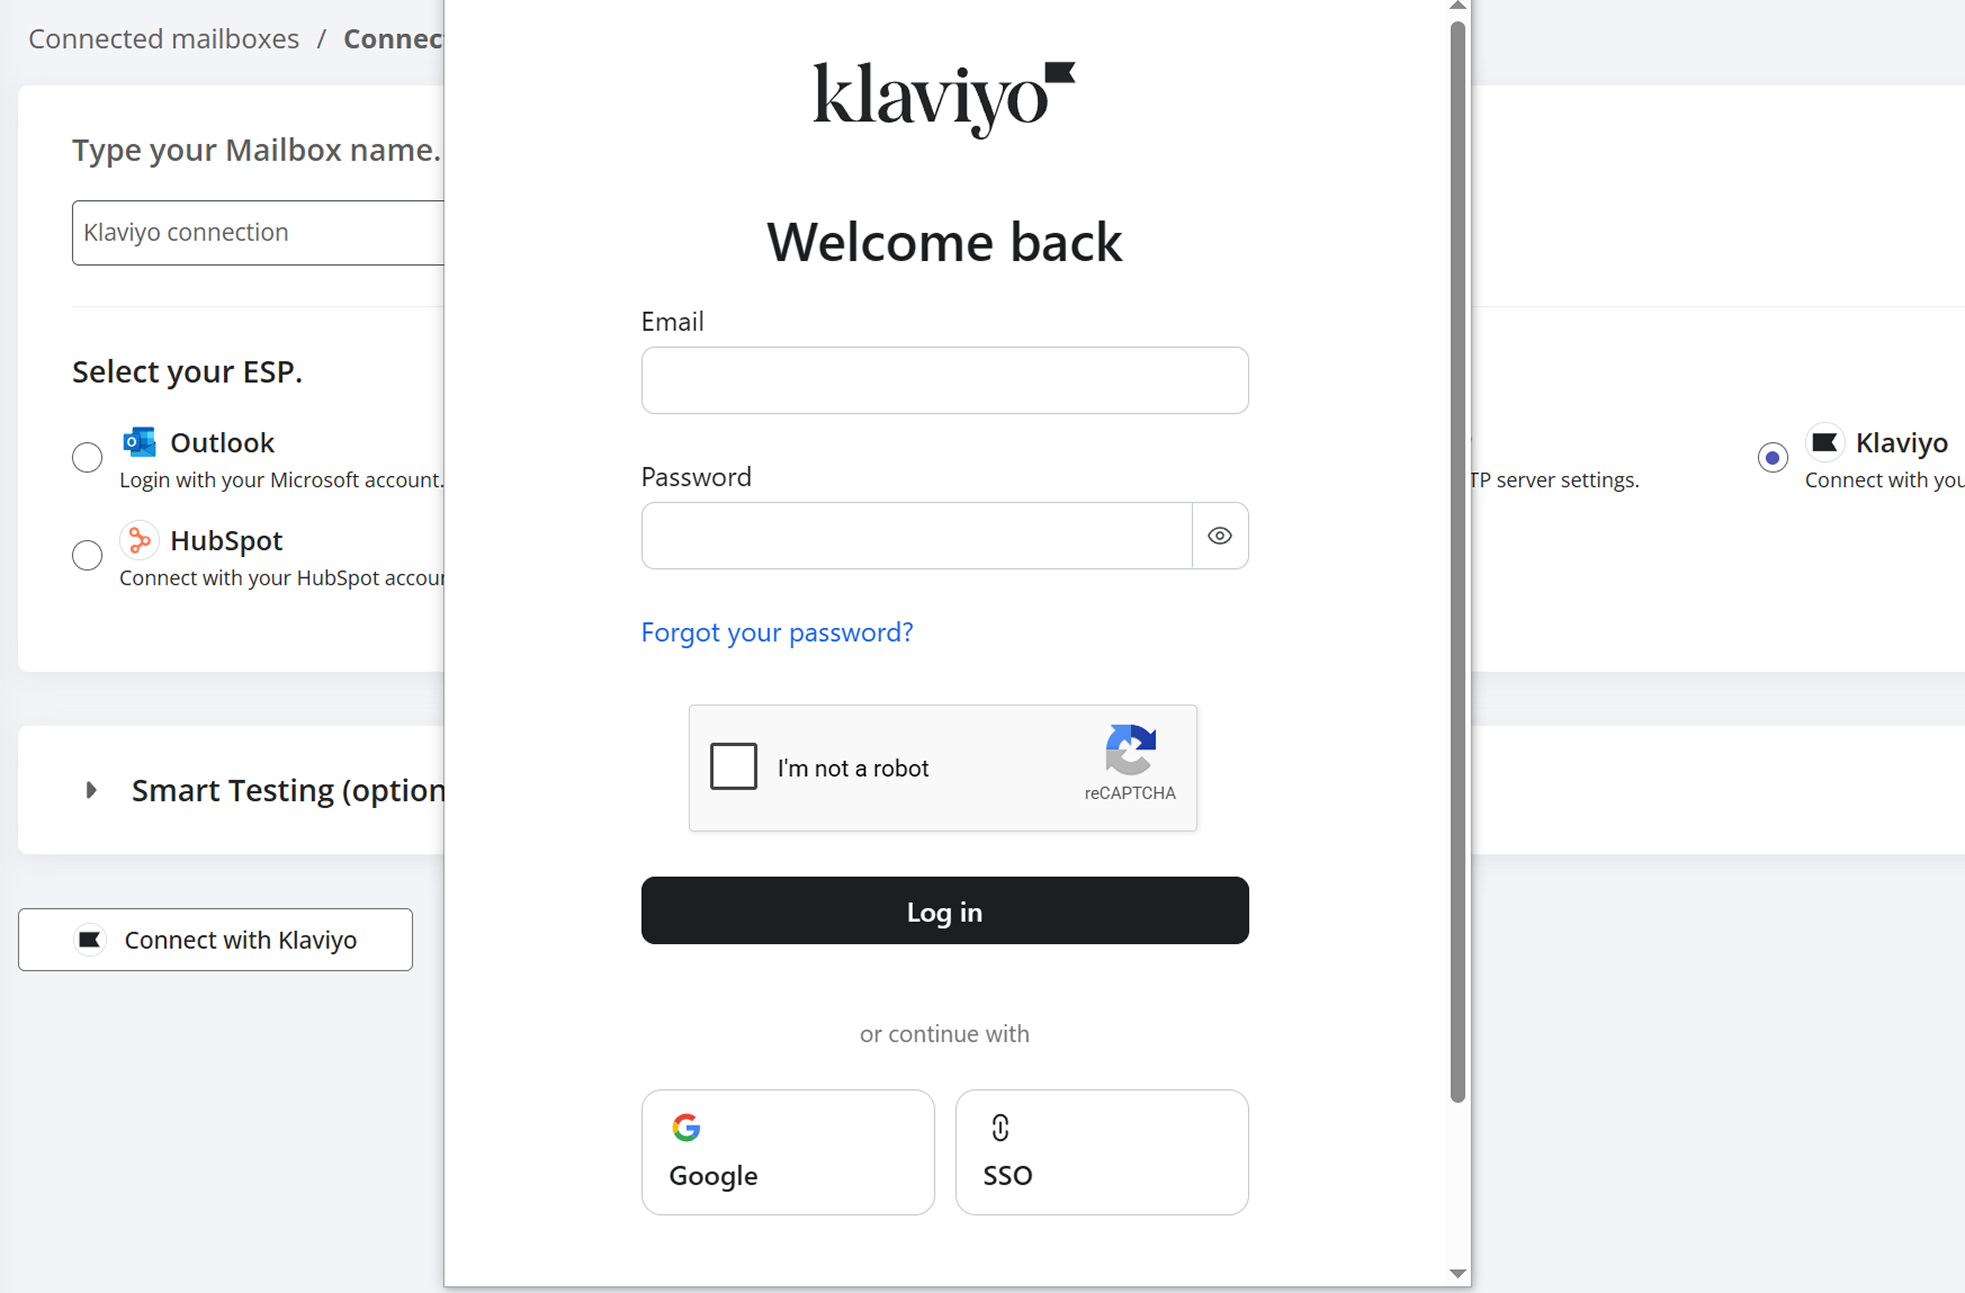
A Klaviyo login window will open. Sign in to the Klaviyo account you want to connect.
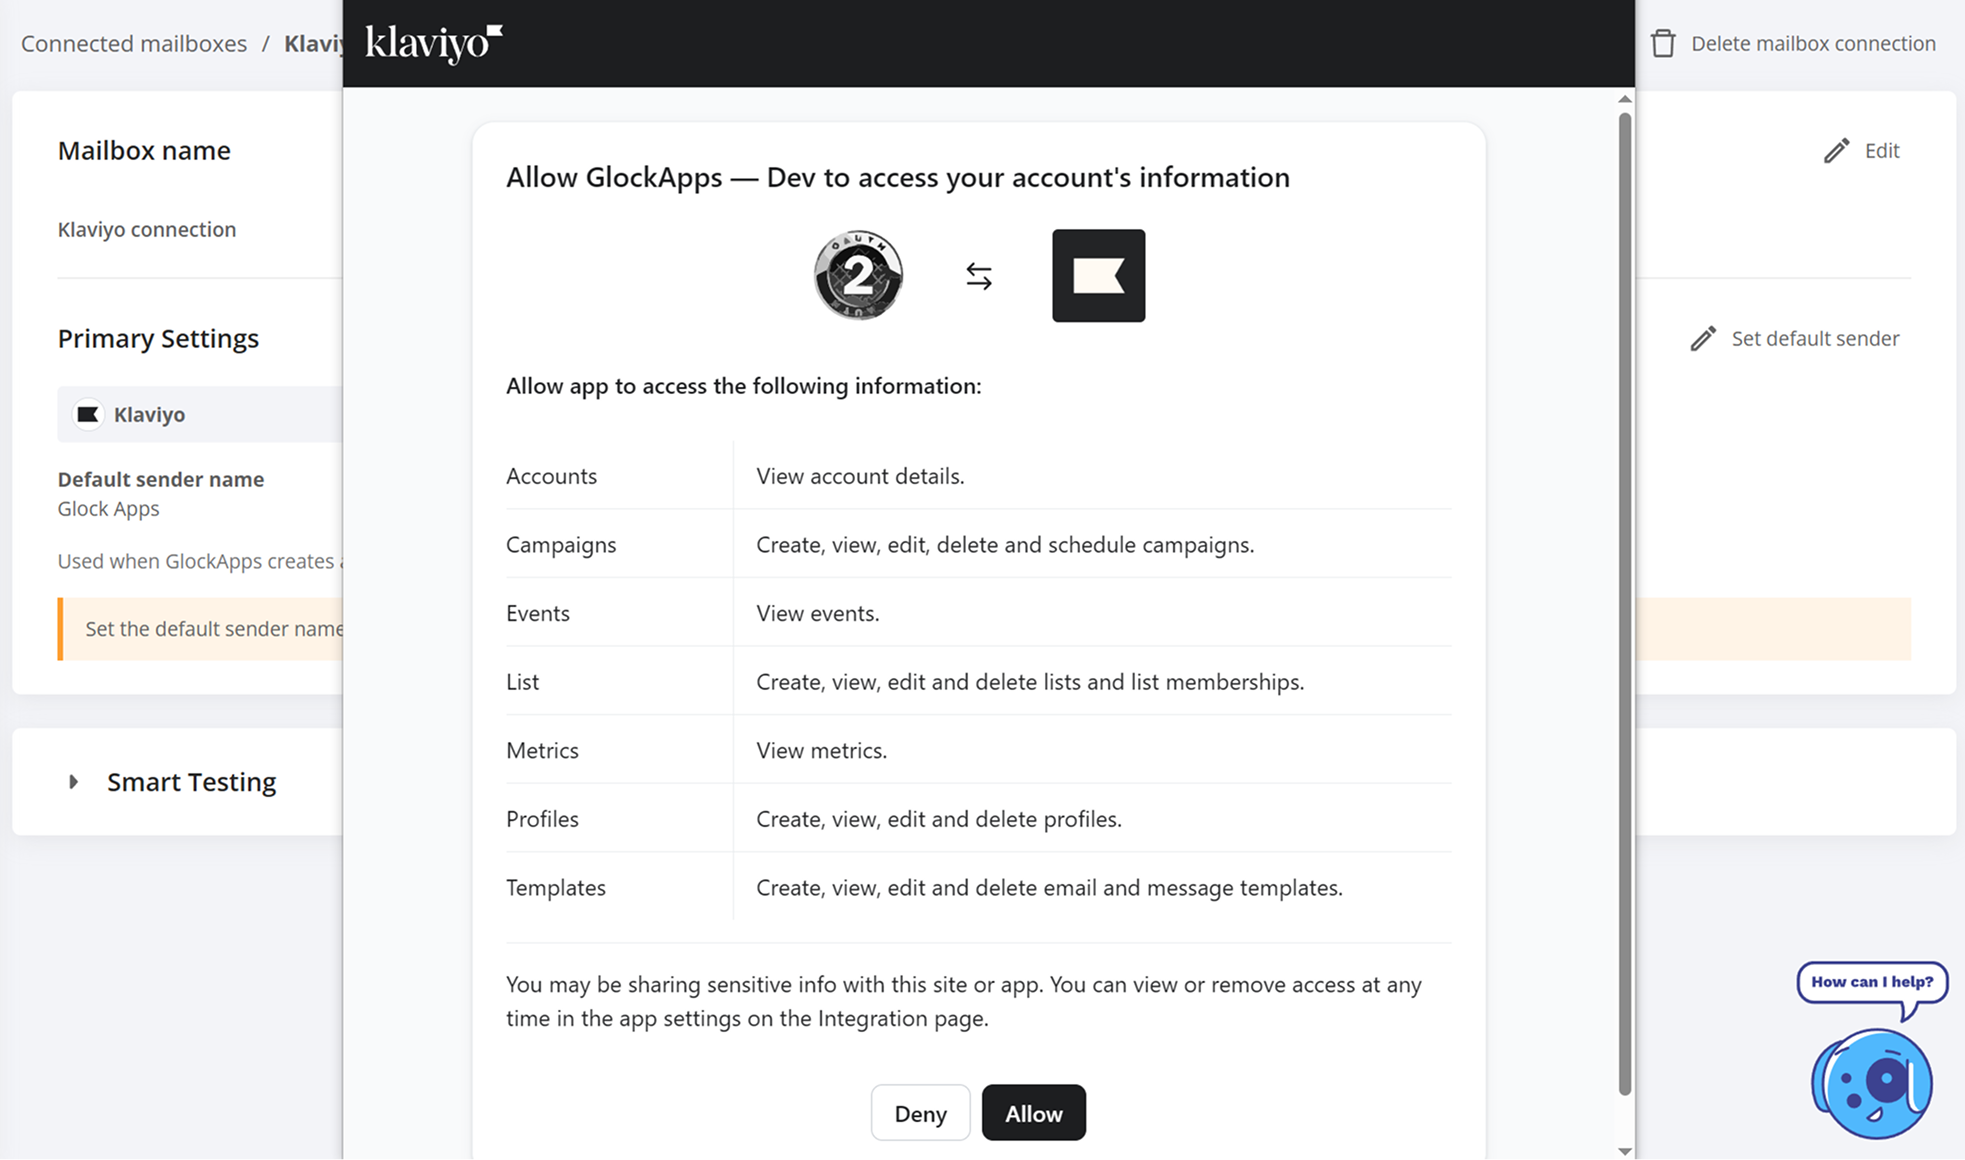
Next, review the permissions requested by GlockApps and click Allow to authorize the integration.
Once the connection is complete, the Klaviyo account can be used for both manual spam tests and automatic recurring tests directly from GlockApps.
Run a Manual Test Using Your Klaviyo Campaign
When creating a manual spam test, select Send Automatically and choose your connected Klaviyo account as the sending account. Under Source campaign to clone, select the Klaviyo campaign you want to test.
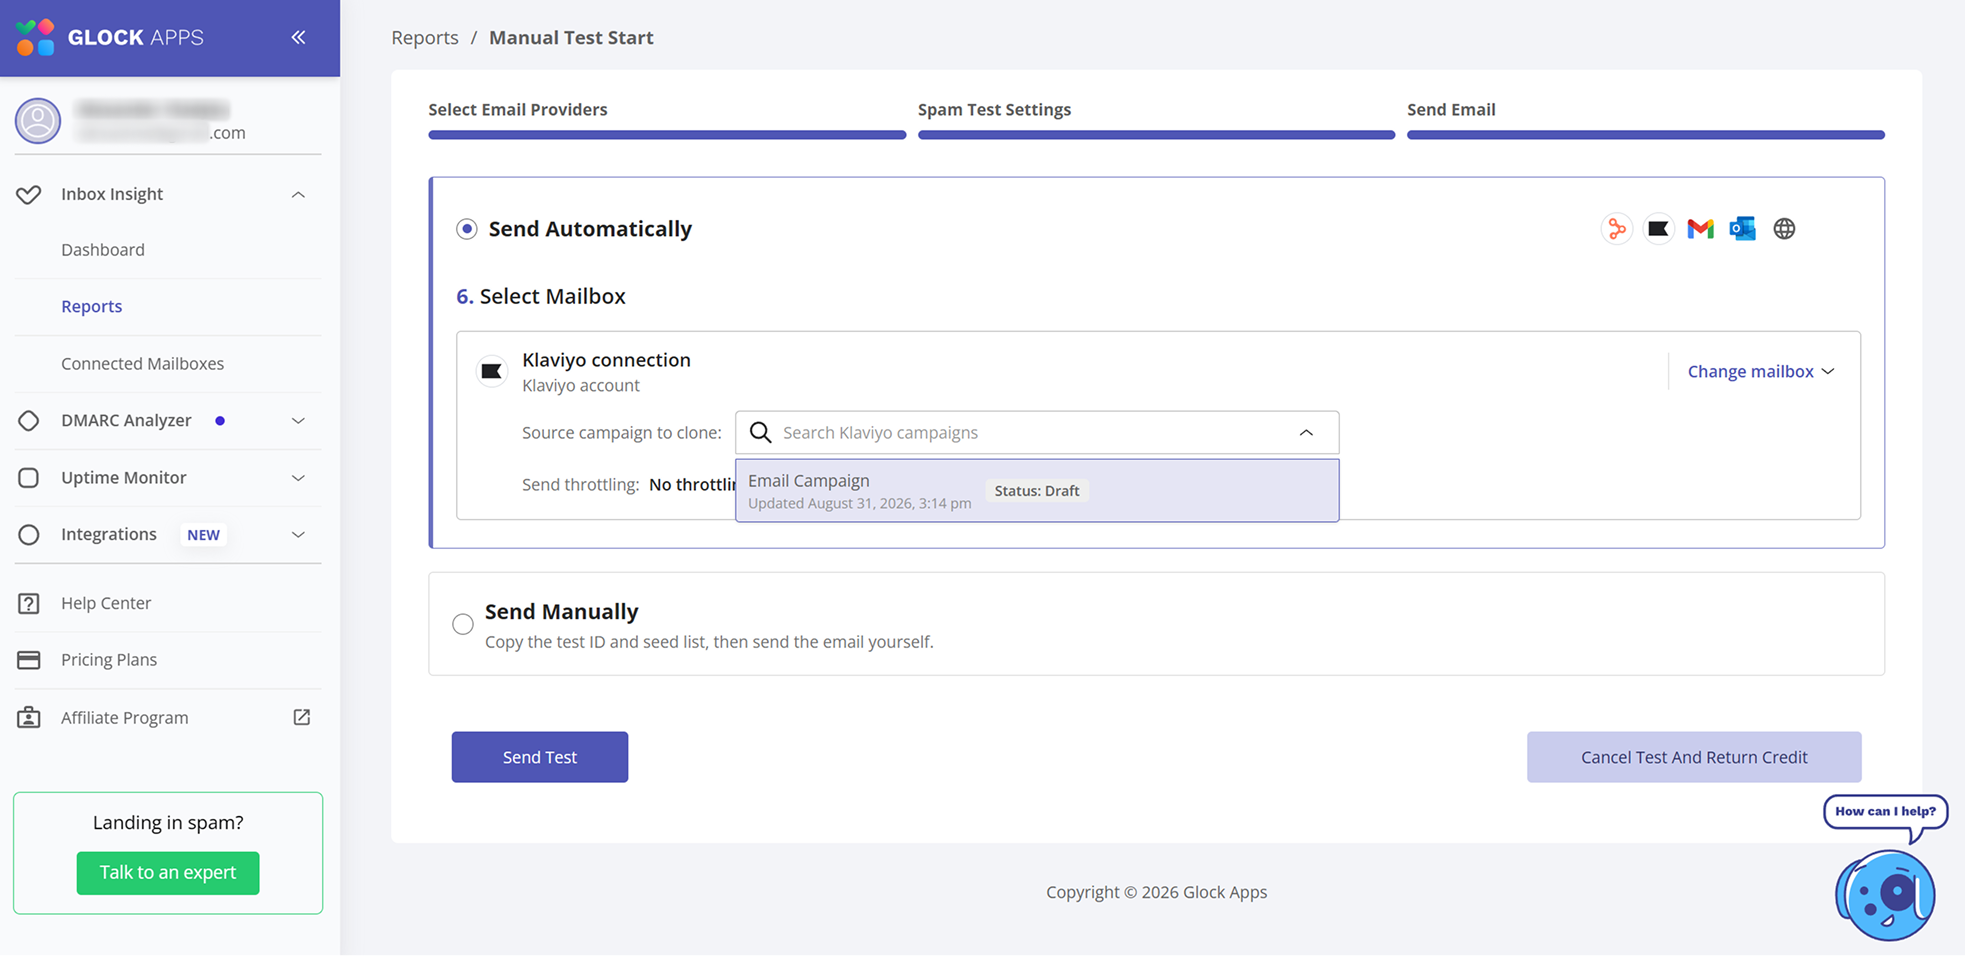
GlockApps will create a clone of the selected campaign and use the GlockApps seed list as the audience for the test. This means you do not need to modify the original Klaviyo campaign or manually import seed addresses. The original campaign remains unchanged.
Click Send Test to launch the deliverability test and receive your GlockApps report.
Set Up Automatic Klaviyo Tests
The same process can be used when creating an automatic test. After selecting your connected Klaviyo sending account, choose the existing Klaviyo campaign you want GlockApps to test on a recurring basis.
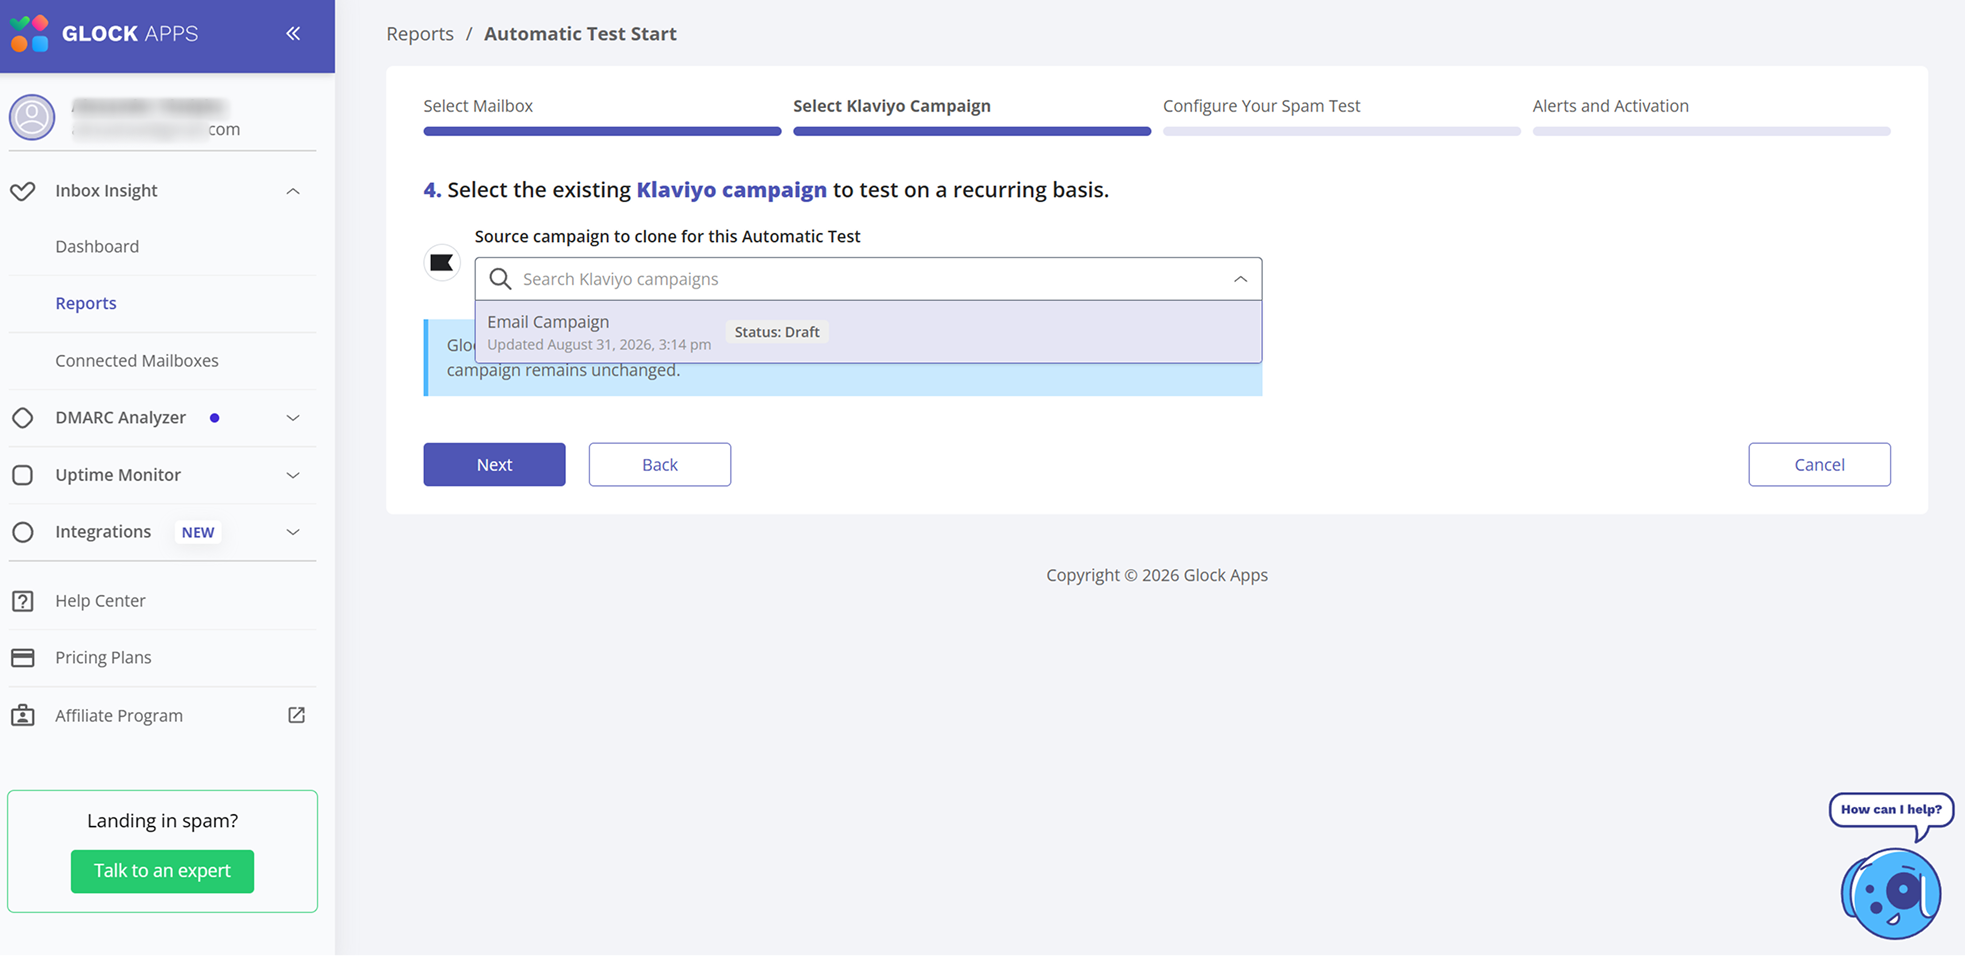
For every automatic test, GlockApps creates a clone of the selected campaign and sends only the cloned version to the seed list. Your original Klaviyo campaign is not changed. You can then complete the remaining test settings, configure alerts, and activate the recurring test.
2. Manual GlockApps Integration with Klaviyo (The Alternative Option)
Part I: Create a New List in Klaviyo Using Only GlockApps Mailboxes
This process will show you how to create a new list in Klaviyo using only the mailboxes from your GlockApps personal seed list.
Step 1: Create the List in Klaviyo:
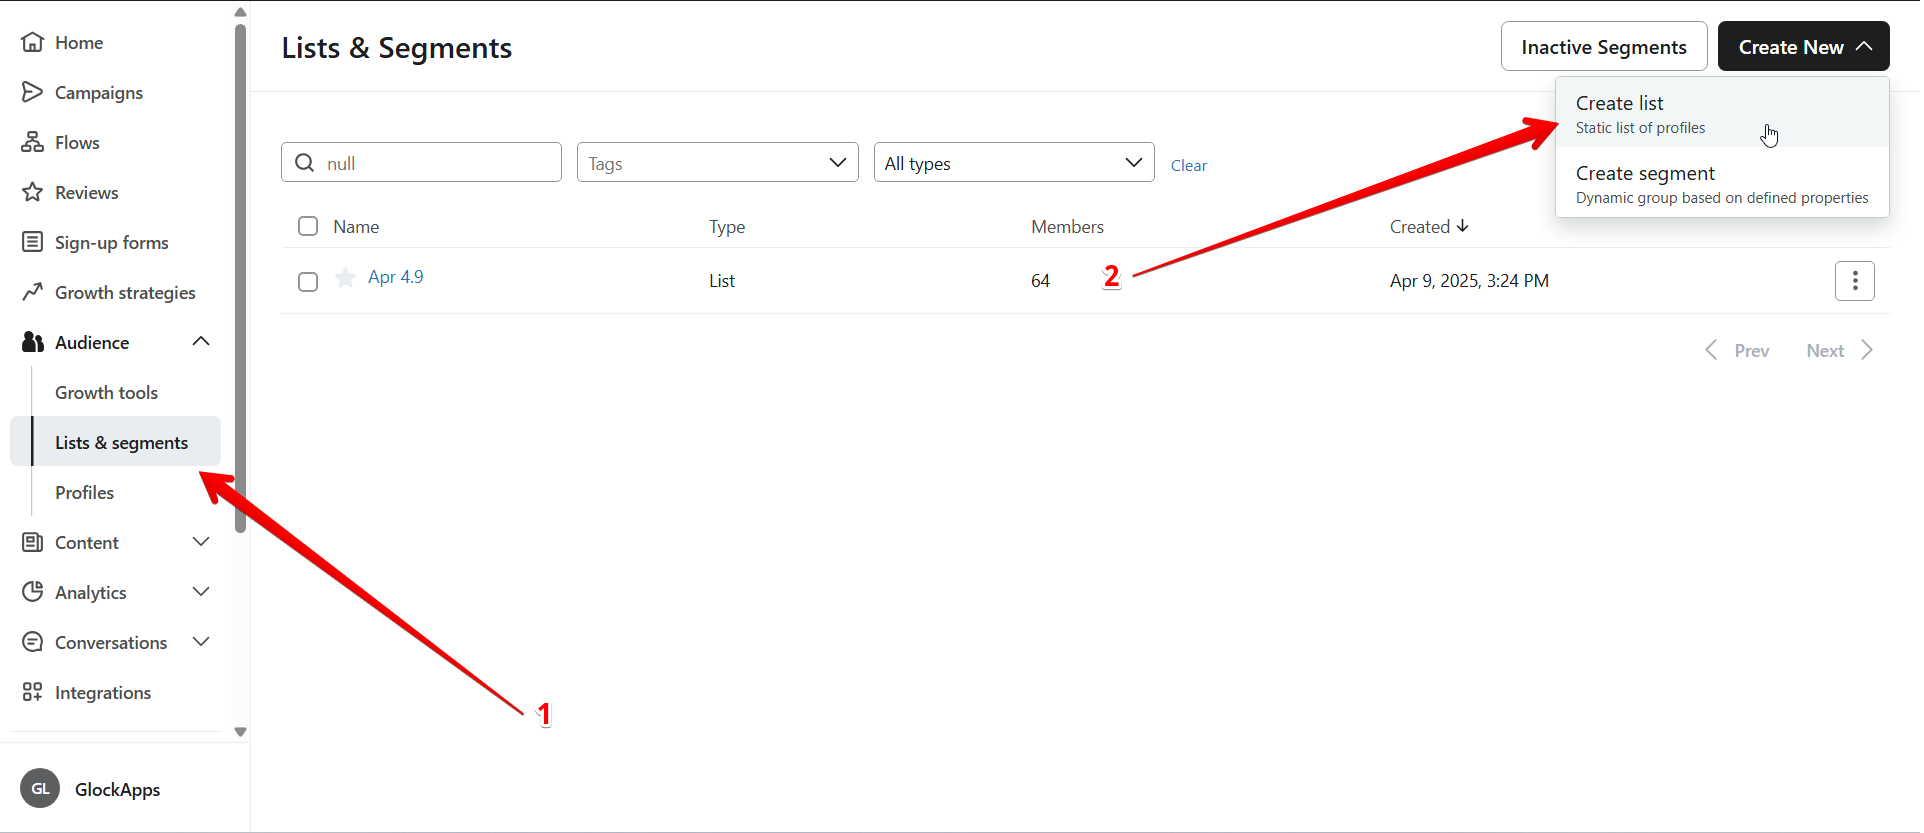
Log into Klaviyo and navigate to the "Audience" tab, then go to "Lists & Segments".
- Log into Klaviyo and navigate to the "Audience" tab, then go to "Lists & Segments".
- Click the "Create List" button.
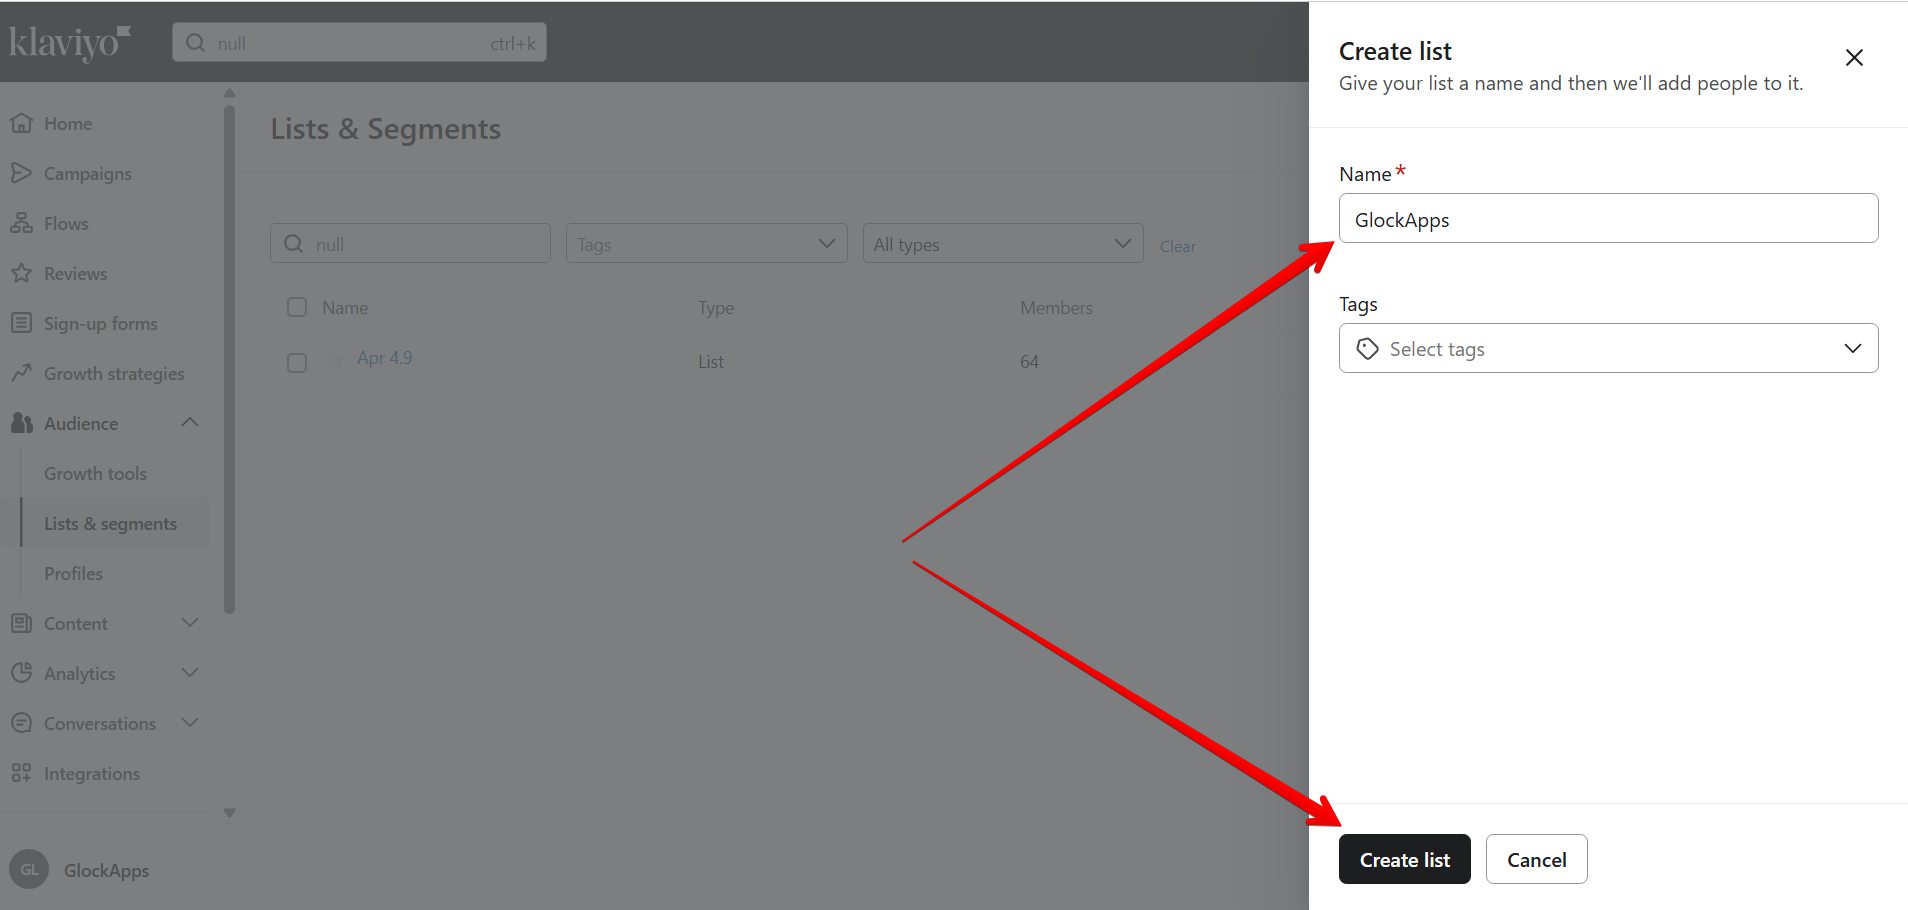
- Enter a list name (you can choose any name that fits your workflow) and click "Create List".
- On the next screen, select the option "Upload contacts".
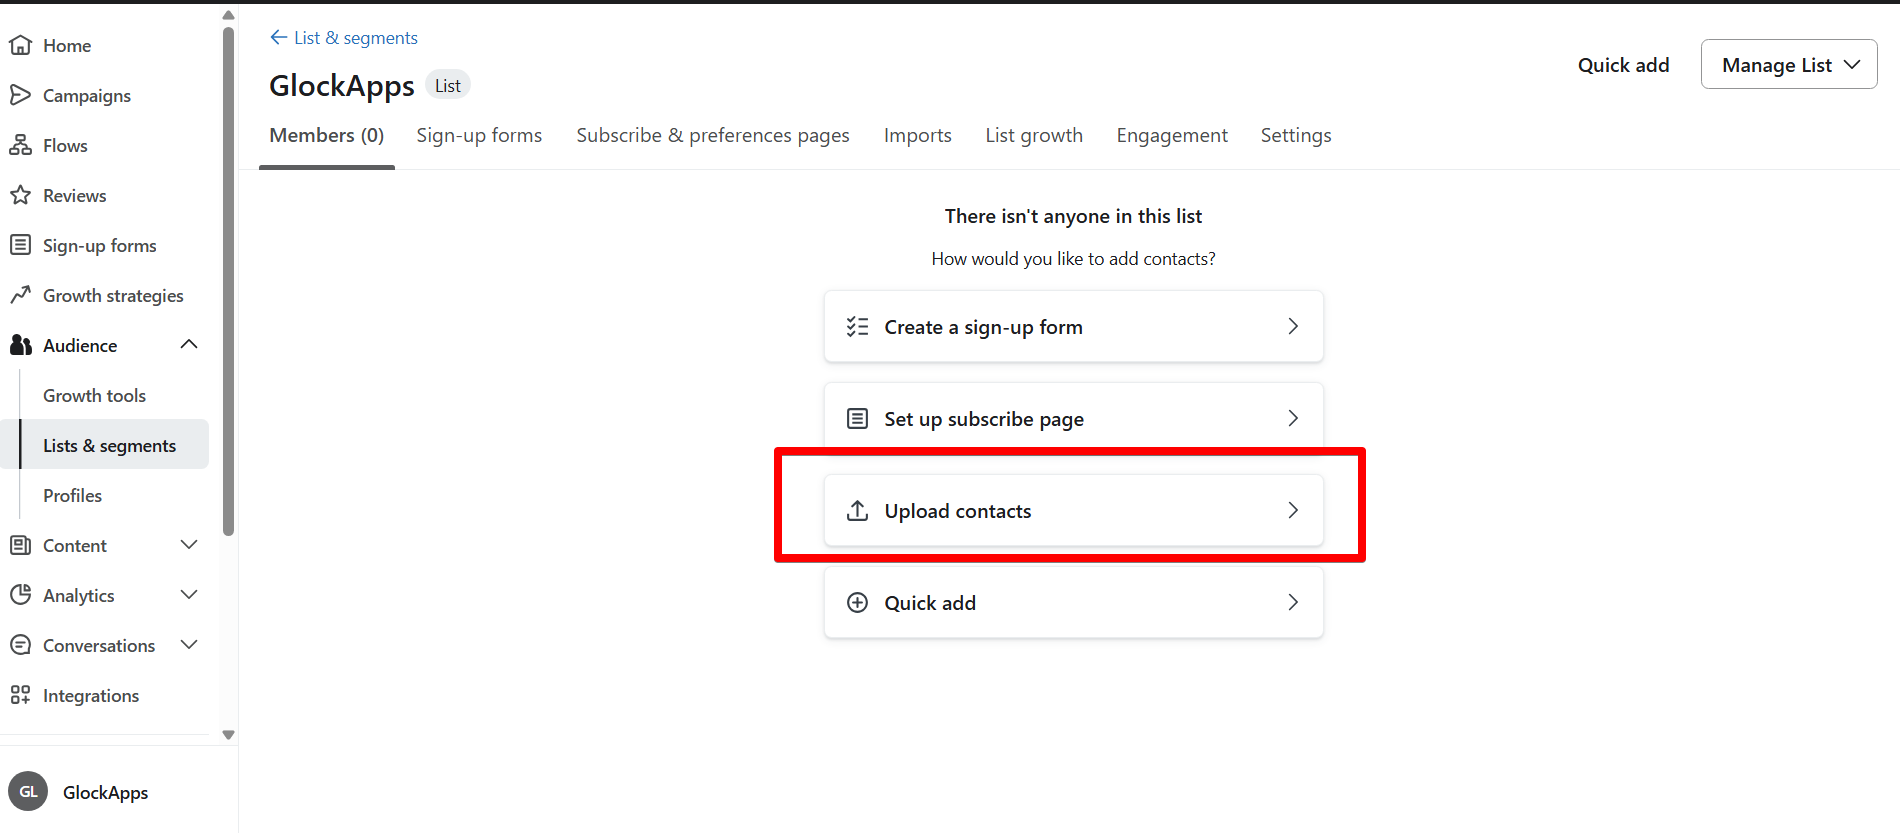
You’ll now be prompted to upload your seed list file. To do that, open GlockApps in a new browser tab.
Step 2: Download Your Personal Seed List from GlockApps.
- In GlockApps, go to the Reports section and click "Start Test".
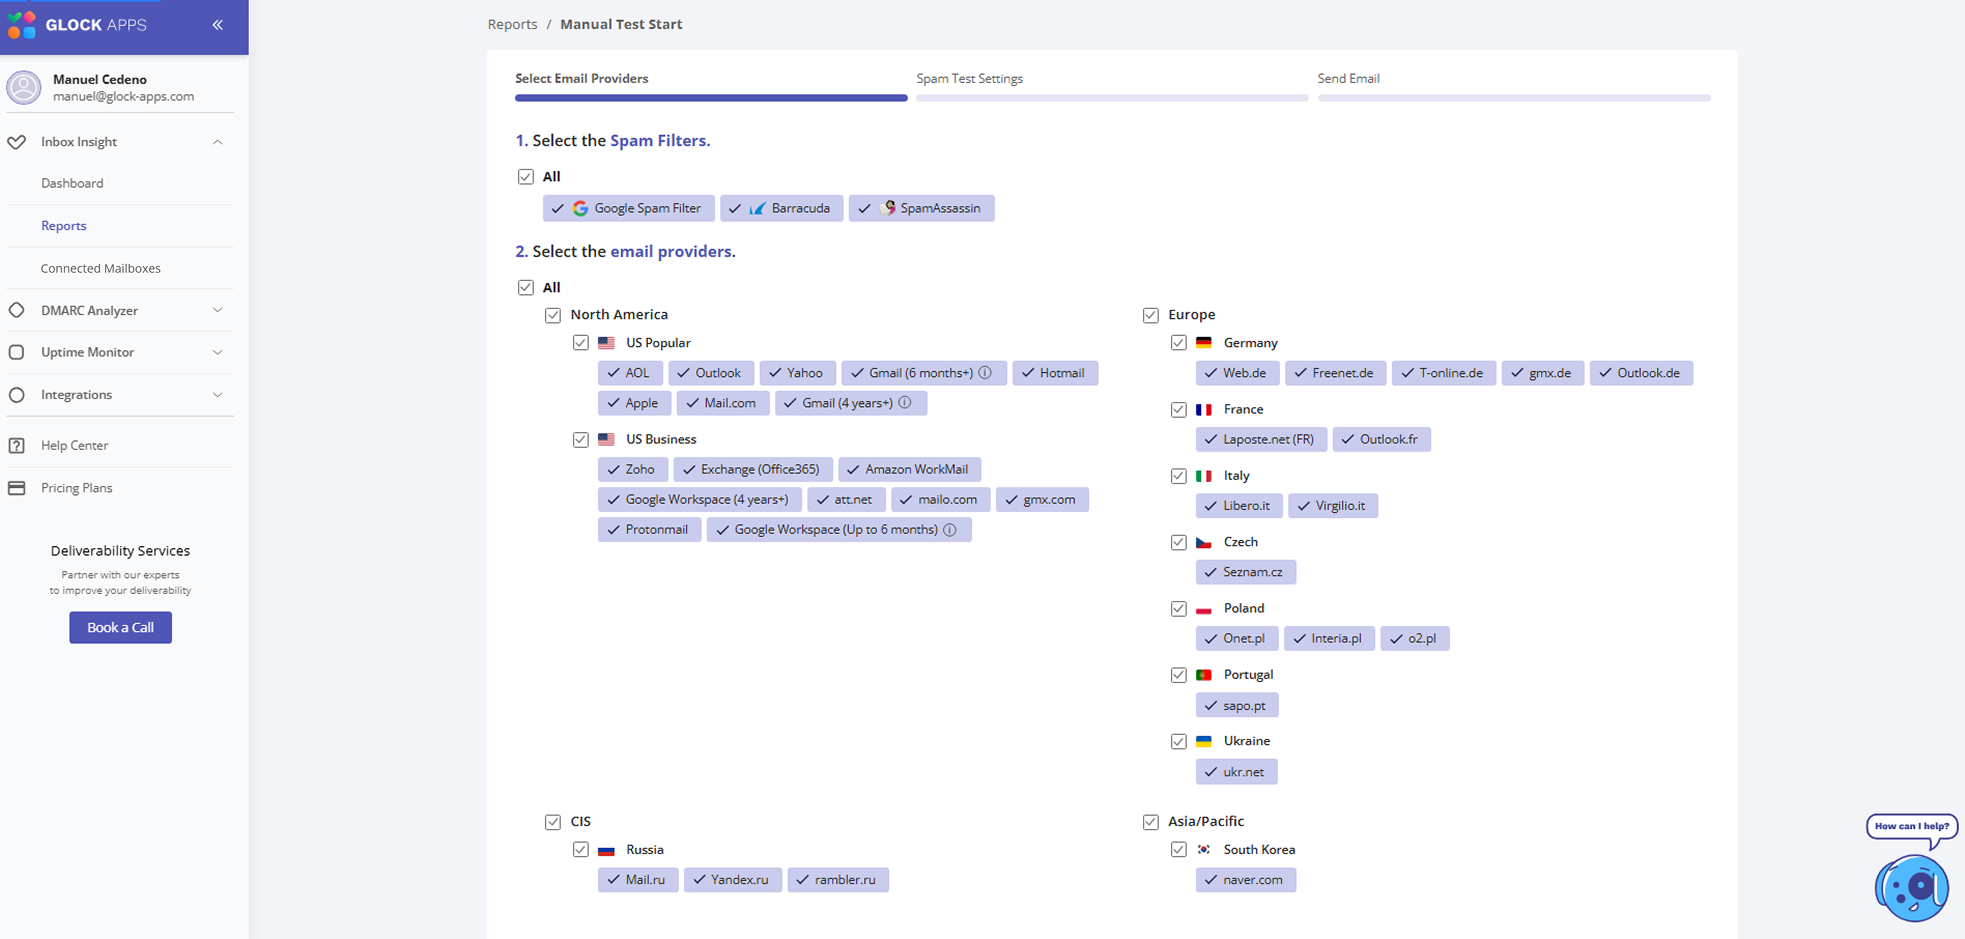
- Select the ESPs you want to test (such as Gmail, Outlook, Yahoo, etc.).
- You will then be redirected to a page showing your personal seed list.
- Click "Download" — the list will be saved as a CSV file by default.
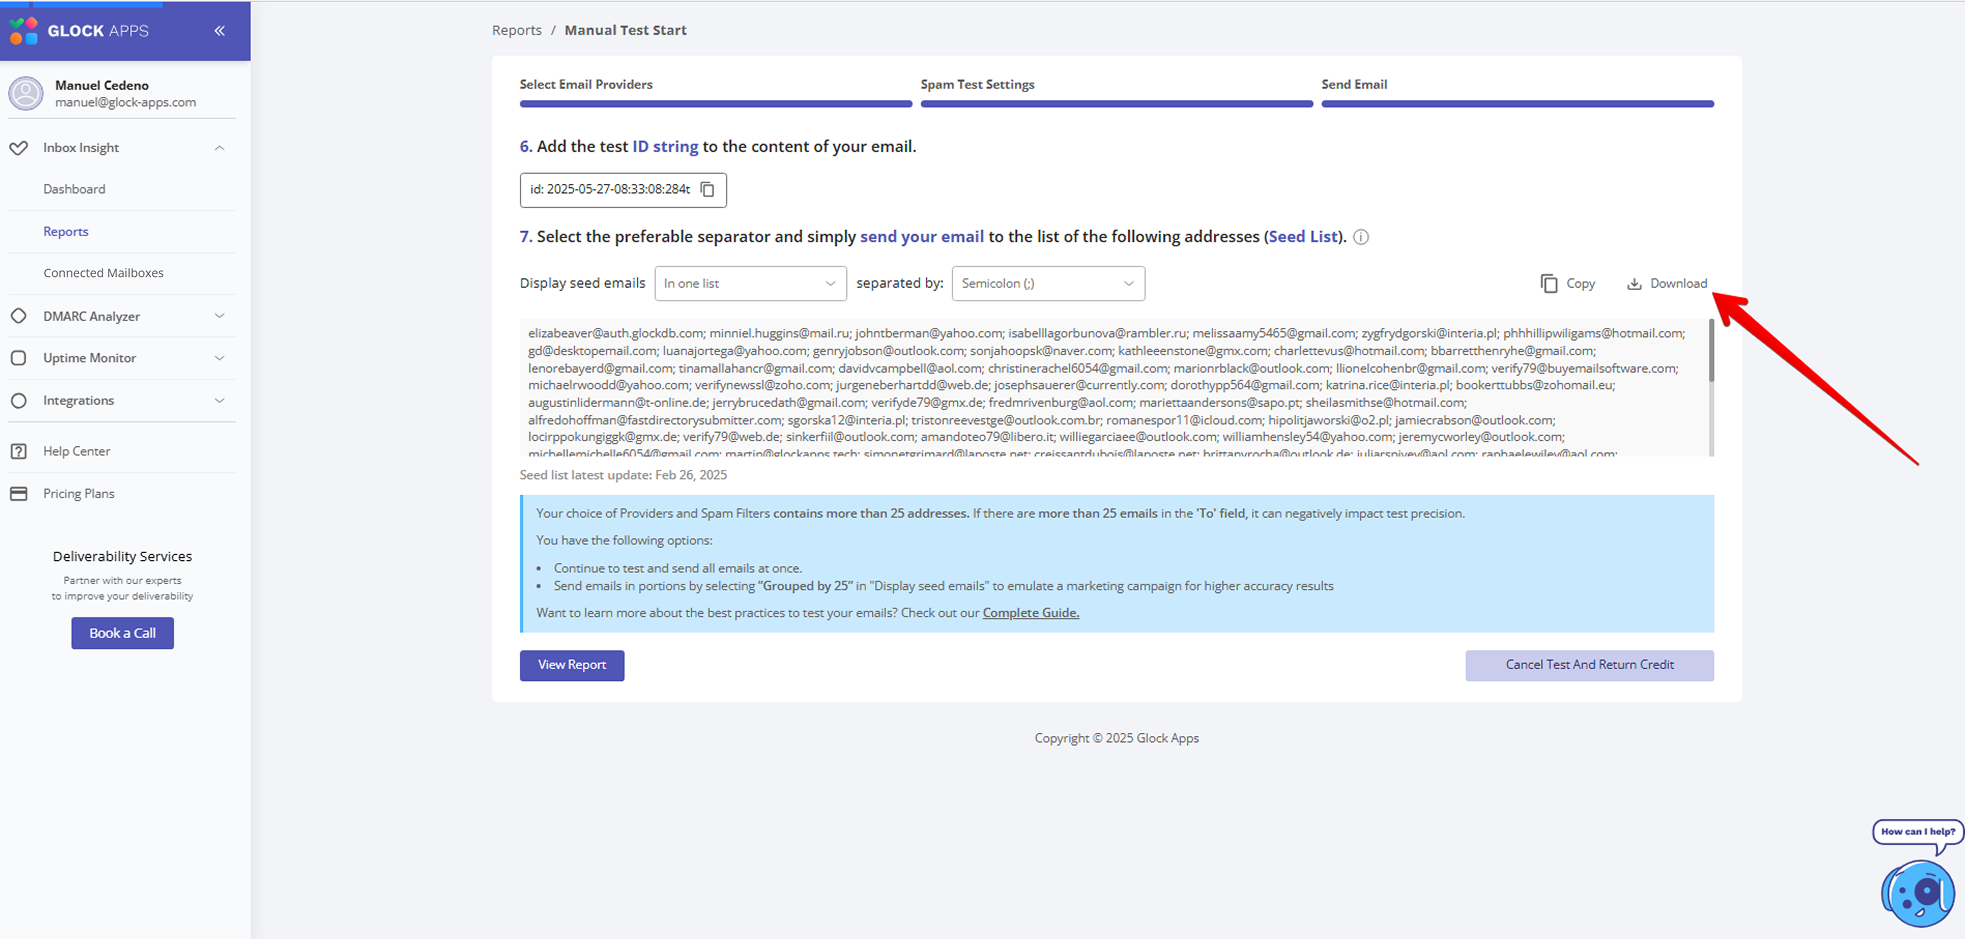
Step 3: Upload the Seed List to Klaviyo.
- Return to the Klaviyo tab and upload the CSV file you just downloaded.
- Klaviyo will auto-detect the email column. Simply press "Next" in the bottom right.
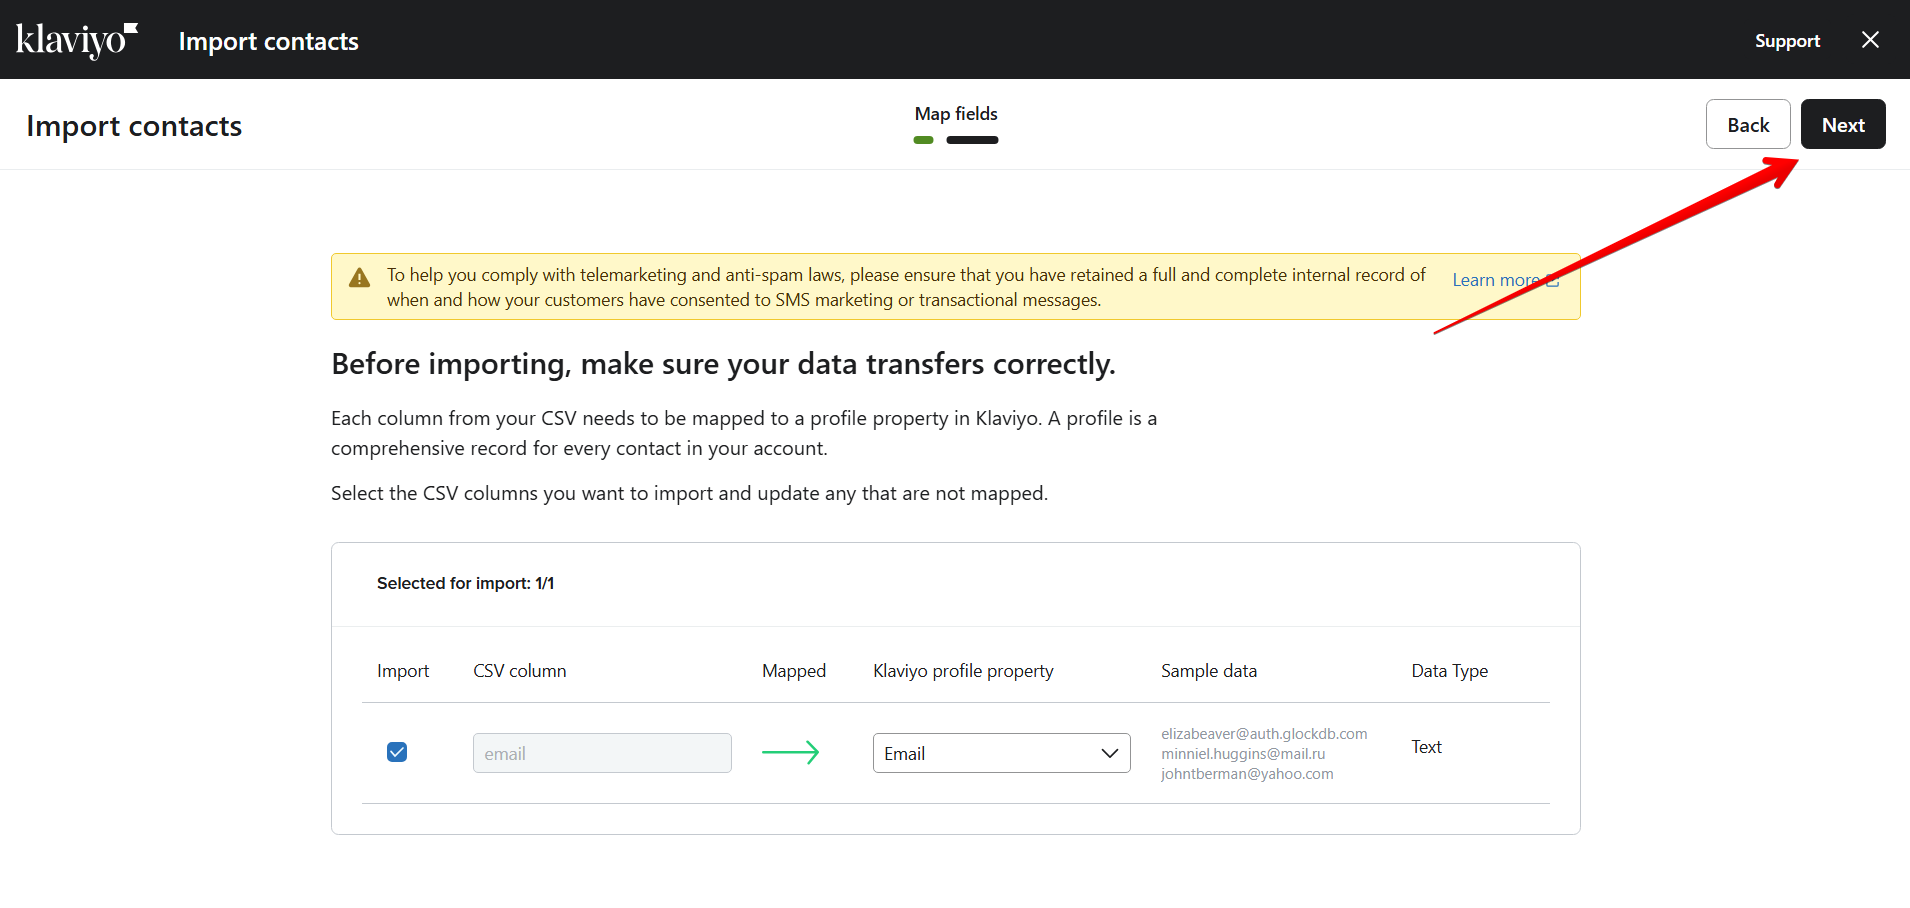
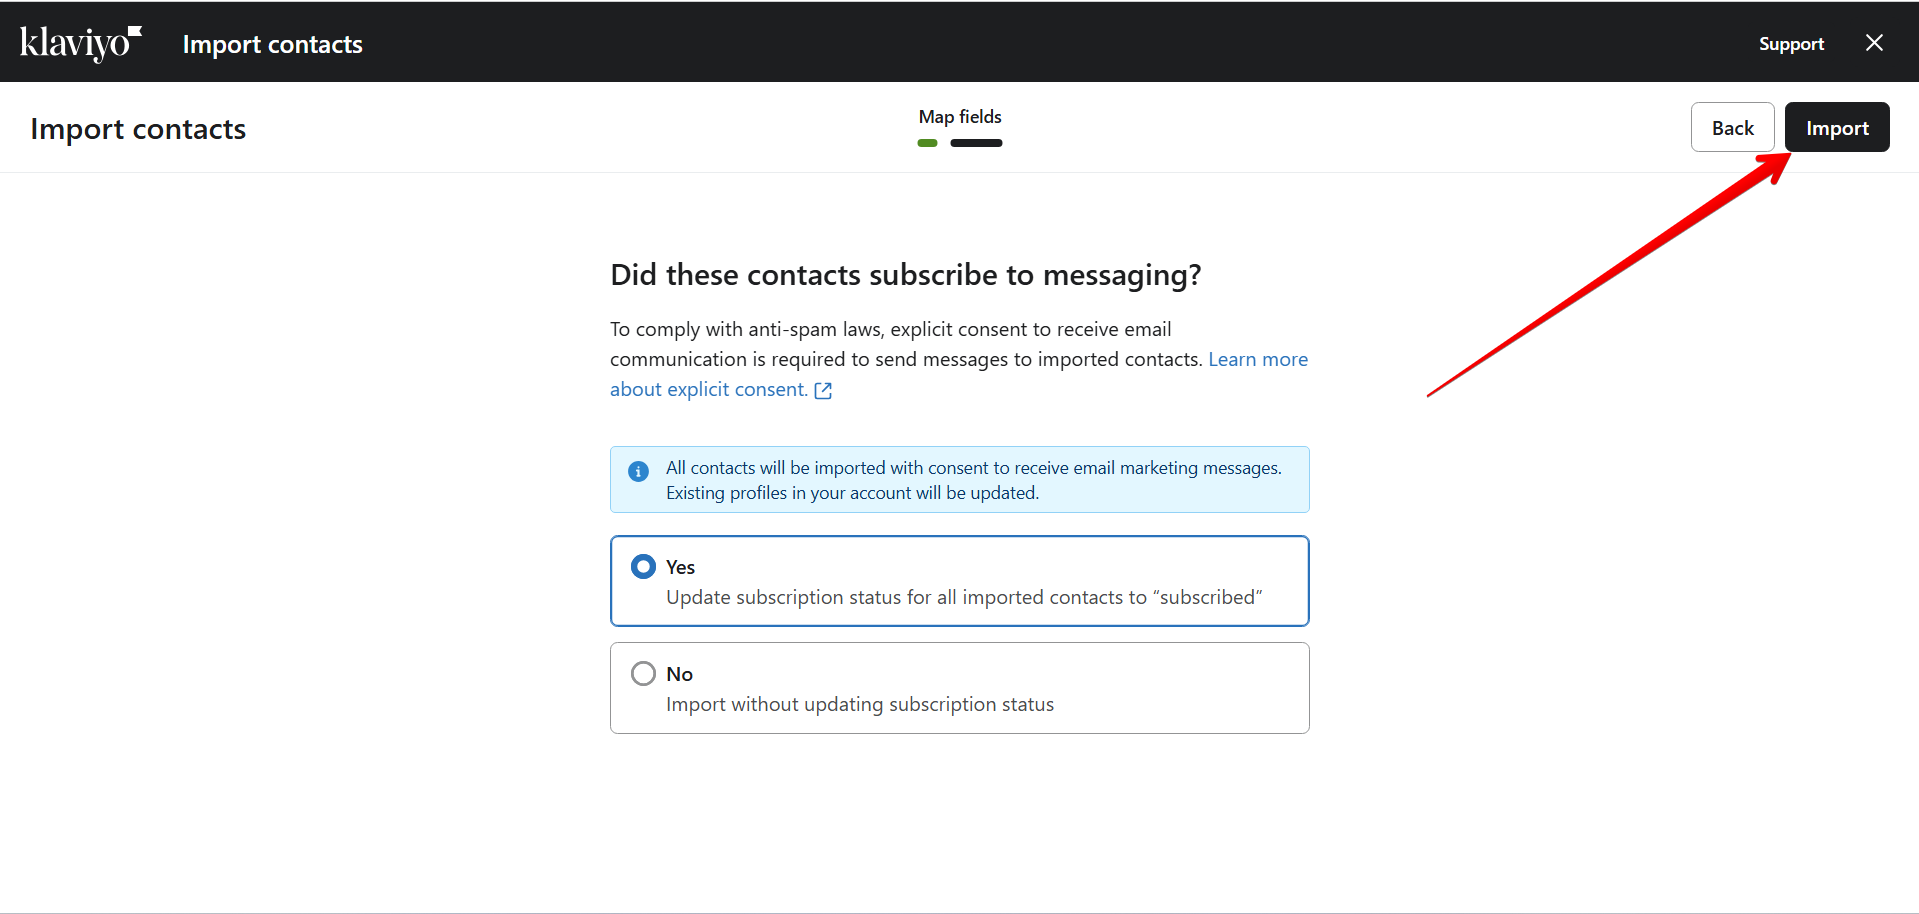
- When prompted with “Did these contacts subscribe to messaging?”, select “YES” and then click "Import".
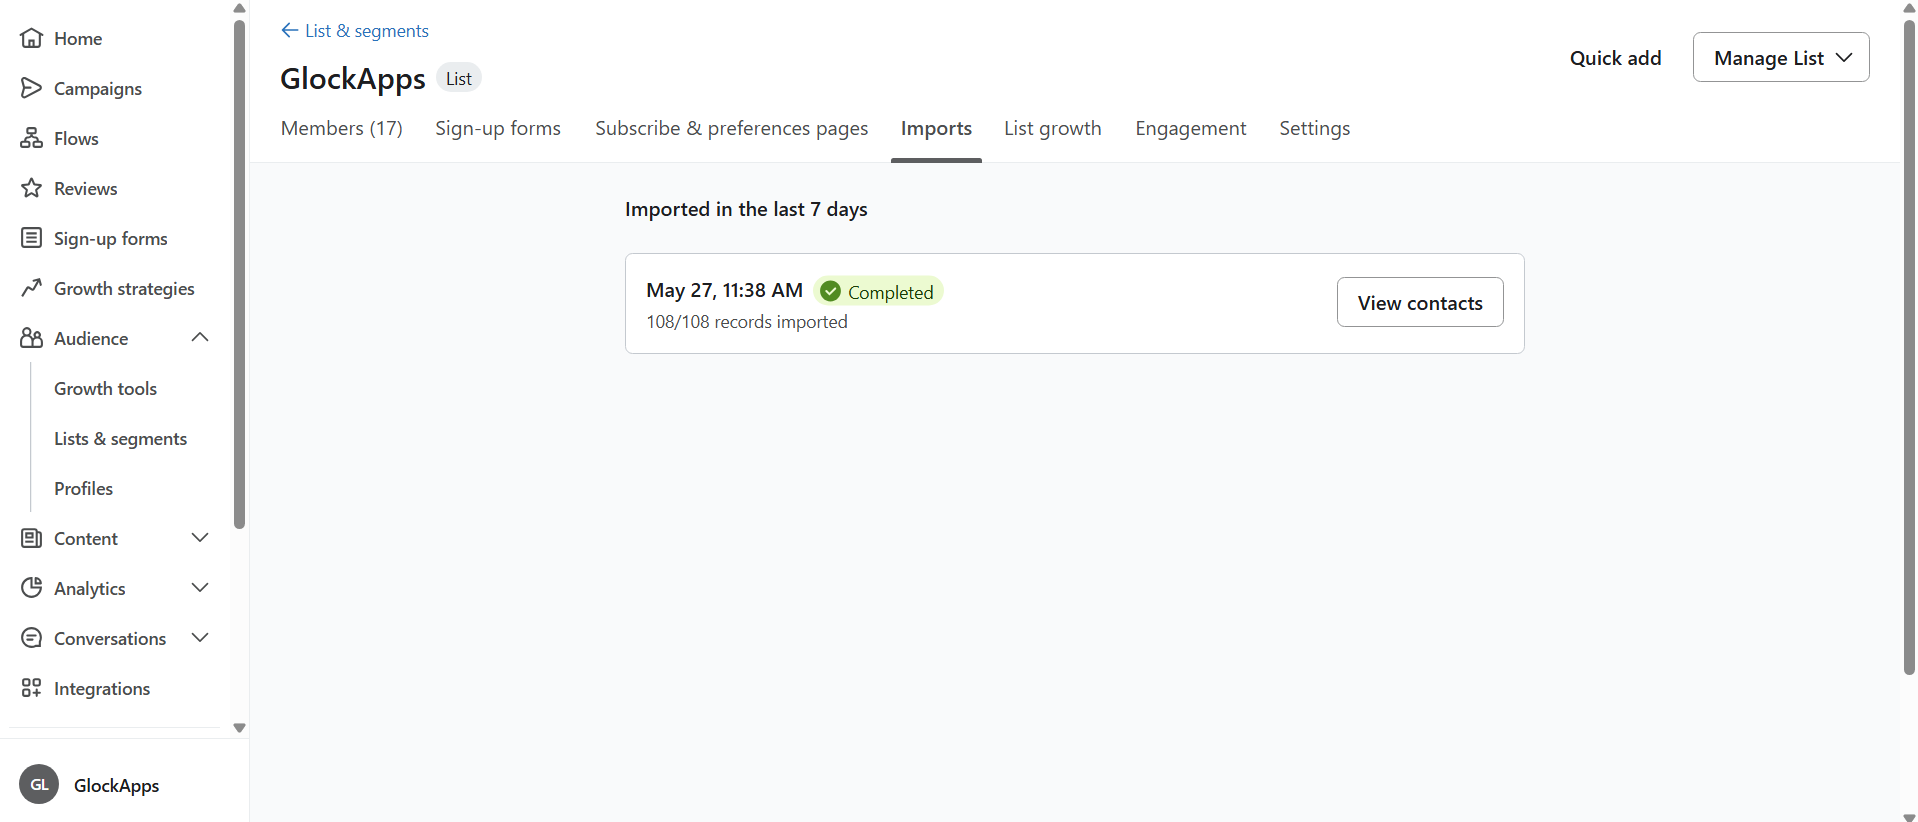
- Wait until the import status shows "Complete".
Part II: Create and Send a Test Campaign in Klaviyo
Now that your GlockApps seed list is uploaded into Klaviyo, it’s time to create a test campaign and track where your emails land.
Step 1: Create the Campaign
- Go to "Campaigns" in Klaviyo and click "Create Campaign."
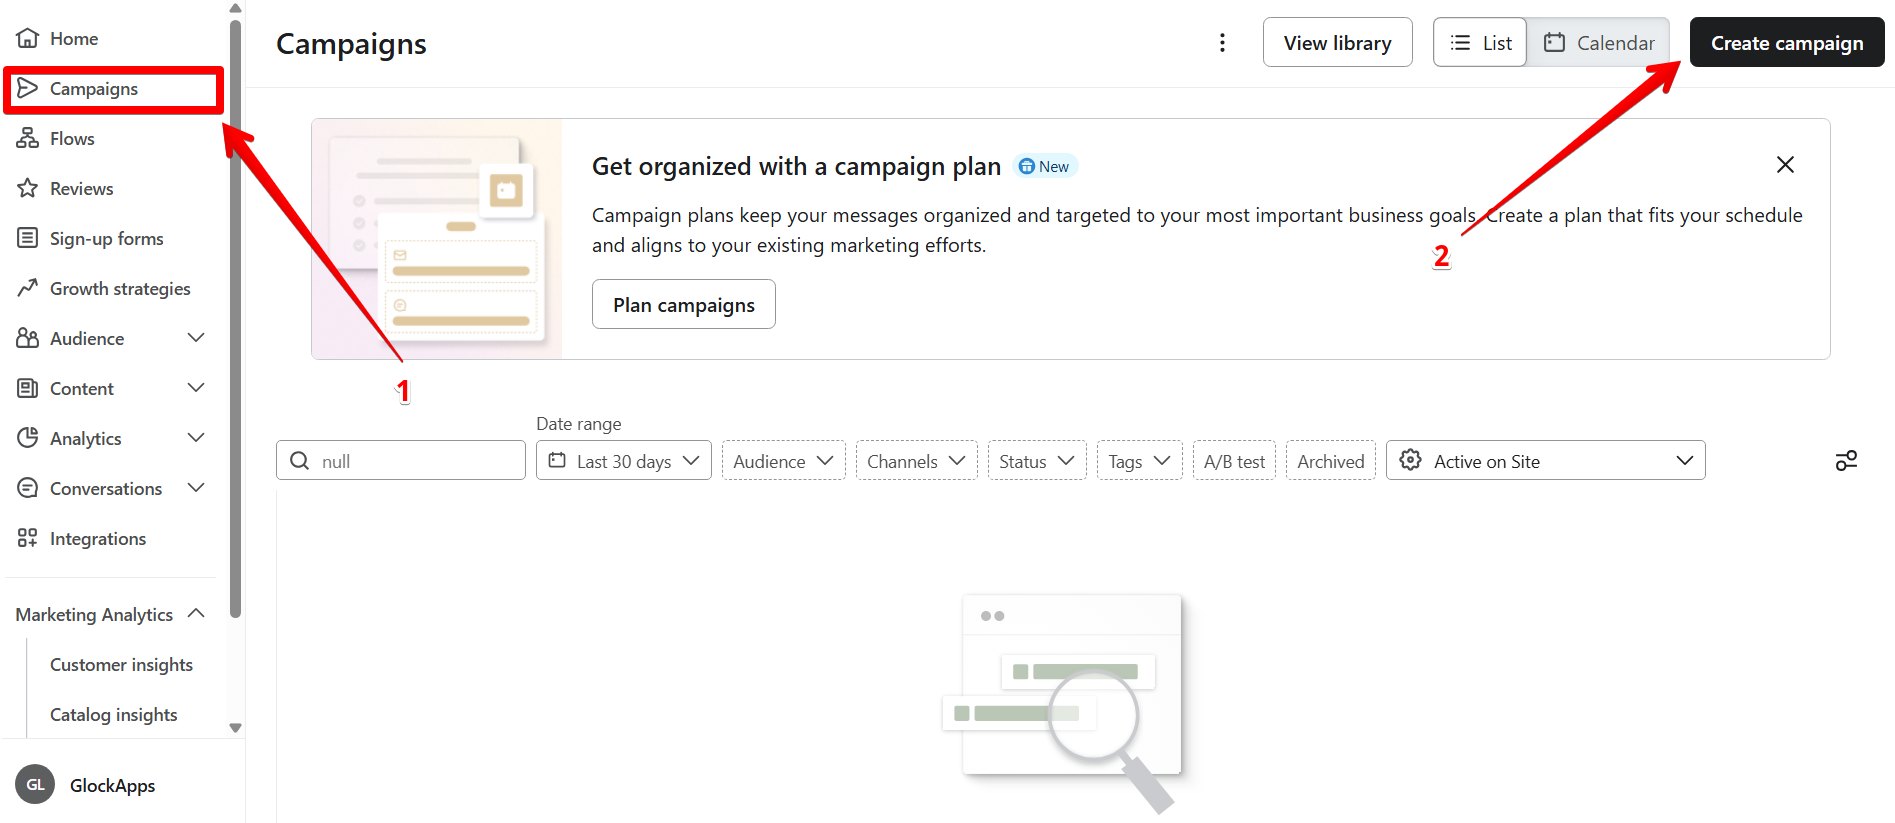
- Enter a campaign name, choose "Email" as the type, and click "Continue".
Step 2: Turn Off Smart Sending and Select List
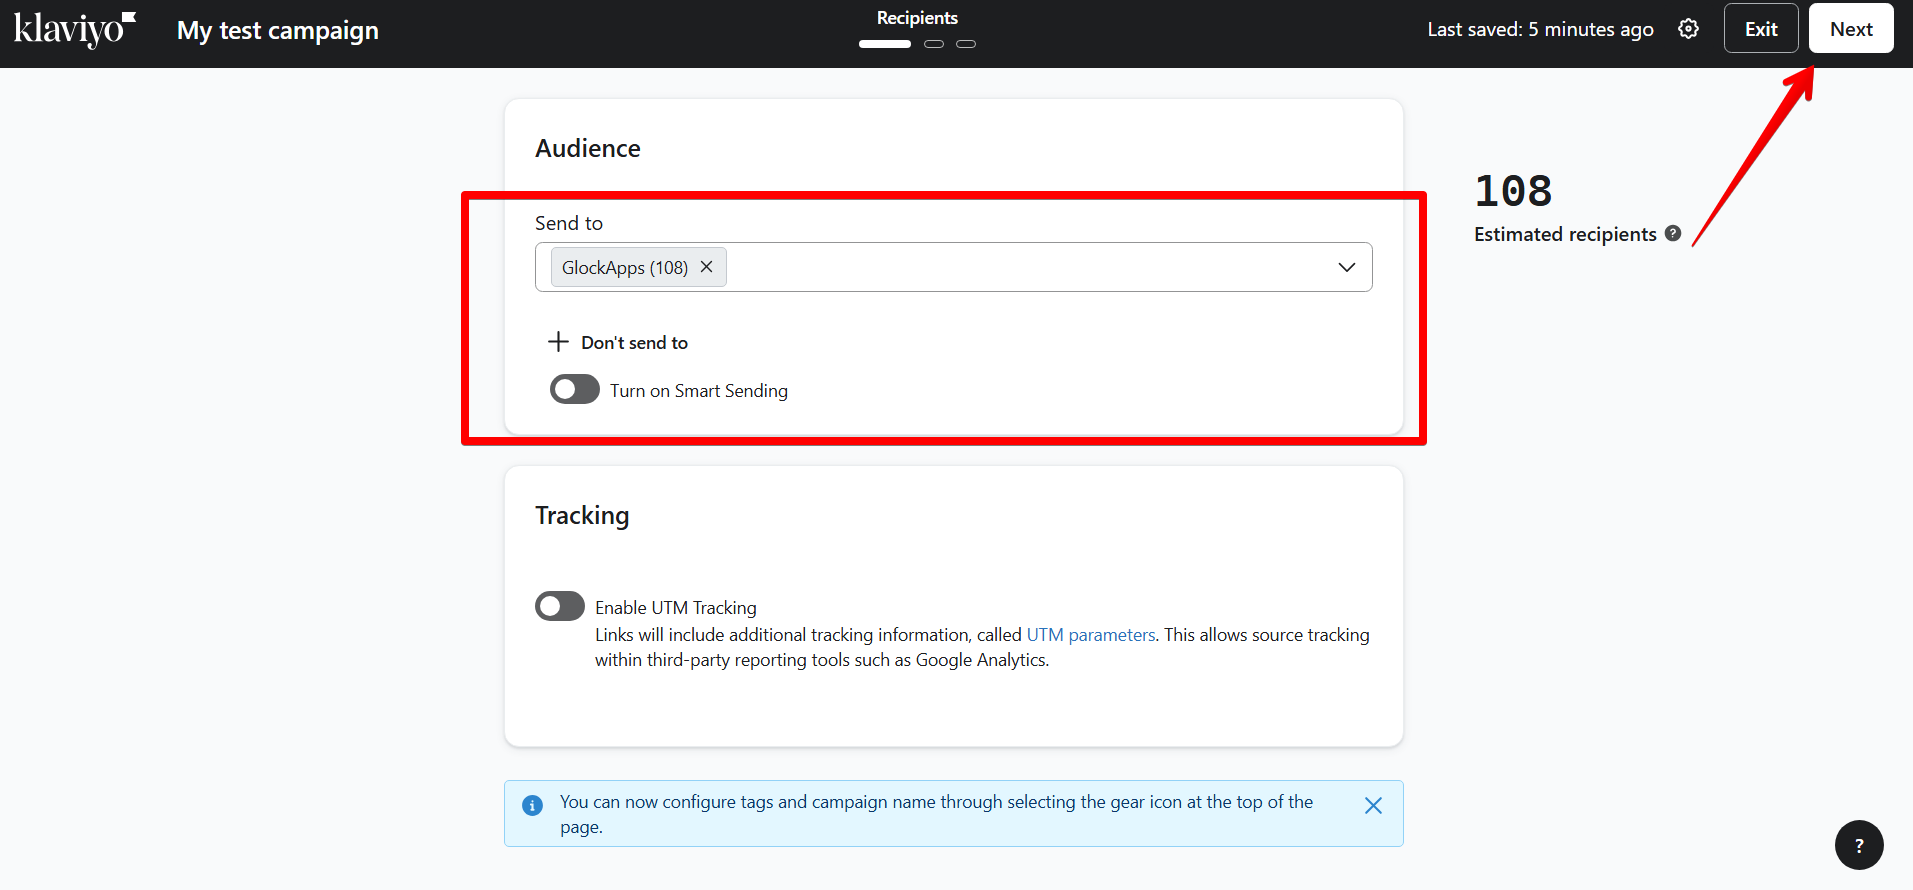
Important: On the setup page, ensure that Smart Sending is turned off; otherwise, it will affect the number of mailboxes that you're testing.
3. Select the list you created using your GlockApps seed addresses and click "Next".
Step 3: Create the Email and Add Spam Test ID.
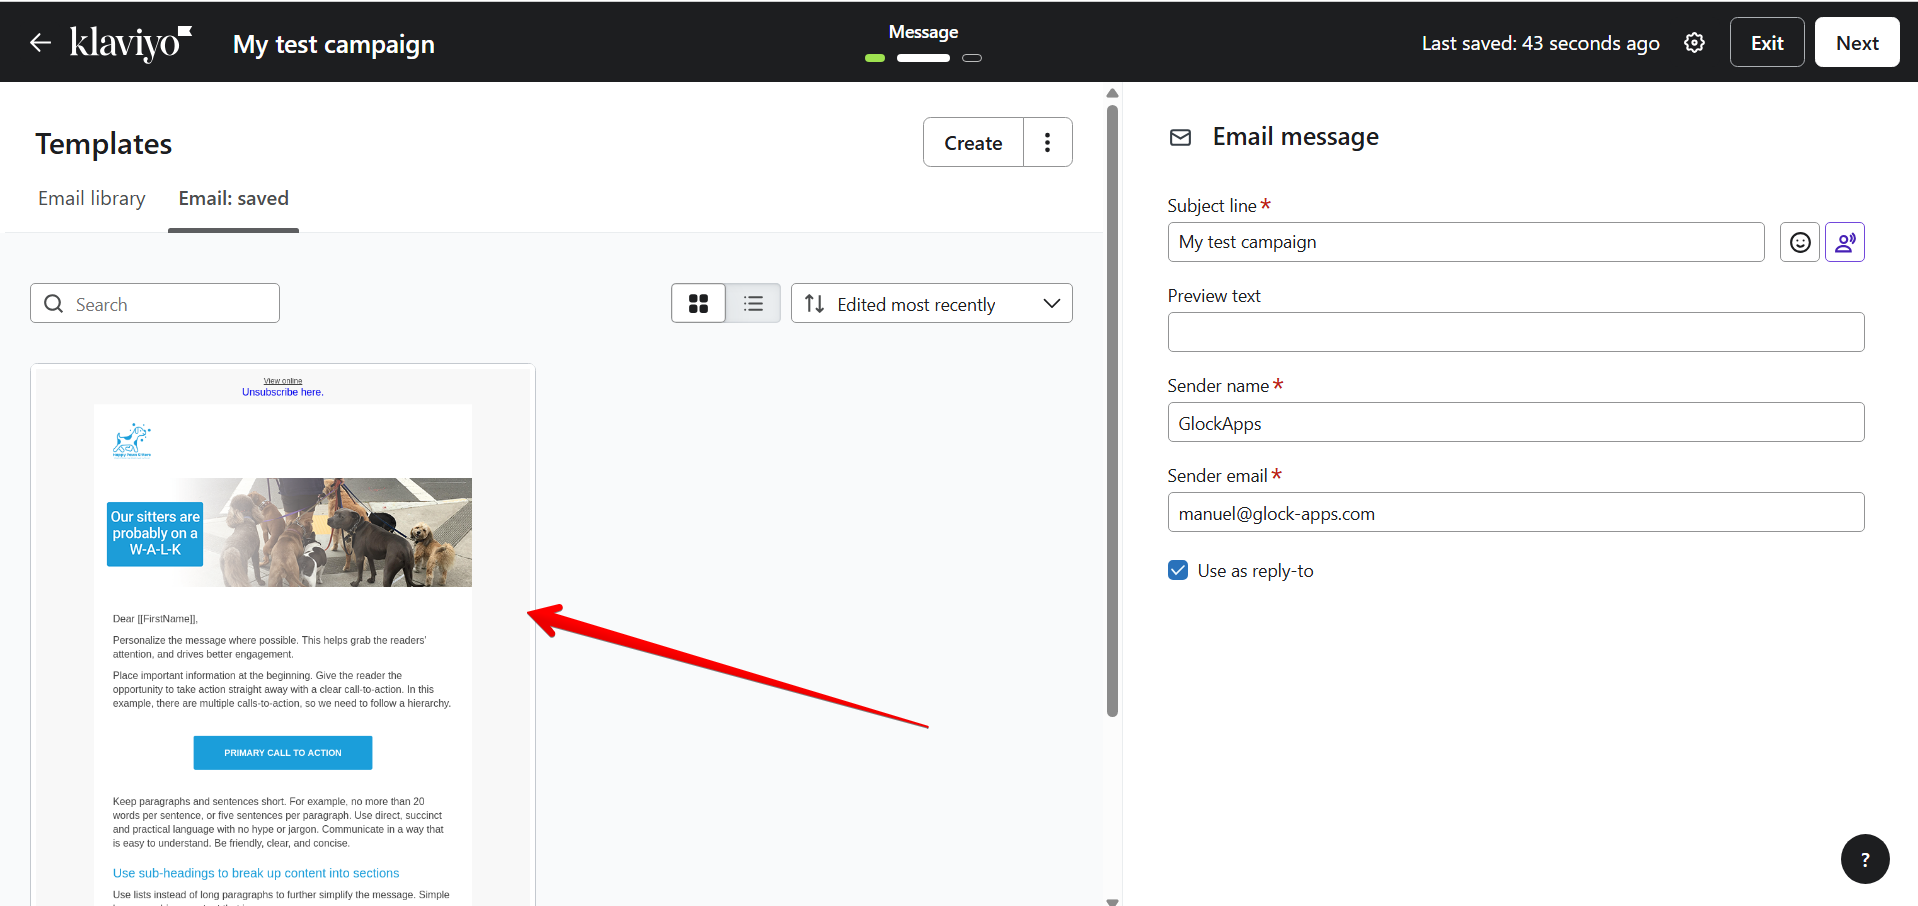
- Build your email using either the block editor or custom HTML; it's up to you.
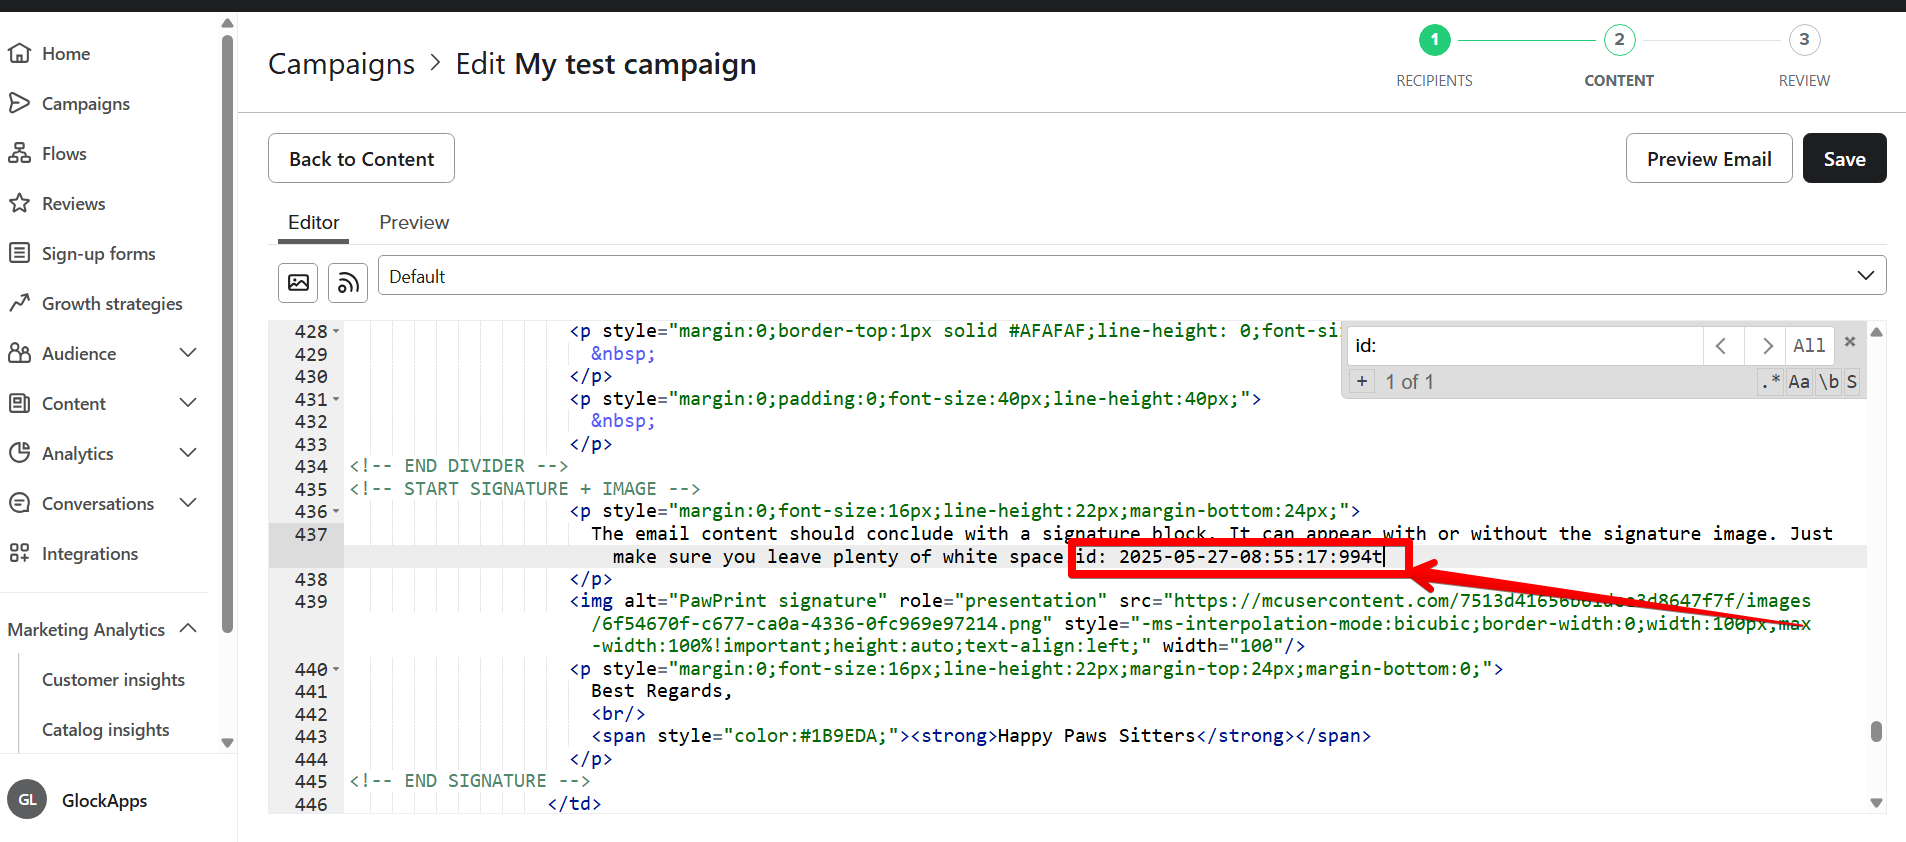
- You must include your GlockApps spam test ID inside the email body. Without it, you won’t receive test results.
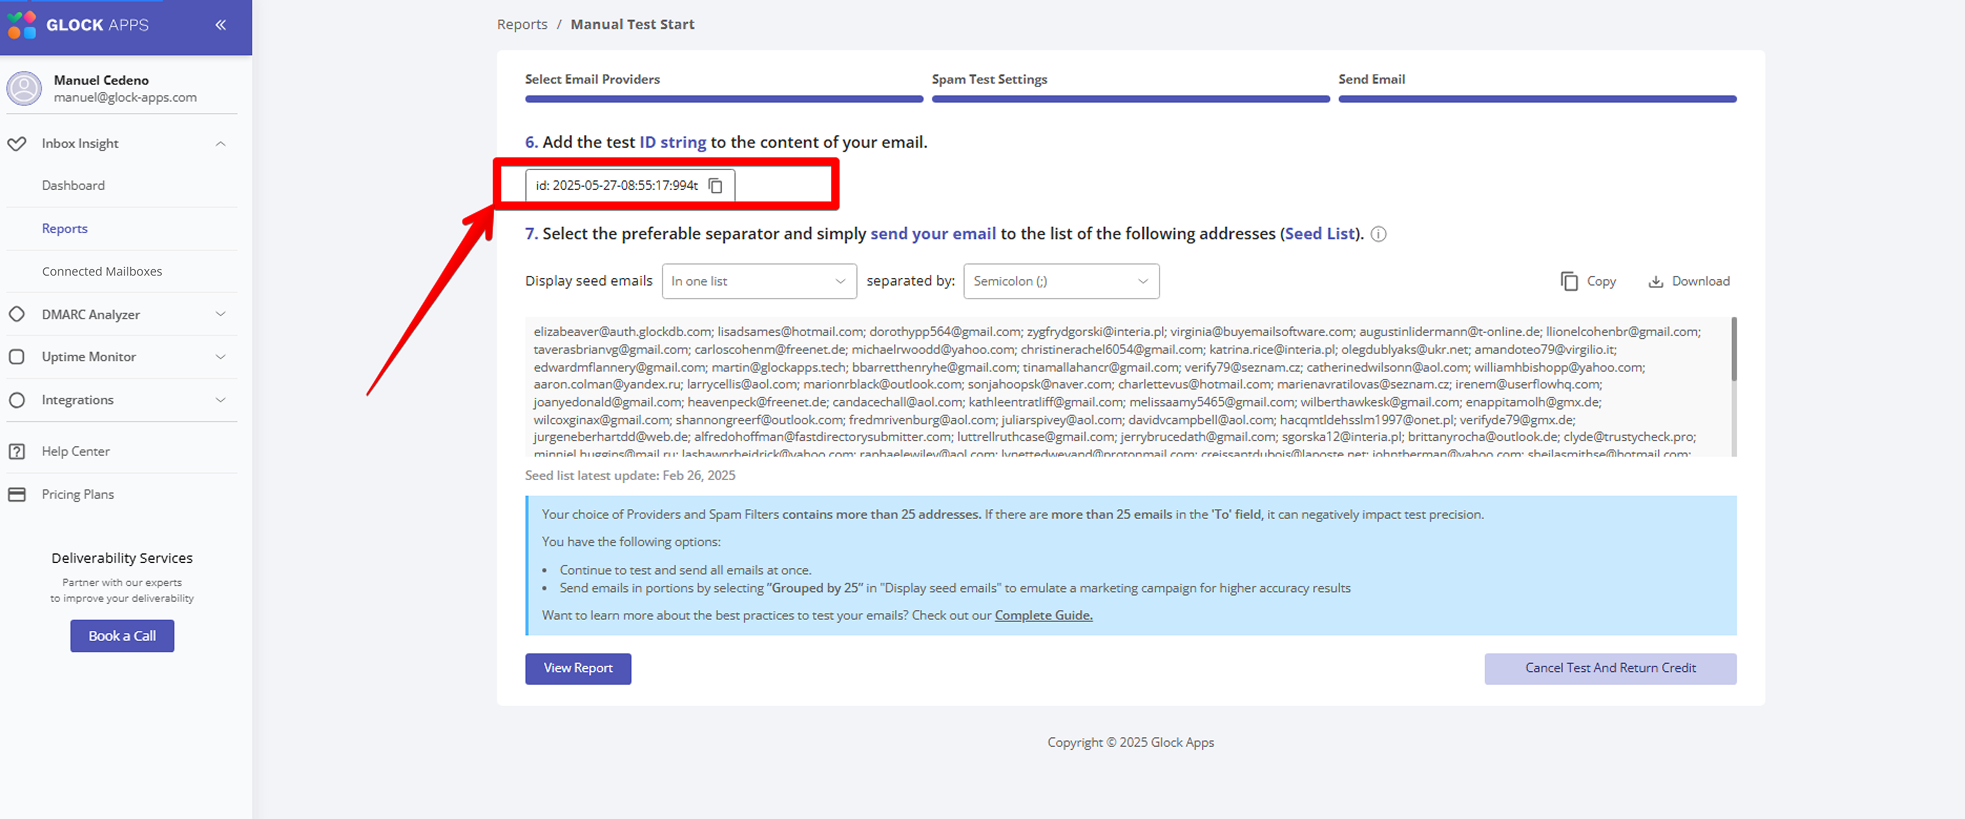
To get your test ID:
- Go back to GlockApps and start a new spam test as described in Step 2 above.
- On the final step of the process, you’ll receive a unique test ID.
Paste this test ID into a visible part of your email content.
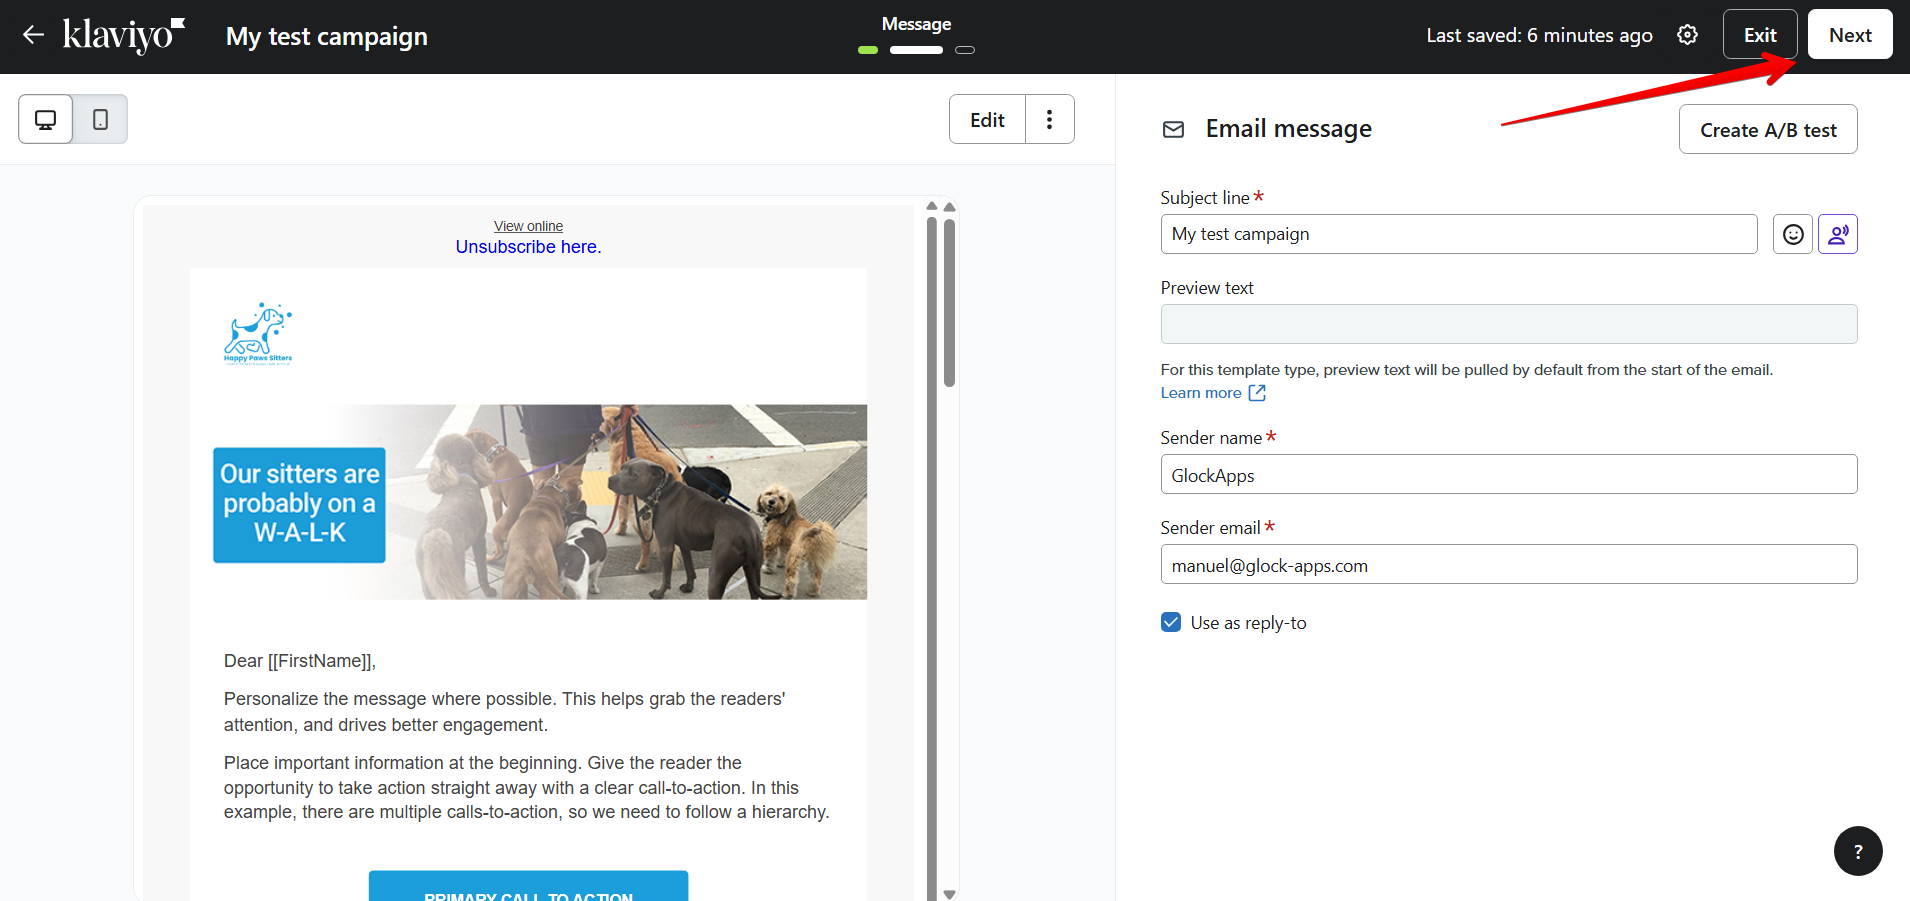
- Click "Save" → "Back to Content", then click "Next".
Step 4: Send the Campaign
- On the next screen, click "Schedule or Send".
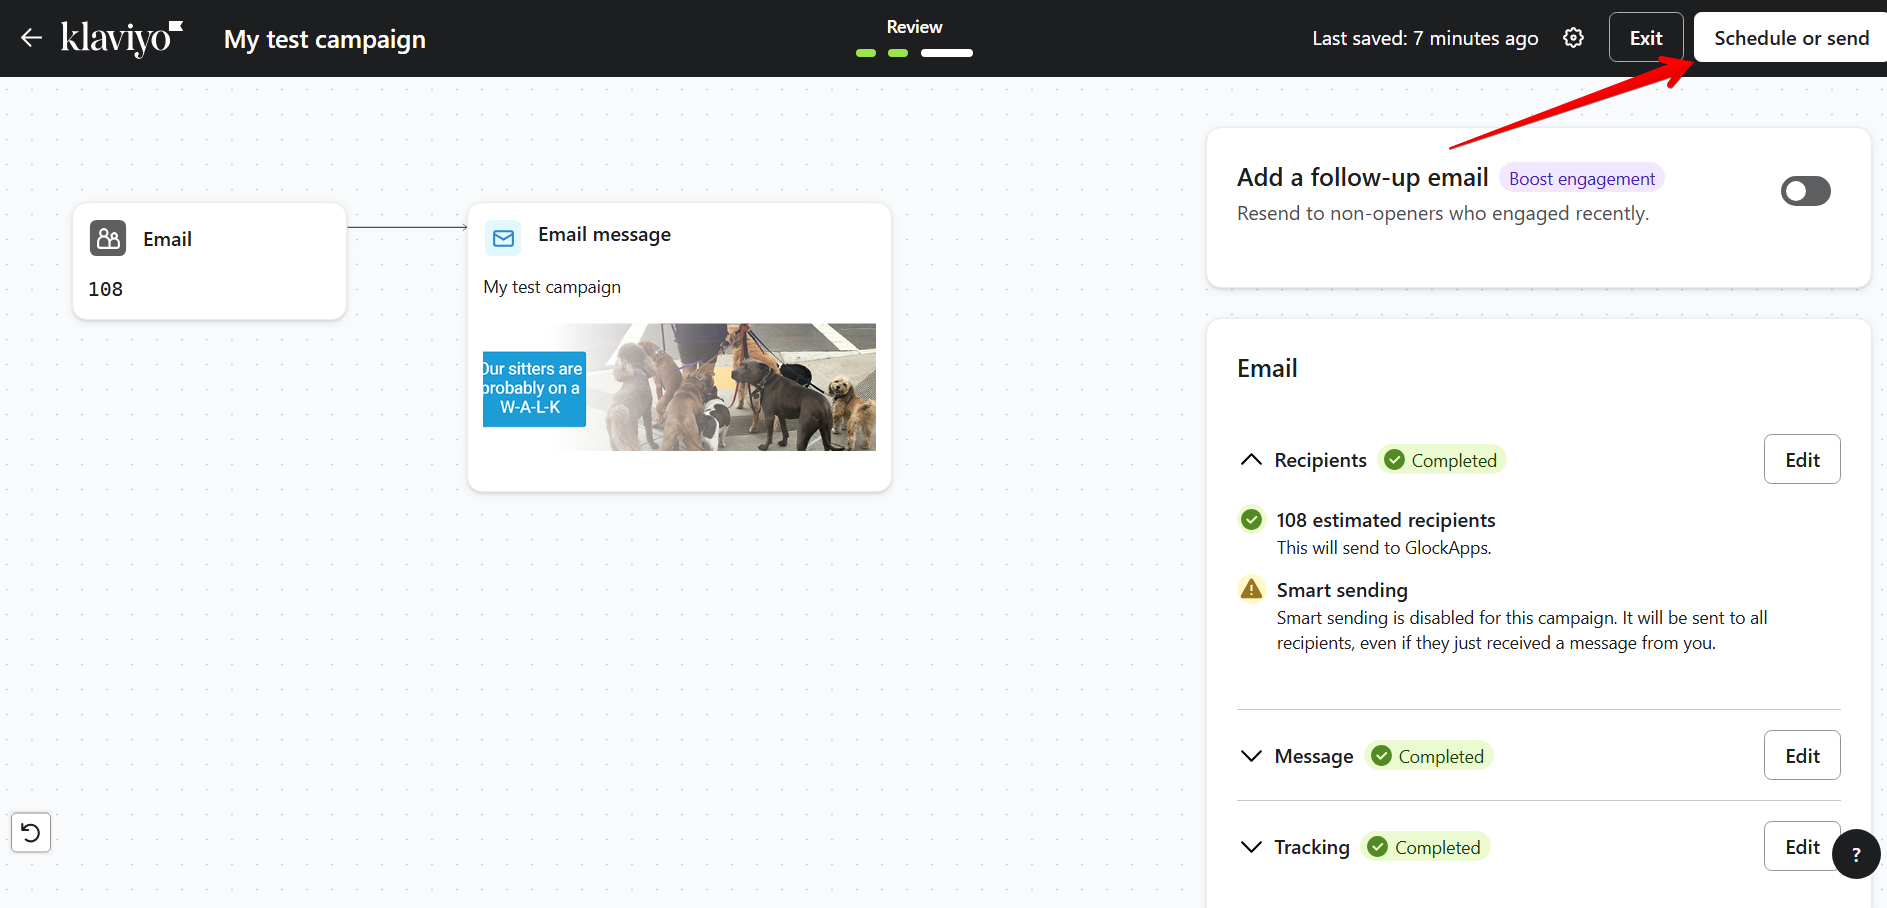
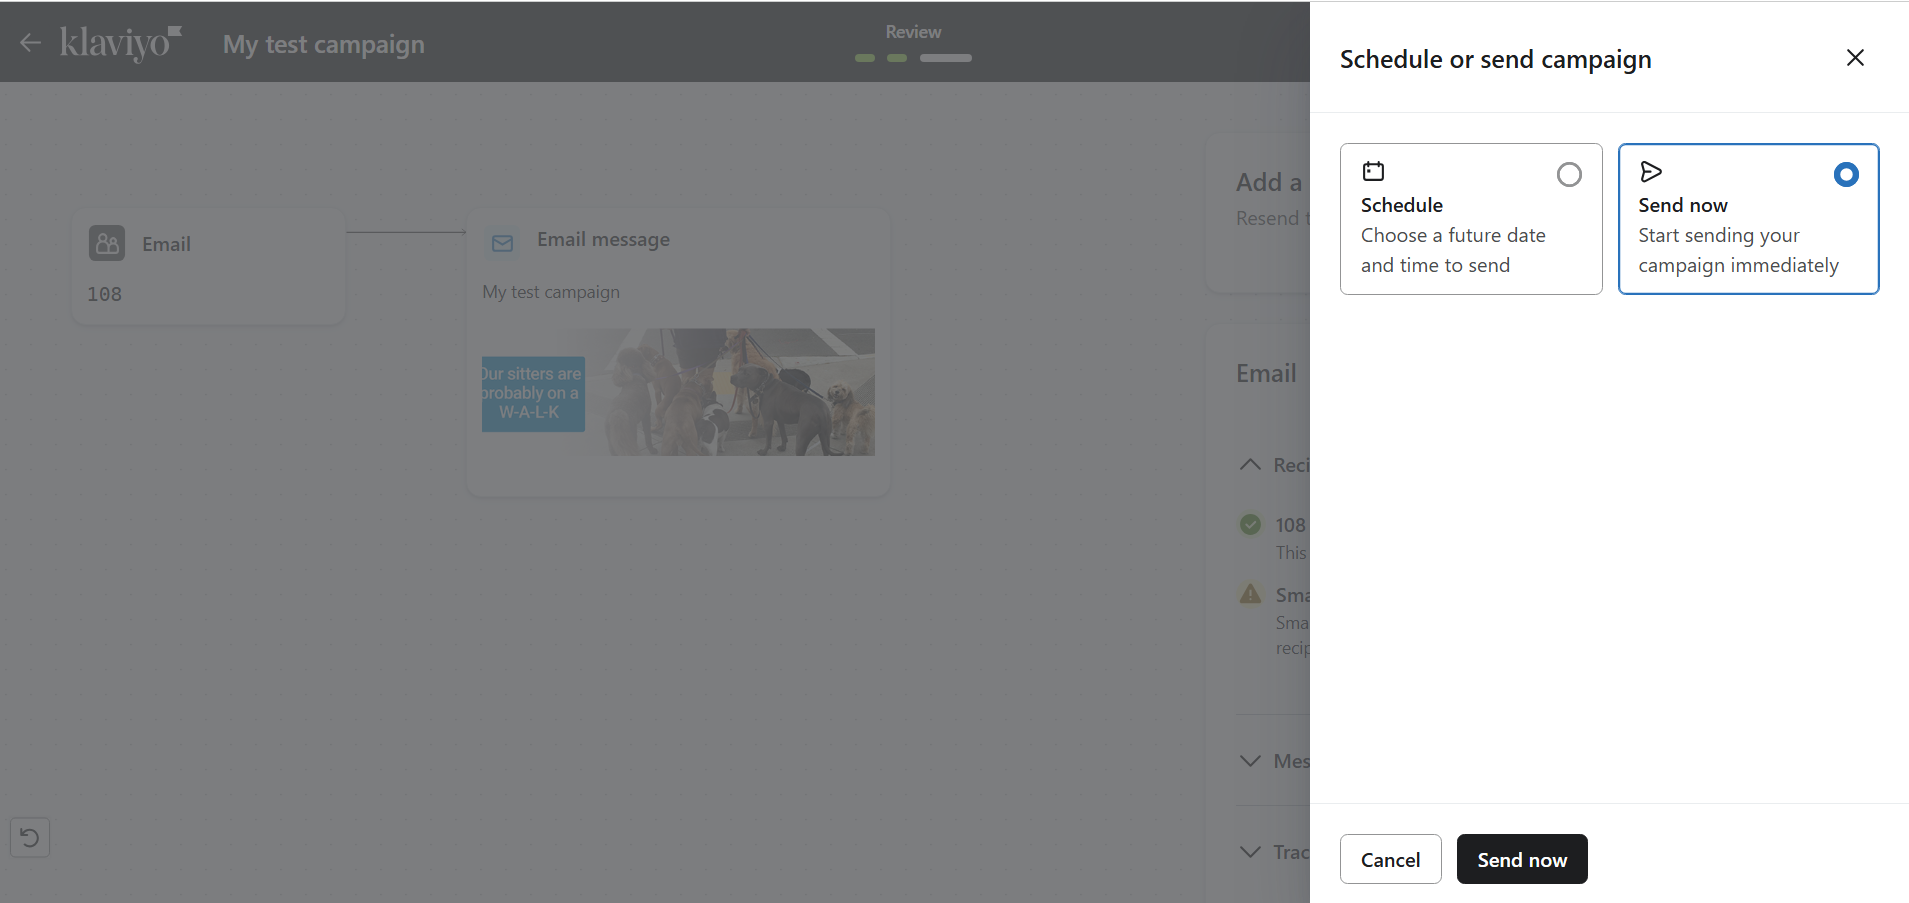
- Choose "Send Now" and confirm by clicking "Send Now" again.
Step 5: View GlockApps Test Report
- Go back to your GlockApps Reports page.
- Click "View Report" next to the test you started earlier.
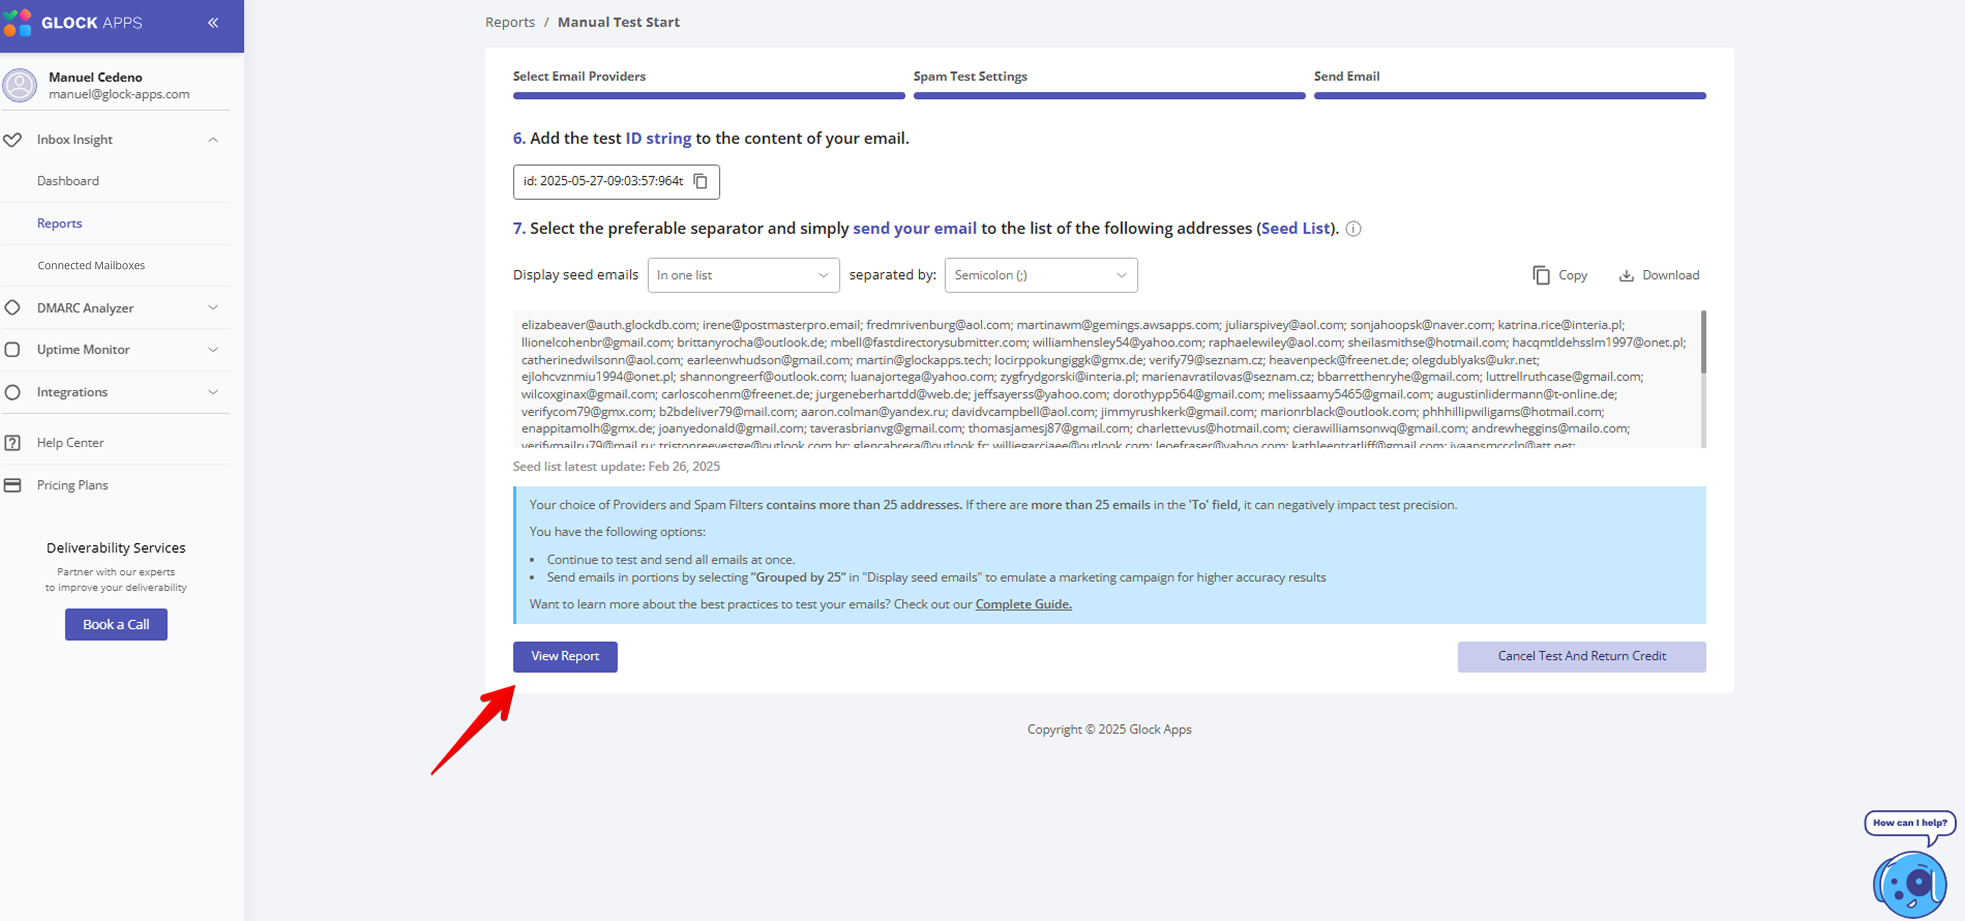
Your deliverability test results will now be available. These show whether your emails landed in the inbox, promotions tab, spam folder, or were missing entirely.
Note: Results may take up to 15 minutes to generate. This delay is due to how Klaviyo sends emails; each one is delivered individually through the ESP.
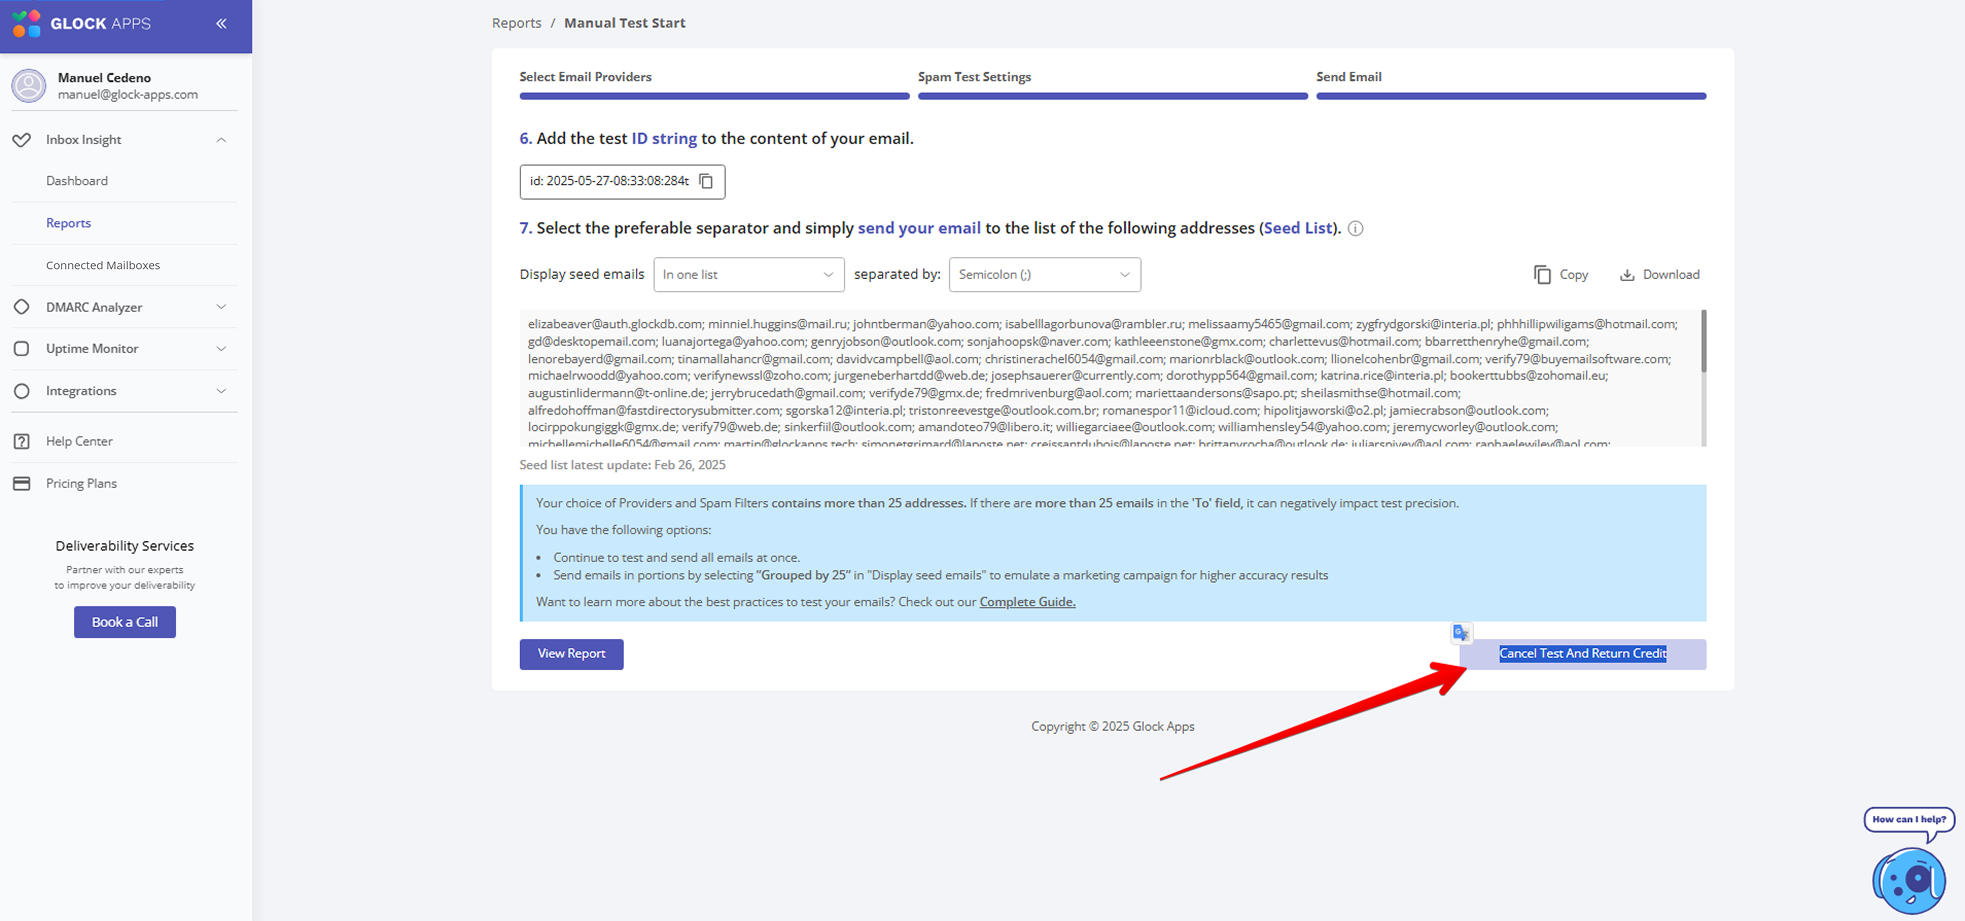
Optional but recommended: You can click Cancel Test And Return Credit to cancel the test and save the credit if you don't want to run the test now.
Conclusion
GlockApps integration with Klaviyo is one of the most effective ways to monitor and improve your email deliverability. By following this tutorial, you ensure your emails are properly tested across different providers, giving you full visibility into your inbox placement and helping you identify spam triggers before launching to your main audience.

