Sending accounts in GlockApps are used to perform automatic tests and run email tests via proxy email addresses. Thanks to built-in integrations, you can quickly connect GlockApps with your Gmail or Google Workspace account, Outlook, Hotmail or Office 365 account. Additionally, you can integrate GlockApps with the SMTP settings of email service providers and delivery services that allow to use their SMTP servers in third party applications.
Below are the steps to connect to your Microsoft account from GlockApps:
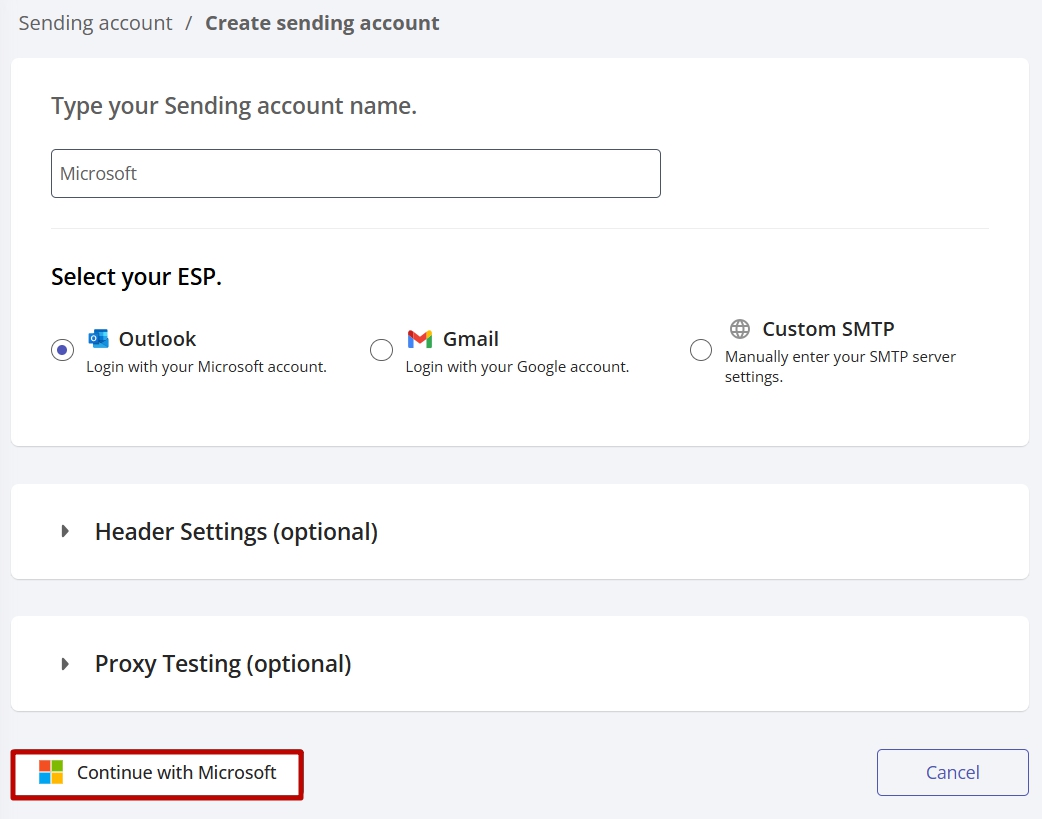
In your account, go to Inbox Insight -> Sending Accounts.
Click “Create Sending Account.”
Type your sending accout name. It can be any name in order you can recognize the sending account in the dashboard.
Select Outlook as your email service provider.
Click “Continue with Microsoft.”
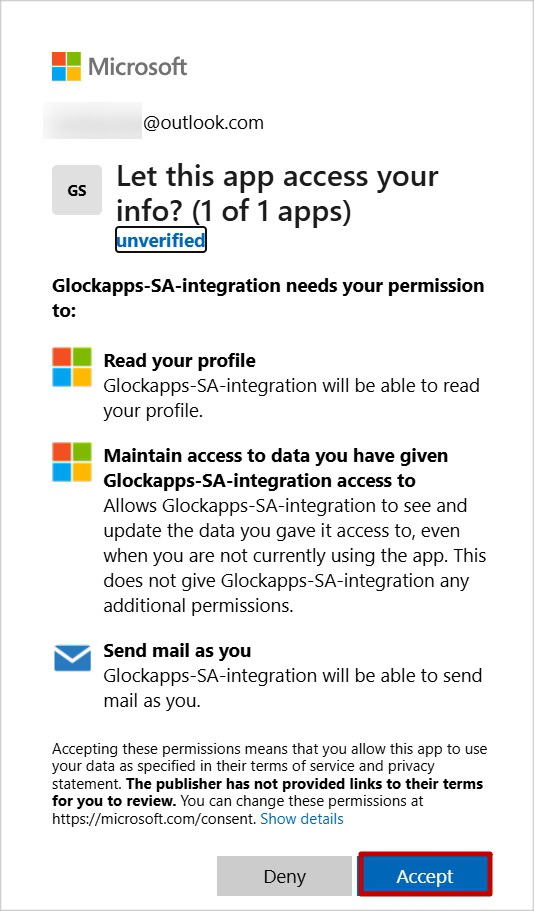
Select the Microsoft account you want to connect with. Go through the login and verification process if needed.
Click “Accept” to give GlockApps permissions to access your account and send mail on behalf of you.
If the connection is successful, your account will appear in the Primary Settings.

Next, you can configure additional settings.
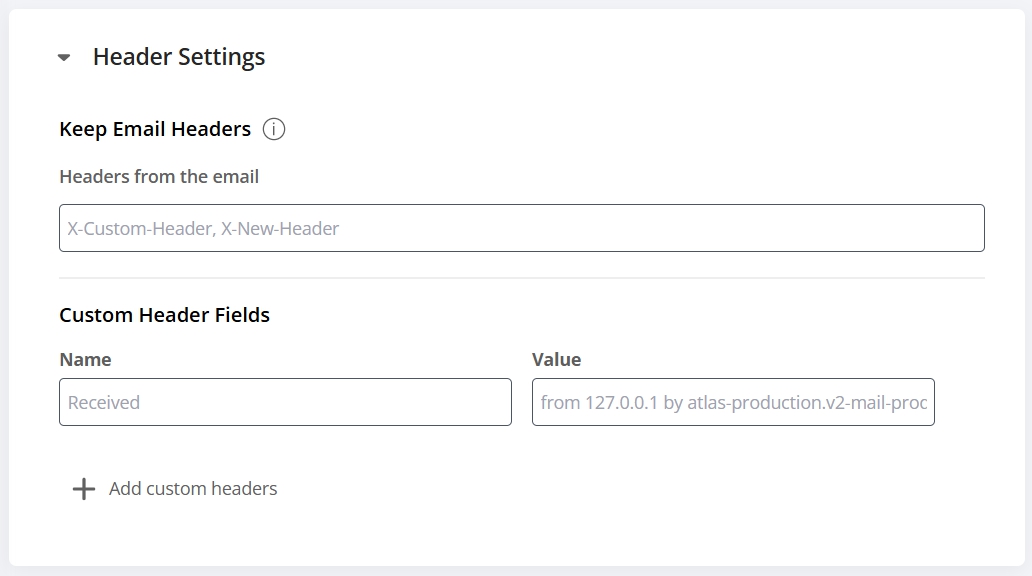
Header Settings
When sending your message to the seed list, GlockApps will only retain certain message headers such as ‘MIME-Version’, ‘Content-Type’, ‘Reply-To’, ‘List-Id’, ‘List-Unsubscribe’, and ‘Subject’.
However, if you wish GlockApps to retain other message headers, list them in the field separated by commas.
Additionally, you can type a name and value of a new header field to be added to the message headers while sending your message to the seed list.
Click “Add Custom Headers” to add a new custom header field.
When done, click “Save”.
If no custom headers are needed, skip these settings.
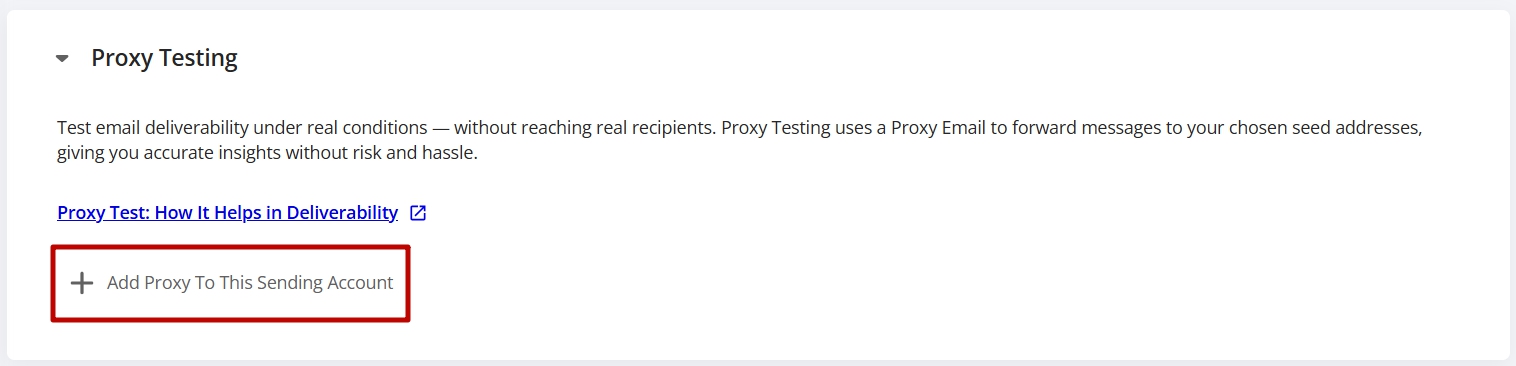
Proxy Testing
A proxy testing mode allows you to send the message to a single proxy email address instead of the whole seed list. The message will be then re-sent to the chosen seed list via your sending account.
The proxy testing eliminates the steps involved in the manual testing and provides a quick and easy email testing option.
To be able to use this mode, you have to generate a proxy email address that will be associated with the sending account.
To do this, click “Add Proxy to this Sending Account.”
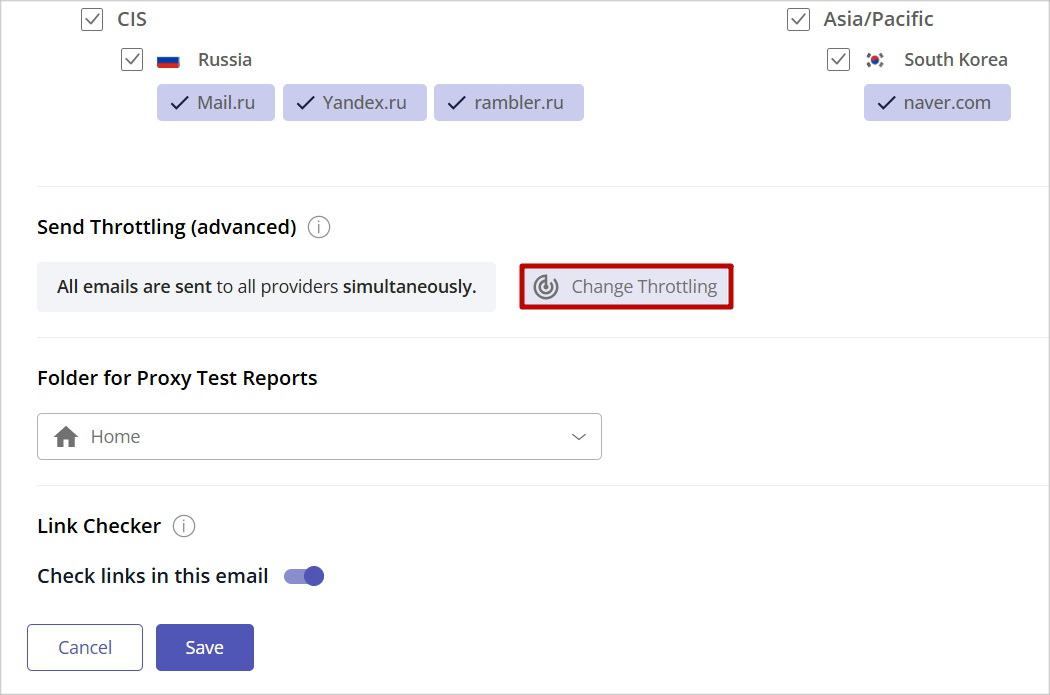
Verify the selection of spam filters and inbox providers for proxy testing. You can remove the check marks next to the providers that you don’t want to use.
Throttling
Next, set the email throttling if required.
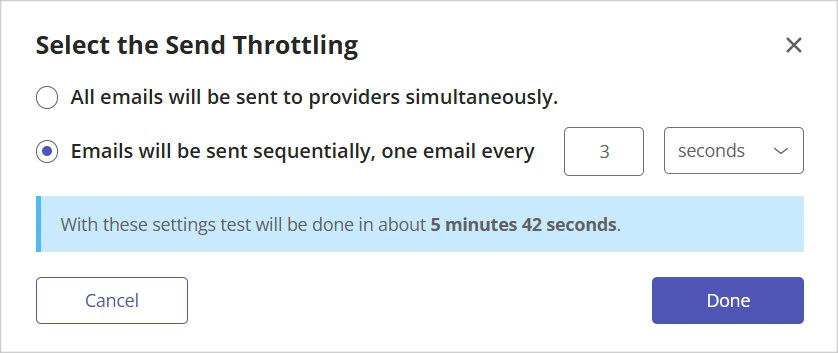
By default, GlockApps, will send the message to the full seed list at one go. To spread email sending over time, click “Change Throttling.” This may be a safer sending mode if you are concerned about your email reputation or if the sending account has any restrictions or limitations.
Choose the “Emails will be sent sequentially, one email every xx seconds (minutes, hours)” option.
Clock “Done.”
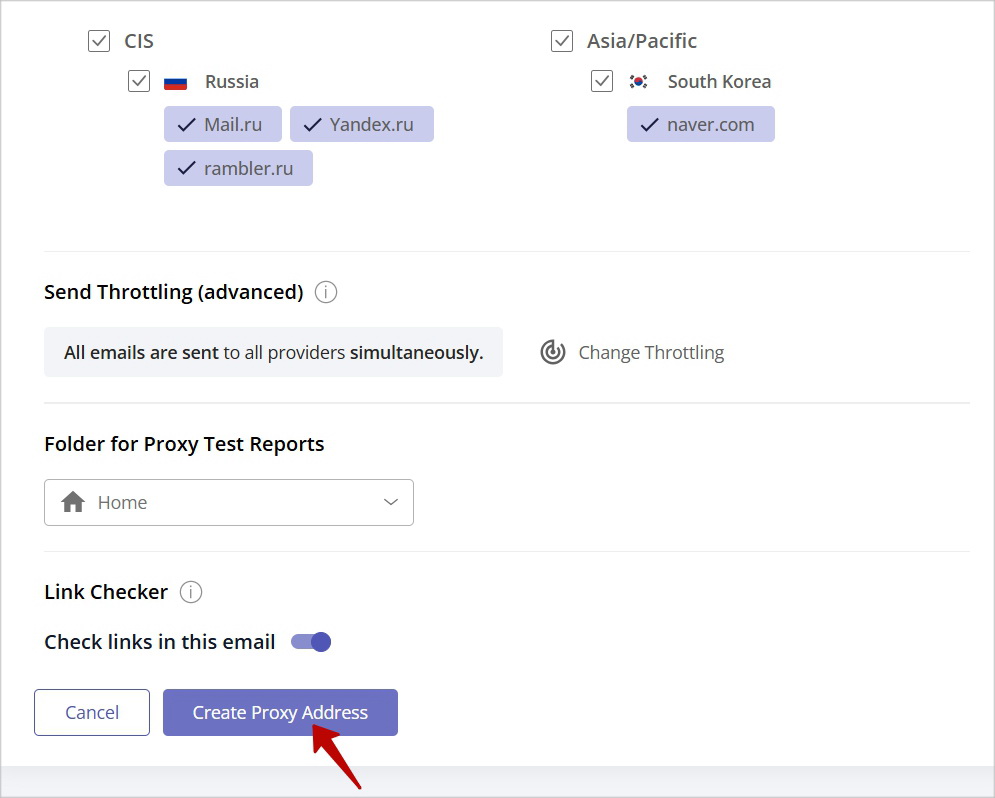
Folder for Proxy Tests
Next, you can choose a folder to save the tests made via a proxy email address to.
By default, the tests will be saved to the Home folder in Reports > Proxy Tests. You can choose a different folder or create a new folder right from the menu.
Link Checker
GlockApps verifies the links used in the email to provide you with a report about valid and invalid URLs. The exception is the unsubscribe link which is not followed.
You can disable the Link Checker for proxy tests if you don’t use URLs in the messages or don’t want to have the links clicked.
When you are done with the settings, click “Create Proxy Address.”
Your sending account will appear in the main dashboard together with a proxy email address. You can copy the proxy email address and send an email to it to have it tested.
You can re-generate a proxy email address by clicking on three dots.

Read also: What’s Causing the 550 SMTP Error and How to Fix It?
Important Information
Our integration uses Microsoft’s official OAuth 2.0 flow and Graph API to send messages on behalf of users — with their explicit permission and within the security policies of their Microsoft 365 organization.
If your Microsoft 365 tenant is configured to prevent users like user1@domain.com from granting consent to third-party applications on their own, the application must be approved by an administrator, in particular, the administrator (for example, admin@domain.com) needs to grant admin consent for the application on behalf of your organization.
However, if admin@domain.com is not assigned a Global Admin role in Azure Active Directory (or lacks sufficient permissions), you will not be able to complete the integration.
This is a configuration that needs to be addressed internally within your Microsoft 365 environment.
Unfortunately, these restrictions are enforced by Microsoft for security reasons, and we’re unable to override them from our side.
To move forward, please contact your Microsoft 365 administrator or IT team to ensure that:
– an admin with the appropriate role (typically a Global Administrator) can review and approve the application,
– or, alternatively, modify the tenant policy to allow users to grant individual consent.
Our application is registered as Glockapps-SA-integration in Azure Active Directory.
If needed, the application’s Client ID is:
2750e184-a080-4e22-9129-88ed2205c090